I’ve been looking to create a process flow diagram using Open AI LLM. And, I think this easy hack will help to generate process flow easily without spending significant time developing it.
Before delving into the details, I strongly recommend taking a look at the demo. It’s a great way to get a comprehensive understanding of Gen AI and its capabilities in coordination with Matplotlib.
Let us understand the generic flow of events in the following diagram –

As one can see the Python-based application will get the relevant steps from the Open AI LLM models & then parse them with the help of matplotlib APIs & finally be able to generate a flow-chart depicted in the right-side box.
Package Installation:
Let us understand the sample packages that are required for this task.
pip install matplotlib==3.9.1
pip install networkx==3.3
pip install numpy==2.0.0
pip install openai==1.35.13
pip install pandas==2.2.2
pip install pillow==10.4.0
Code:
1. clsGenFlowLLM.py (This script will publish a flow diagram with a stunning visual palette based on the input topics provided by the command prompt. Note that we’re only going to discuss a few important functions here.)
    def summarizeToFourWords(self, sentence):
        try:
            modelName = self.modelName
            content_3 = templateVal_4
            content_4 = f"" + templateVal_5 + str(sentence)

            response = client.chat.completions.create(
                model=modelName,
                messages=[
                    {"role": "system", "content": content_3},
                    {"role": "user", "content": content_4}
                ],
                n=1,
                temperature=0.1,
            )

            summary = response.choices[0].message.content.strip().split('\n')

            # If summary is a list, join it into a string
            if isinstance(summary, list):
                summary = ' '.join(summary)

            summary = ' '.join(summary.replace('.', '').split()[:4])

            return summary

        except Exception as e:
            return f"Error: {str(e)}"
This function translates the input task that was assigned through the command prompt & then translates that into a more meaningful 4-word picture name, that will represent the output of the process flow generated by matplotlib with the help from OpenAI.
For example, let us understand the following input queries –

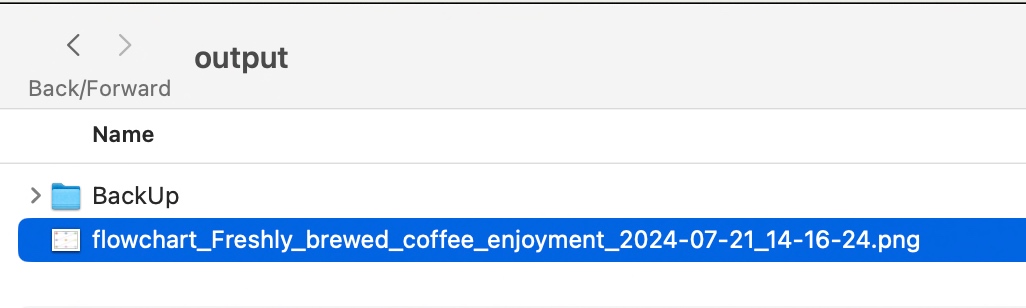
As per the above function, the application will create a meaningful file name, which represents the above task as follows –
def generateFlowchart(self, srcDesc, debugInd, varVa):
        try:
            modelName = self.modelName
            ouputPath = self.ouputPath

            content_1 = templateVal_1
            content_2 = templateVal_2 + " " + srcDesc + ". " + templateVal_3

            # Use OpenAI to generate flowchart steps
            response = client.chat.completions.create(
                model=modelName,
                messages=[
                    {"role": "system", "content": content_1},
                    {"role": "user", "content": content_2}
                ],
                temperature=0.7,
            )

            steps = response.choices[0].message.content.strip().split('\n')

            # Create a new directed graph
            G = nx.DiGraph()

            # Add nodes and edges based on the generated steps
            for i, step in enumerate(steps):
                step_parts = step.split(': ', 1)
                if len(step_parts) == 2:
                    step_number, step_description = step_parts
                    G.add_node(i, description=step_description)
                    if i > 0:
                        G.add_edge(i-1, i)

            # Calculate layout
            num_nodes = len(G.nodes())
            rows = math.ceil(math.sqrt(num_nodes))
            cols = math.ceil(num_nodes / rows)

            # Calculate figure size
            fig_width = max(12, cols * 4)
            fig_height = max(8, rows * 3)

            # Create the plot
            fig, ax = plt.subplots(figsize=(fig_width, fig_height))

            # Generate a list of soft, pleasing colors
            colors = plt.cm.Pastel1(np.linspace(0, 1, num_nodes))

            # Calculate positions for nodes
            pos = {}
            for i in range(num_nodes):
                row = i // cols
                col = i % cols
                x = col / (cols - 1) if cols > 1 else 0.5
                y = 1 - (row / (rows - 1) if rows > 1 else 0.5)
                pos[i] = (x, y)

            # Draw arrows
            for edge in G.edges():
                start = pos[edge[0]]
                end = pos[edge[1]]
                ax.arrow(start[0], start[1], end[0]-start[0], end[1]-start[1],
                         head_width=0.03, head_length=0.05, fc='gray', ec='gray', linewidth=2)

            # Draw nodes and labels
            for i, (node, (x, y)) in enumerate(pos.items()):
                srcDesc = G.nodes[node]['description']
                wrapped_text = '\n'.join(wrap(srcDesc, width=15))

                circle = Circle((x, y), radius=0.08, fill=True, facecolor=colors[i], edgecolor='black', zorder=2)
                ax.add_patch(circle)

                ax.text(x, y, wrapped_text, ha='center', va='center', wrap=True, fontsize=8, zorder=3)

                if i == 0:
                    ax.text(x, y+0.11, "Start", ha='center', va='bottom', fontweight='bold')
                elif i == num_nodes - 1:
                    ax.text(x, y-0.11, "End", ha='center', va='top', fontweight='bold')

            # Set plot limits and remove axes
            ax.set_xlim(-0.1, 1.1)
            ax.set_ylim(-0.1, 1.1)
            ax.axis('off')

            # Getting the Short Description of the Image
            resDesc = self.summarizeToFourWords(srcDesc)

            plt.title(f"Flowchart: {resDesc}")
            plt.tight_layout()

            var = datetime.now().strftime("%Y-%m-%d_%H-%M-%S")

            filename = f"flowchart_{resDesc.replace(' ', '_')}_{var}.png"
            print('Filename:')
            print(filename)
            plt.savefig(ouputPath+filename, format='png', dpi=300, bbox_inches='tight')
            plt.close()
            print(f"Flowchart generated as '{filename}'")

            return 0

        except Exception as e:
            x = str(e)
            print(x)

            logging.info(x)

            return 1
This code defines a function called “generateFlowchart” that creates a visual flowchart based on a given description. Here’s what it does:
- It uses an AI model to generate steps for the flowchart based on the input description.
- It creates a graph structure to represent these steps and their connections.
- The function then sets up a plot to visualize this graph as a flowchart.
- It arranges the steps in a grid layout, with each step represented by a colored circle.
- The steps are connected by arrows to show the flow of the process.
- The first step is labeled “Start” and the last step is labeled “End”.
- The function adds a title to the flowchart based on a summary of the input description.
- Finally, it saves the flowchart as an image file with a unique name based on the description and current date/time.
- If any errors occur during this process, the function logs the error and returns a failure code.
2. generateFlowDiagram.py.py (Main calling script. Note that we’re only going to discuss a few important functions here.)
import clsGenFlowLLM as gfl

from clsConfigClient import clsConfigClient as cf

import datetime
import logging

def main():
    try:
        # Other useful variables
        debugInd = 'Y'

        var = datetime.datetime.now().strftime("%Y-%m-%d_%H-%M-%S")
        print('Start Time: ', str(var))

        # Initiating Log Class
        general_log_path = str(cf.conf['LOG_PATH'])

        # Enabling Logging Info
        logging.basicConfig(filename=general_log_path + 'genFLDLog.log', level=logging.INFO)

        print('Started predicting best bodyline deliveries from the Cricket Streaming!')

        # Passing source data csv file
        x1 = gfl.clsGenFlowLLM()

        while True:
            desc = input("Enter the subject to generate the flow diagram (or 'quit' to exit): ")

            var1 = datetime.datetime.now()

            if desc.lower() == 'quit':
                break

            # Execute all the pass
            r1 = x1.generateFlowchart(desc, debugInd, var1)

            if (r1 == 0):
                print('Successfully generated Flow Diagram based on the content!')
            else:
                print('Failed to generate Flow Diagram!')

            r1 = 0

            var2 = datetime.datetime.now()

            c = var2 - var1
            minutes = c.total_seconds() / 60
            print('Total difference in minutes: ', str(minutes))

        var3 = datetime.datetime.now().strftime("%Y-%m-%d_%H-%M-%S")

        print('End Time: ', str(var3))

    except Exception as e:
        x = str(e)
        print('Error: ', x)

if __name__ == "__main__":
    main()
The above code will instantiate the class & then invoke the function based on the input command task & receive the response.
So, we’ve done it. For more information, you can visit the following link.
I’ll bring some more exciting topics in the coming days from the Python verse.
Till then, Happy Avenging! 🙂
Note: All the data & scenarios posted here are representational data & scenarios & available over the internet & for educational purposes only. There is always room for improvement in this kind of model & the solution associated with it. I’ve shown the basic ways to achieve the same for educational purposes only.