
Hi Guys!
After a brief gap, here is the latest edition of data pipeline implementation through Azure Data Factory.
Our objective is straightforward. In this post, we’ll develop a major ADF pipeline. However, our main aim in coming days to use the same pipe & enhance them in the coming days.
So, let’s get started!
Step -1:
The first step to view the sample data.

So, now, we’ll be loading this file in one of our already created SQL DB inside our cloud environment.
Step -2:
Now, we will upload this sample file to blobstore, which our application will use as a source in the flow.

Step -3:
Let’s create & set-up the initial data factory.

Now, clicking the create data factory, we’ll set-up the first time environment.

By clicking the “create,” the cloud will prepare the environment for the first time.

For security reason, I’m not displaying other essential options.
Now, you need to click Author & Monitor to finally arrive at the main development interface, which will look like this –


Now, you need to click “Create Pipeline.”

Once, you are on this page. You are ready to build your first data flow.
Step -4:
Let’s make the source data ready. To do that, we’ll be the first click the “Add Dataset” in this case. And, follow the given steps provided in the series of snapshot given below –

In this case, we would choose Azure Blob Storage as our source place.

Now, we have to choose the source file type.
Finally, you need to provide other essential information as shown in the next screenshot & you need to test it.

Now, you need to choose the source path & need to preview the data. You can only view the data once you can successfully connect.


So, if everything looks good. Then you can see the following page –

Once, you click it. You will be able to view it.

Step -5:
Now, we’ll be using the copy data option as shown below –

Now, we’ll be configuring the key places –

As you can see, you can choose the csv file as source.
You can then generate the mapping. By clicking the Mapping tab, you can view the detail.

Now, we’ll be preparing the dataflow.

So, basically, here we’ll be creating the flow as per our requirement. In our case, we’ll be using one primary filter before we push our data to the target.
And, the steps are as follows –
As from the above picture, we have configured the source by choosing the appropriate source data selection.
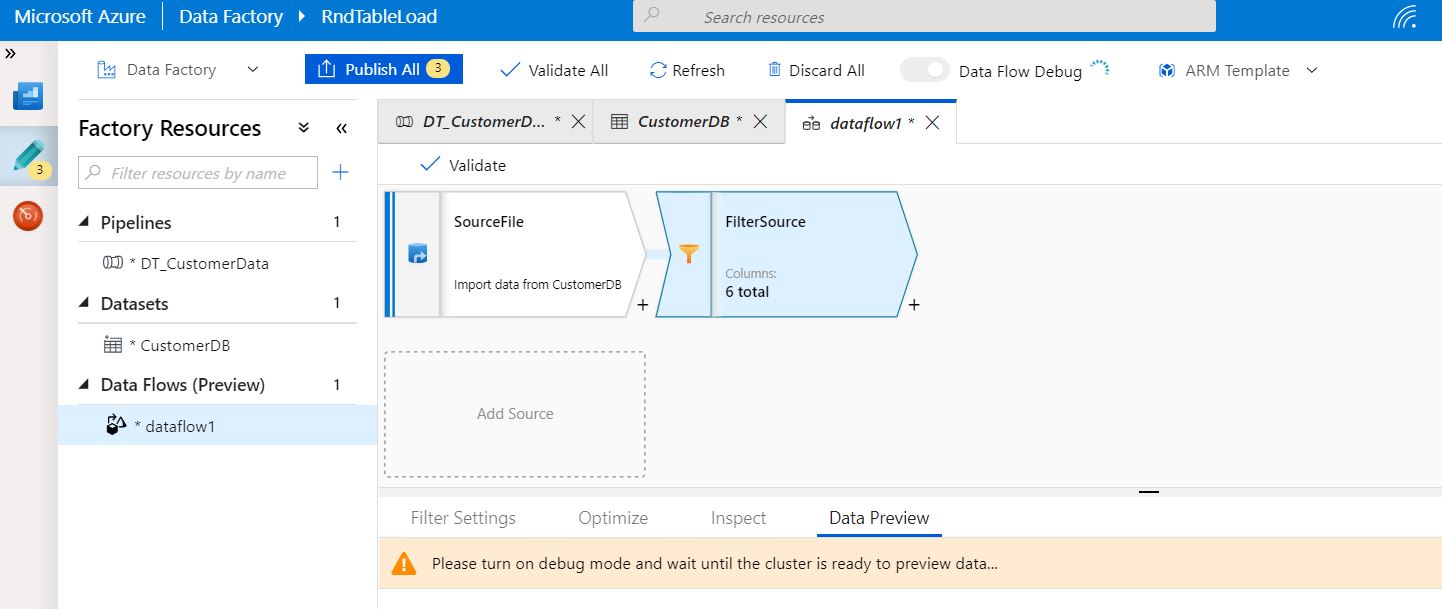
You have to turn-on debug preview mode. But, remember one crucial point. For that ADF will create one runtime cluster & for that you will be charged separately. However, you can view while building the data pipeline.

Finally, we’ll be selecting the target.

We’ll be dragging the sink/target. And, then configure that in this following steps –


So, In this case, It will create a new table.
Once, you prepare everything, you have to validate the basic flow.

Finally, we’ll create the trigger.

You need to click the trigger at the bottom. You need to mention the trigger timing. Just for testing purpose, we’ll mention one-time execution only.

Once, you click the finish button. The next page will look like me.

Here is the Action button. Once, you click the play/run button – you would trigger the task/flow & this would look like this.

So, we’re done for the day.
Let me know, what do you think?
Till then! Happy Avenging! 😀
Note: All the data posted here are representational data & available over the internet.
You must be logged in to post a comment.