
Welcome back! As you have now understood our objectives for the new initiative that we have explored in the other two posts, this post will show the actual implementation of the framework in a simple step-by-step process. But before that, why don’t you see the final LLM environment and the response from it?
But before that, here are the previous two posts in case you directly land on this page –
Isn’t it exciting?
Great! Now, let us dive into the actual setup & implementation.
Before we proceed, let us understand what the target architecture should look like –
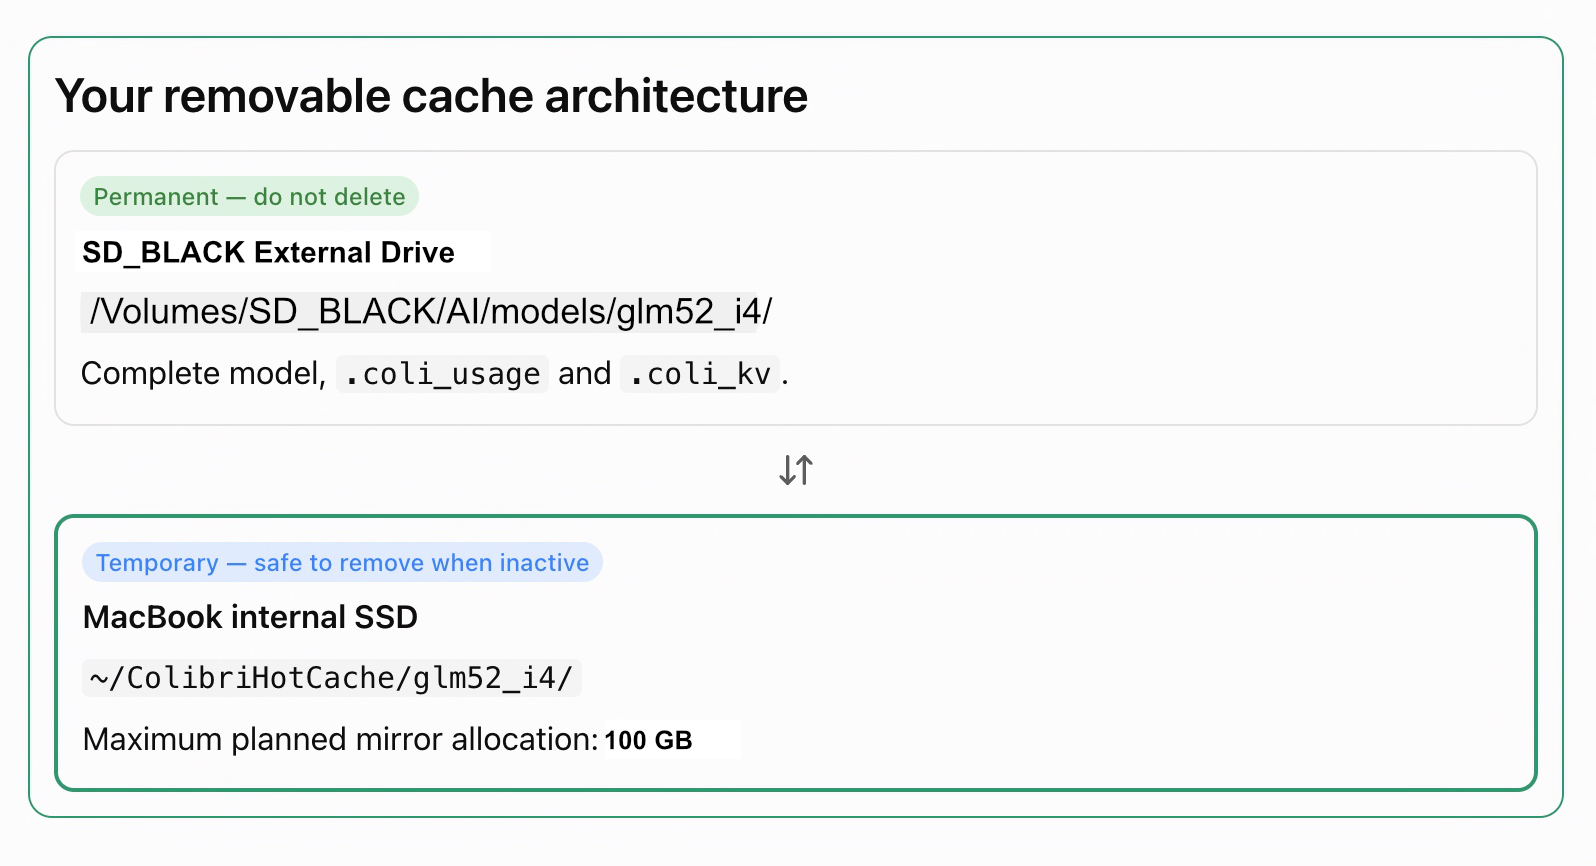
EXTERNAL SSD / NVMe/Volumes/ColibriSSD/│├── AI/│ ├── colibri/ ← Colibrì source + executable│ ├── models/│ │ └── glm52_i4/ ← ~372 GB MODEL│ │ ├── *.safetensors│ │ ├── config.json│ │ ├── tokenizer...│ │ ├── .coli_usage│ │ ├── .coli_ssd│ │ └── .coli_kv│ ││ ├── huggingface/ ← HF cache/download metadata│ ├── config/ ← Colibrì tuning profiles│ └── venv/ ← optional Python environment││ USB4 / Thunderbolt / USB-C│ ││ ▼│ Your Apple-Silicon Mac││ ┌─────────────────┐│ │ Unified Memory ││ │ e.g. 24/48/64GB ││ └────────┬────────┘│ ││ Metal GPU│ ││ ▼│ Colibrì inference│ ││ localhost:8000│ ││ ┌──────────┼──────────┐│ ▼ ▼ ▼│ Python RAG app AI Agent│ app etc. etc.
Step-By-Step Process:
1. Identify the external volume
Connect the external SSD and run:
ls /VolumesAnd the response –

Then define one variable:
export COLI_DRIVE="/Volumes/SD_BLACK"Verify that macOS sees it:
df -h "$COLI_DRIVE"
And verify available space:
diskutil info "$COLI_DRIVE"
2. Create the entire Colibrì environment on the external SSD
Create a clean directory structure:
mkdir -p "$COLI_DRIVE/AI"
mkdir -p "$COLI_DRIVE/AI/models"
mkdir -p "$COLI_DRIVE/AI/huggingface"
mkdir -p "$COLI_DRIVE/AI/config"Validate the output –
ls -la "$COLI_DRIVE/AI"
3. Install the small macOS prerequisites
The following components may already exists in your Mac. So, install them based on your availability.
xcode-select --install
brew install libomp git python
Now clone Colibrì directly onto the external SSD:
cd "$COLI_DRIVE/AI"

git clone https://github.com/JustVugg/colibri.gitYour source will therefore be located at:

You can also build it using the following command –
cd "$COLI_DRIVE/AI/colibri/c"

./setup.sh4. Build the Apple Metal version
Because you’re on Apple Silicon, you should use Colibrì’s Metal backend rather than staying CPU-only.
From the above directory, runt he following command:
make colibri METAL=1You can then confirm that Colibrì exists:
ls -lh colibriAnd the output is as follows –

5. Force the model location to the external drive
Now define:
export COLI_MODEL="$COLI_DRIVE/AI/models/glm52_i4"

mkdir -p "$COLI_MODEL"And verify it
echo "$COLI_MODEL"
6. Download the preconverted model directly to the external SSD
I would use the project’s currently recommended preconverted GLM-5.2 model instead of downloading the approximately 756 GB FP8 source and converting it unless you specifically want to experiment with quantization.
Colibrì currently recommends:
mastouri/GLM-5.2-colibri-int4-g64-with-int8-mtpand specifically recommends its group-scaled gs64 configuration. For more information, you can refer to the following link.
Create an optional Python environment on the external SSD:
python3 -m venv "$COLI_DRIVE/AI/venv"Activate it:
source "$COLI_DRIVE/AI/venv/bin/activate"Install the Hugging Face client:
pip install -U huggingface_hubNow keep Hugging Face’s standard cache on the external drive too:
export HF_HOME="$COLI_DRIVE/AI/huggingface"HF_HOME controls the root of Hugging Face’s cache; otherwise, it normally defaults to your user cache on the internal drive.
Now, we are in a position to start downloading the model with the given command –
unset HF_HUB_DISABLE_XET
unset HF_XET_HIGH_PERFORMANCE

export HF_XET_NUM_CONCURRENT_RANGE_GETS=8

HF_HUB_DISABLE_XET=1 \
hf download \
  mastouri/GLM-5.2-colibri-int4-g64-with-int8-mtp \
  --local-dir "$COLI_MODEL" \
--max-workers 4And you will see something like the following –

Now, with the following command, you can verify whether all the models downloaded successfully or not –
hf download \
  mastouri/GLM-5.2-colibri-int4-g64-with-int8-mtp \
  --local-dir "$COLI_MODEL" \
--dry-runYou would see something like this –

As you can see, those models that are already downloaded won’t show the model size beside their name. Otherwise, it will show the name of the model along with its size, as shown below –

7. Verify that the huge model really is external
Run the following command –
du -sh "$COLI_MODEL"And you will see something like this –

Then verify the underlying volume:
df -h "$COLI_MODEL"
Now let Colibrì verify the model:
cd "$COLI_DRIVE/AI/colibri/c"

./coli doctor --model "$COLI_MODEL"Or,
./coli doctor --deep --model "$COLI_MODEL"doctor --deep validates safetensors headers, tensor layouts, shard completeness, required tensors, and other model-layout details.
Then:
./coli info --model "$COLI_MODEL"And most importantly:
./coli plan --model "$COLI_MODEL"coli plan is designed to show the computed disk/RAM/VRAM placement plan.
This is the command I would use before actually loading the model.
8. Start with a conservative RAM allocation
Suppose, purely as an example, you had 64 GB of unified memory.
Instead of telling Colibrì to consume almost everything, you could initially give it:
COLI_METAL=1 \
./coli chat \
  --model "$COLI_MODEL" \
--ram 48This means –
~372 GB model │ └──────────── External SSD~48 GB max working/cache budget │ └──────────── Mac unified memoryCompute │ └──────────── Apple Metal GPU + CPU
The --ram parameter is explicitly Colibrì’s RAM budget for the expert working set; leaving it at 0 lets the software choose an automatic value based on available memory. For more information, you can refer to the following link.
Therefore, you can also start more safely with:
COLI_METAL=1 \
./coli chat \
--model "$COLI_MODEL"However, I’ll use some of the more advanced options to get the best performance out of this. “chat” means you will be triggering the chat interface.
9. Let Colibrì measure your external SSD
This part is particularly useful on a Mac.
On Metal/macOS, Colibrì automatically performs an F_NOCACHE storage test against the model volume and writes the result into:
$COLI_MODEL/.coli_ssdThe file contains the measured throughput and volume identity. Colibrì uses this information when selecting caching behavior.
You can inspect it after the first successful startup:
cat "$COLI_MODEL/.coli_ssd"
would represent a measured storage throughput value used by Colibrì.
This is particularly useful because an external enclosure advertised as “10 Gbps” or “40 Gbps” does not guarantee that the actual SSD delivers that performance under Colibrì’s workload.
10. Run Colibrì as a local AI server
For your applications, I recommend running Colibrì as a server rather than launching the model separately for every script.
You need to be in the following path –
cd "$COLI_DRIVE/AI/colibri/c"Now, set the following variables –
export COLI_DRIVE="/Volumes/SD_BLACK"
export COLI_MODEL="$COLI_DRIVE/AI/models/glm52_i4"
export XDG_CONFIG_HOME="$COLI_DRIVE/AI/config"
export HF_HOME="$COLI_DRIVE/AI/huggingface"Enable Metal:
export COLI_METAL=1Then run:
./coli serve \
  --model "$COLI_MODEL" \
  --host 127.0.0.1 \
  --port 8000 \
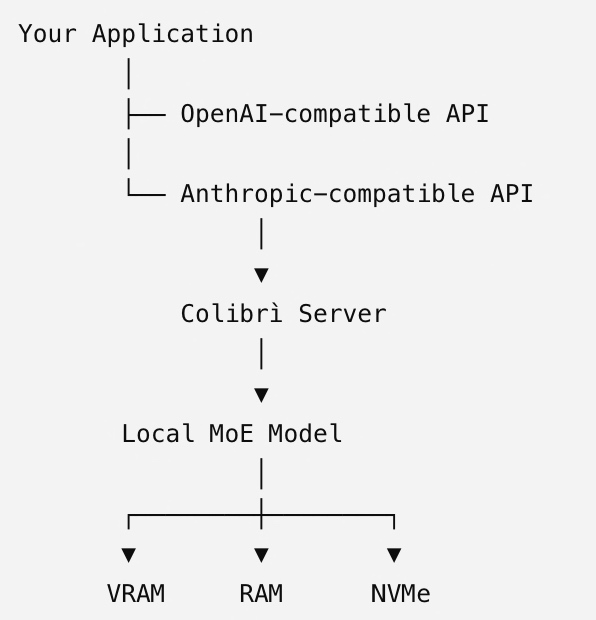
--model-id glm-5.2-colibri- Note that this will enable the service mode, which can be accessed from any application as an API.
Colibrì’s API documentation defines the OpenAI-compatible base URL as:
http://localhost:8000/v1
and exposes endpoints such as /v1/chat/completions.
So, the architecture become –
External SSD │ │ 372 GB model weights │ ▼ Colibrì │ │ streams active experts ▼RAM ⇄ Metal GPU │ ▼localhost:8000/v1 │ ┌───┼───────────┬───────────┐ ▼ ▼ ▼ ▼RAG Python AutoGen Your AppApp script agent
Now, you can test the application in the following ways –
Inside the terminal by using the “Curl” command:
curl http://127.0.0.1:8000/v1/chat/completions \
  -H 'Content-Type: application/json' \
  -d '{
    "model":"glm-5.2-colibri",
    "messages":[
      {
        "role":"user",
        "content":"Explain mixture-of-experts architecture."
      }
    ]
}'Connecting from a sample Python application:
from openai import OpenAI

client = OpenAI(
    base_url="http://127.0.0.1:8000/v1",
    api_key="local"
)

response = client.chat.completions.create(
    model="glm-5.2-colibri",
    messages=[
        {
            "role": "user",
            "content": "Explain retrieval-augmented generation."
        }
    ]
)

print(response.choices[0].message.content)Now, let us understand the command that I used –
PROF=1 \
COLI_METAL=1 \
COLI_METAL_PREFILL=1 \
DIRECT=1 \
PIPE=1 \
PIPE_WORKERS=6 \
COLI_NO_OMP_TUNE=1 \
MTP=0 \
./coli chat \
  --model "$COLI_MODEL" \
--ram 96And you would see & then ask some questions to get your answer, which should look like this –

Now, let us ask some questions & validate the response –
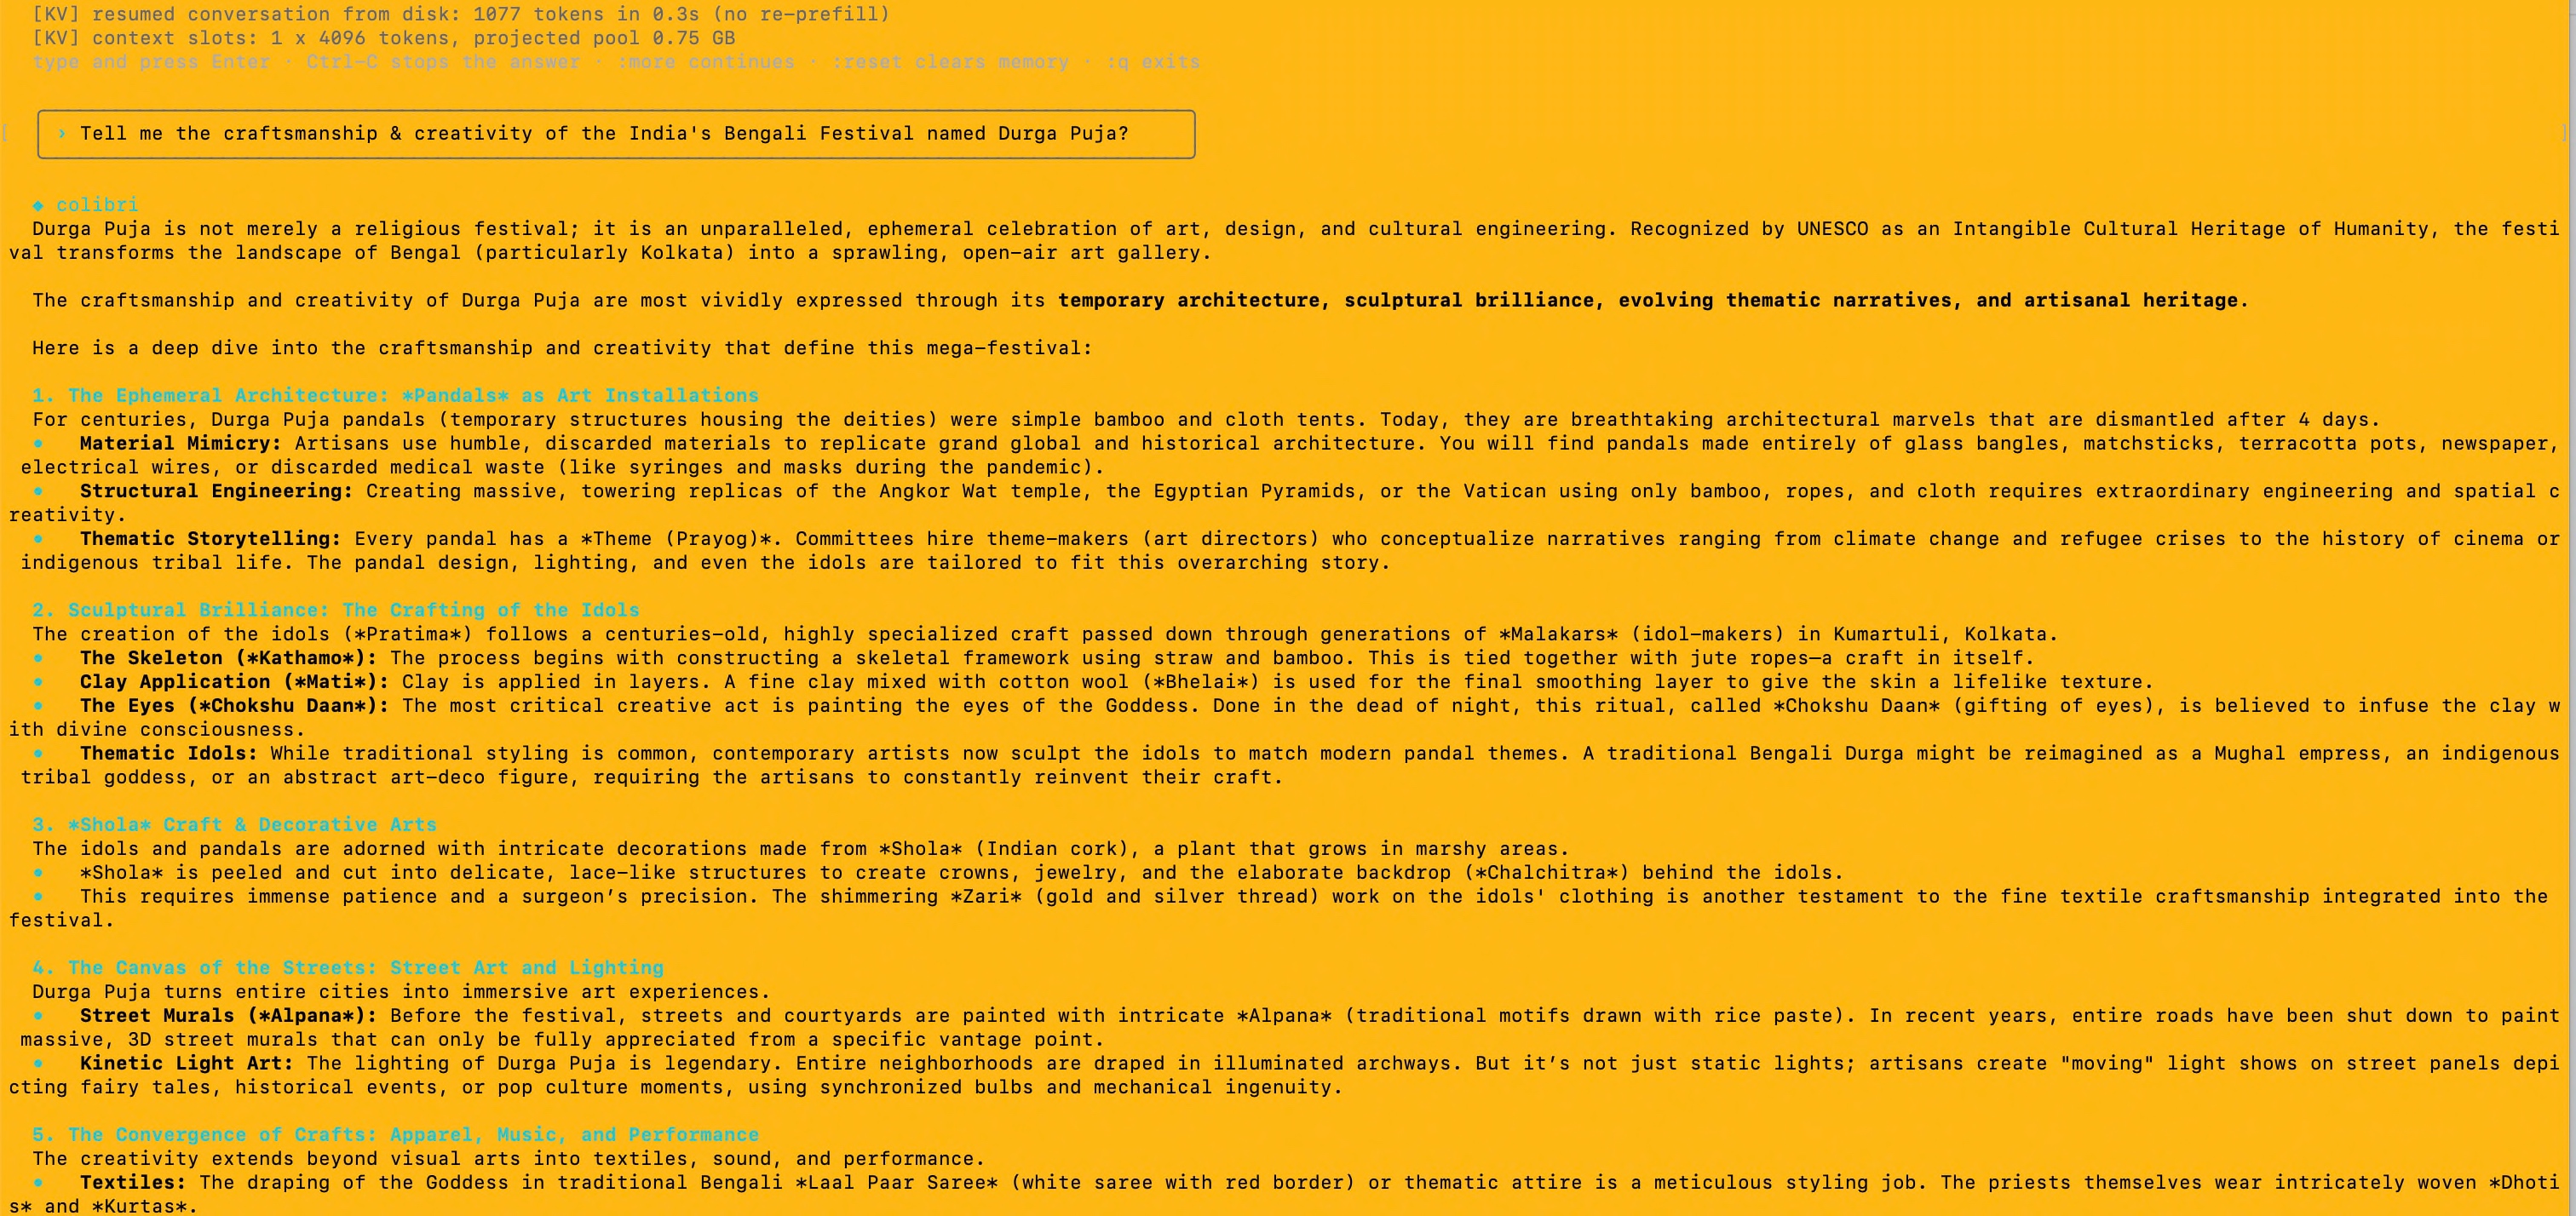
The performance is quite better. Now, based on your external SSD USB’s speed, you can get closed to your MacBook Pro’s SSD speed.
In the next post, we’ll explore a more advanced combination to explore even better & faster response with the introduction of a custom script. And there will be some upgraded architecture that follows it. However, in this post, we conclude the basic concept of the Colibri framework.
So, we’ve done it. 🙂
I hope you all like this effort & let me know your feedback. I’ll be back with another topic. Until then, Happy Avenging!
Note: All the data & scenarios posted here are representative of data & scenarios available on the internet for educational purposes only. There is always room for improvement in this kind of model & the solution associated with it. This article is for educational purposes only. The techniques described should only be used for authorized security testing and research. Unauthorized access to computer systems is illegal and unethical & not encouraged.





You must be logged in to post a comment.