
Hi Guys,
Today, I’ll be using a popular tool known as Mulesoft to generate a mock API & then we’ll be testing the same using python. Mulesoft is an excellent tool to rapidly develop API & also can integrate multiple cloud environments as an Integration platform. You can use their Anypoint platform to quickly design such APIs for your organization. You can find the details in the following link. However, considering the cost, many organization has to devise their own product or tool to do the same. That’s where developing a Python or Node.js or C# comes adequately considering the cloud platform.
Before we start, let us quickly know what Mock API is?
A mock API server imitates a real API server by providing realistic responses to requests. They can be on your local machine or the public Internet. Responses can be static or dynamic, and simulate the data the real API would return, matching the schema with data types, objects, and arrays.
And why do we need that?
A mock API server is useful during development and testing when live data is either unavailable or unreliable. While designing an API, you can use mock APIs to work concurrently on the front and back-end, as well as to gather feedback from developers. Our mock API sever guide for testing covers how you can use a mock API server so the absence of a real API doesn’t hold you back.
Often with internal projects, the API consumer (such as a front end developer through REST APIs) moves faster than the backend team building the API. This API mocking guide shows how a mock API server allows developers to consume a working API with the same interface as the eventual production API. As an added benefit, the backend team can discover where the mock API doesn’t meet the developer’s needs without spending developer time on features that may be removed or changed. This fast feedback loop can make engineering teams much more efficient.
If you need more information on this topic, you can refer to the following link.
Great! Since now we have a background of mock API – let’s explore how Mulesoft can help us here?
Mulesoft used the “RESTful API Modeling Language (RAML)” language. We’ll be using this language to develop our mock API. To know more about this, you can view the following link.
Under the developer section, you can find Tutorials as shown in the screenshot given below –

You can select any of the categories & learn basic scripting from it.
Now, let’s take a look at the process of creating a Mulesoft free account to test our theories.
Step 1:
Click the following link, and you will see the page as shown below –

Step 2:
Now, click the login shown in the RED square. You will see the following page –

Step 3:
Please provide your credentials if you already have an account. Else, you have to click the “Sign-Up” & then you will need to provide the few details as shown below –

Step 4:
Once, you successfully create the account, you will see the following page –

So, now we are set. To design an API, you will need to click the design center as marked within the white square.
Once you click the “Start designing” button, this will land into the next screen.
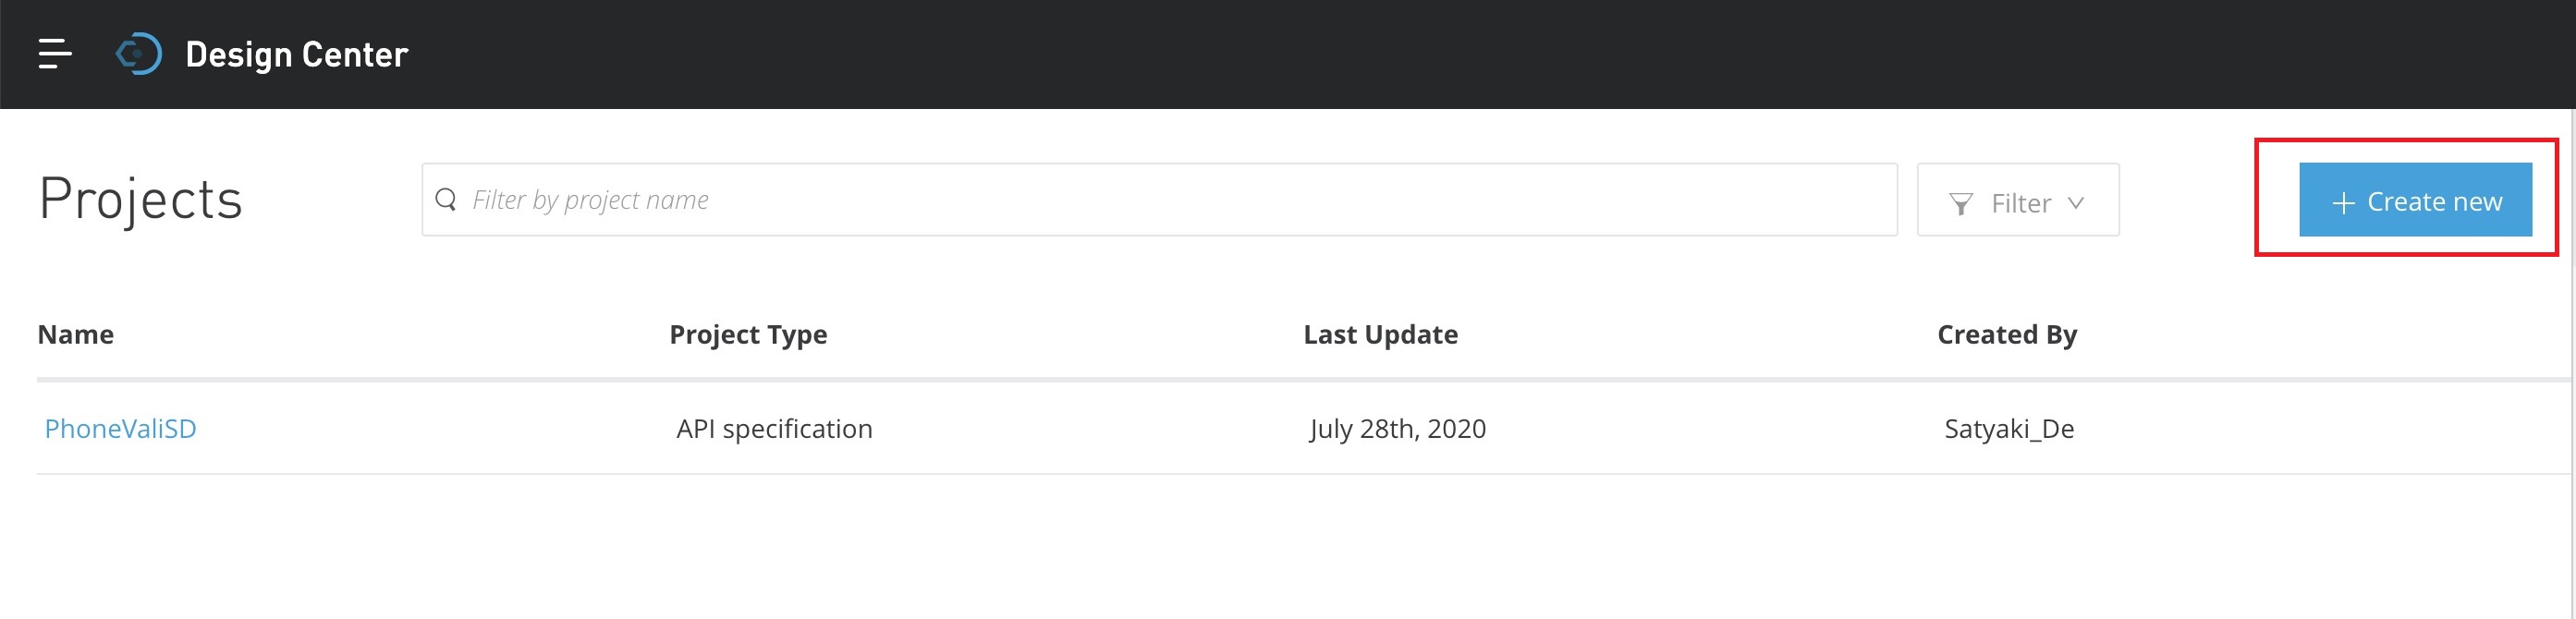
As shown above, you need to click the “Create new” for fresh API design.
This will prompt you the next screen –
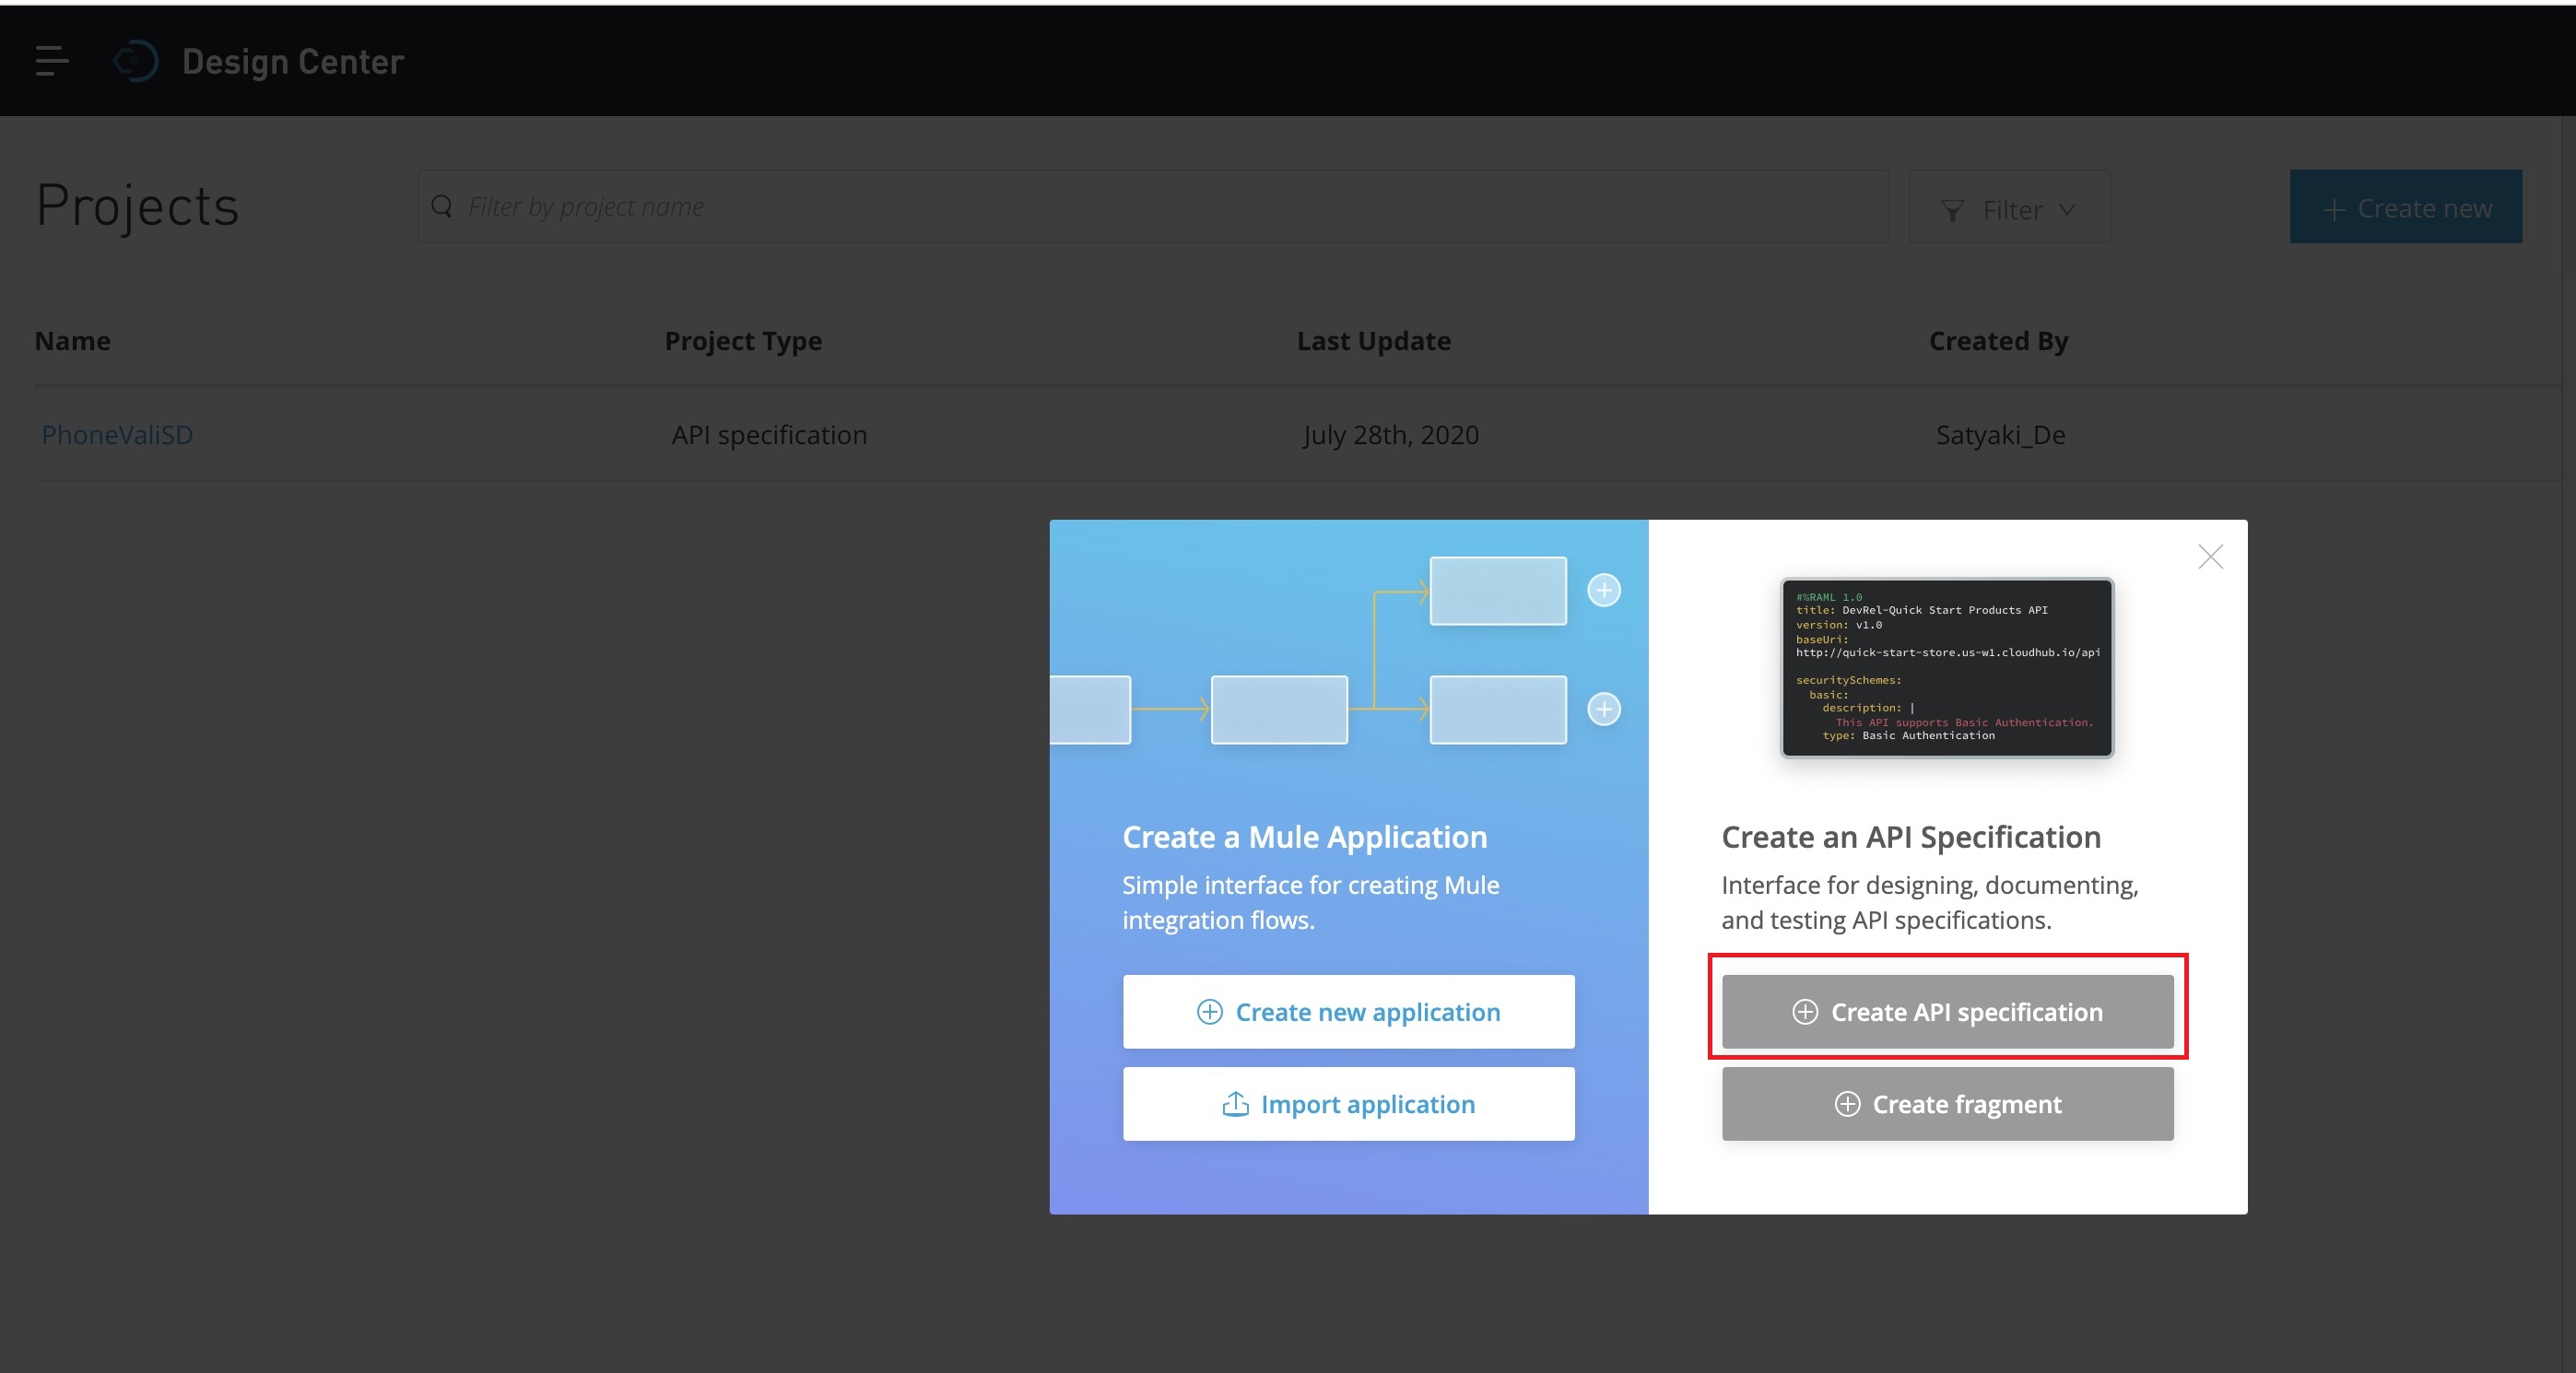
Now, you need to create the – “Create API specification” as marked in the RED square box. And, that will prompt you the following screen –
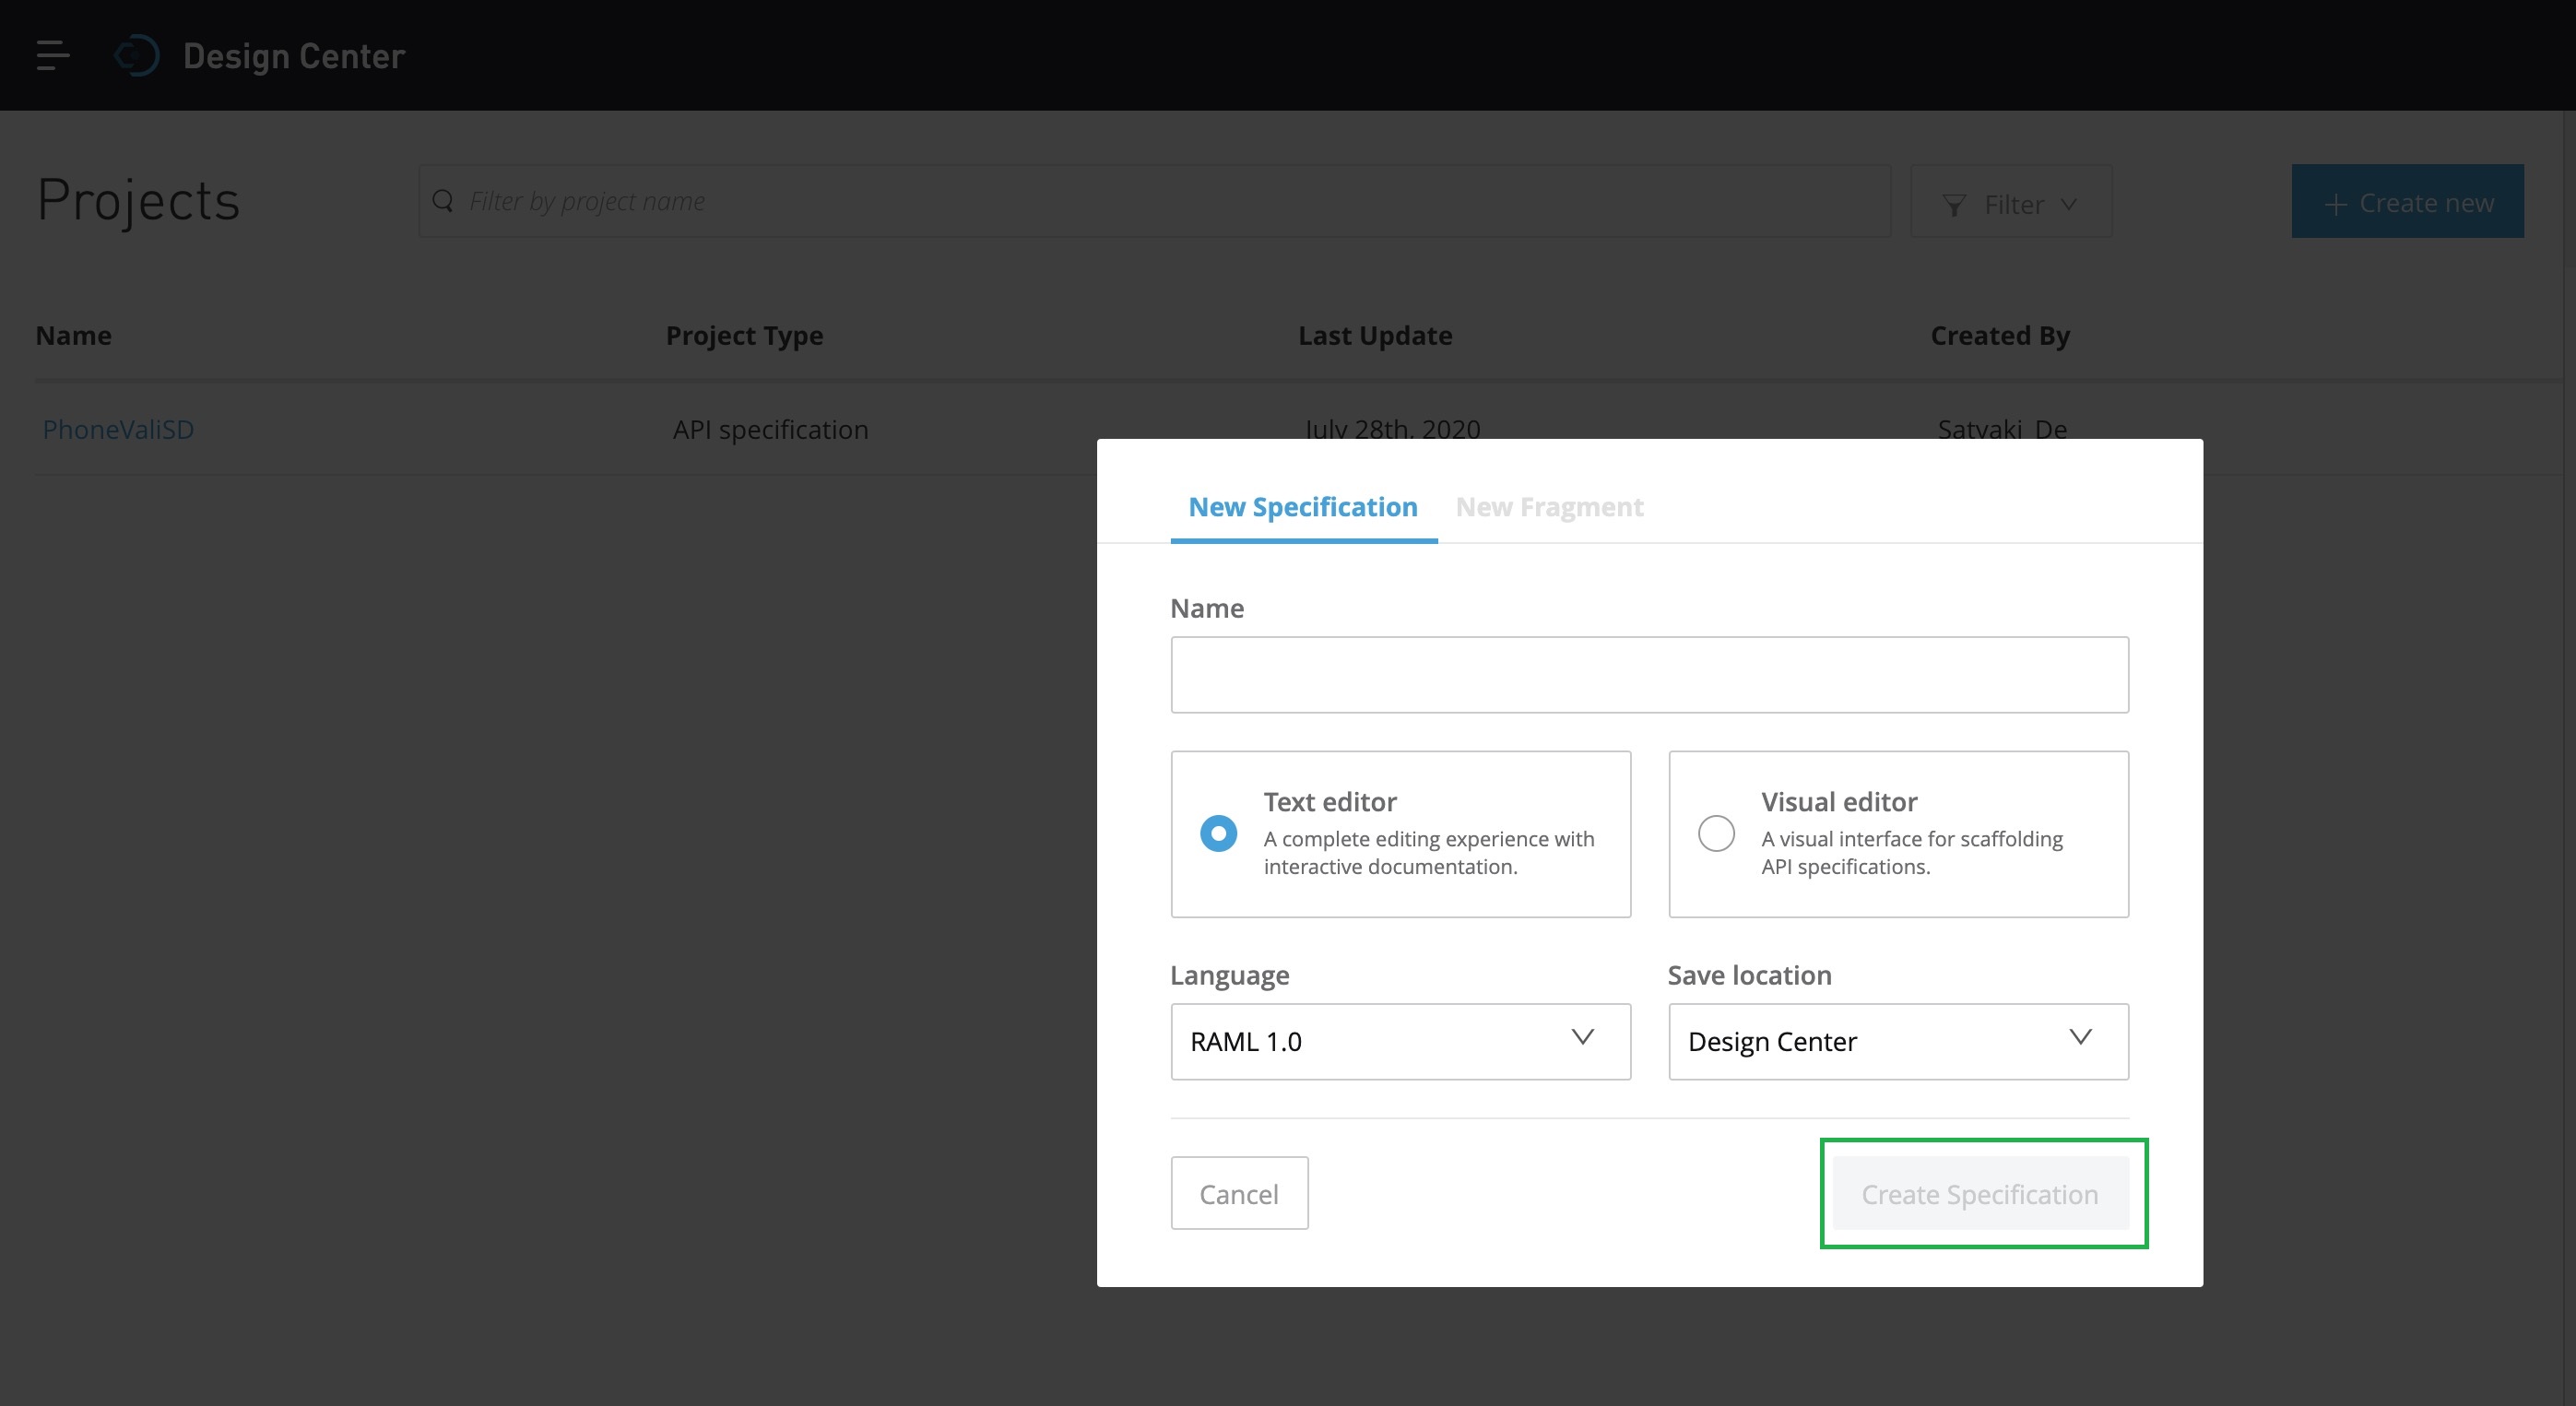
You have to provide a meaningful name of our API & you can choose either Text or Visual editor. For this task, we’ll be selecting the Text Editor. And we’ll select RAML 1.0 as our preferred language. Once, we provide all the relevant information, the “Create Specification” button marked in Green will be activated. And then you need to click it. It will lead you to the next screen –
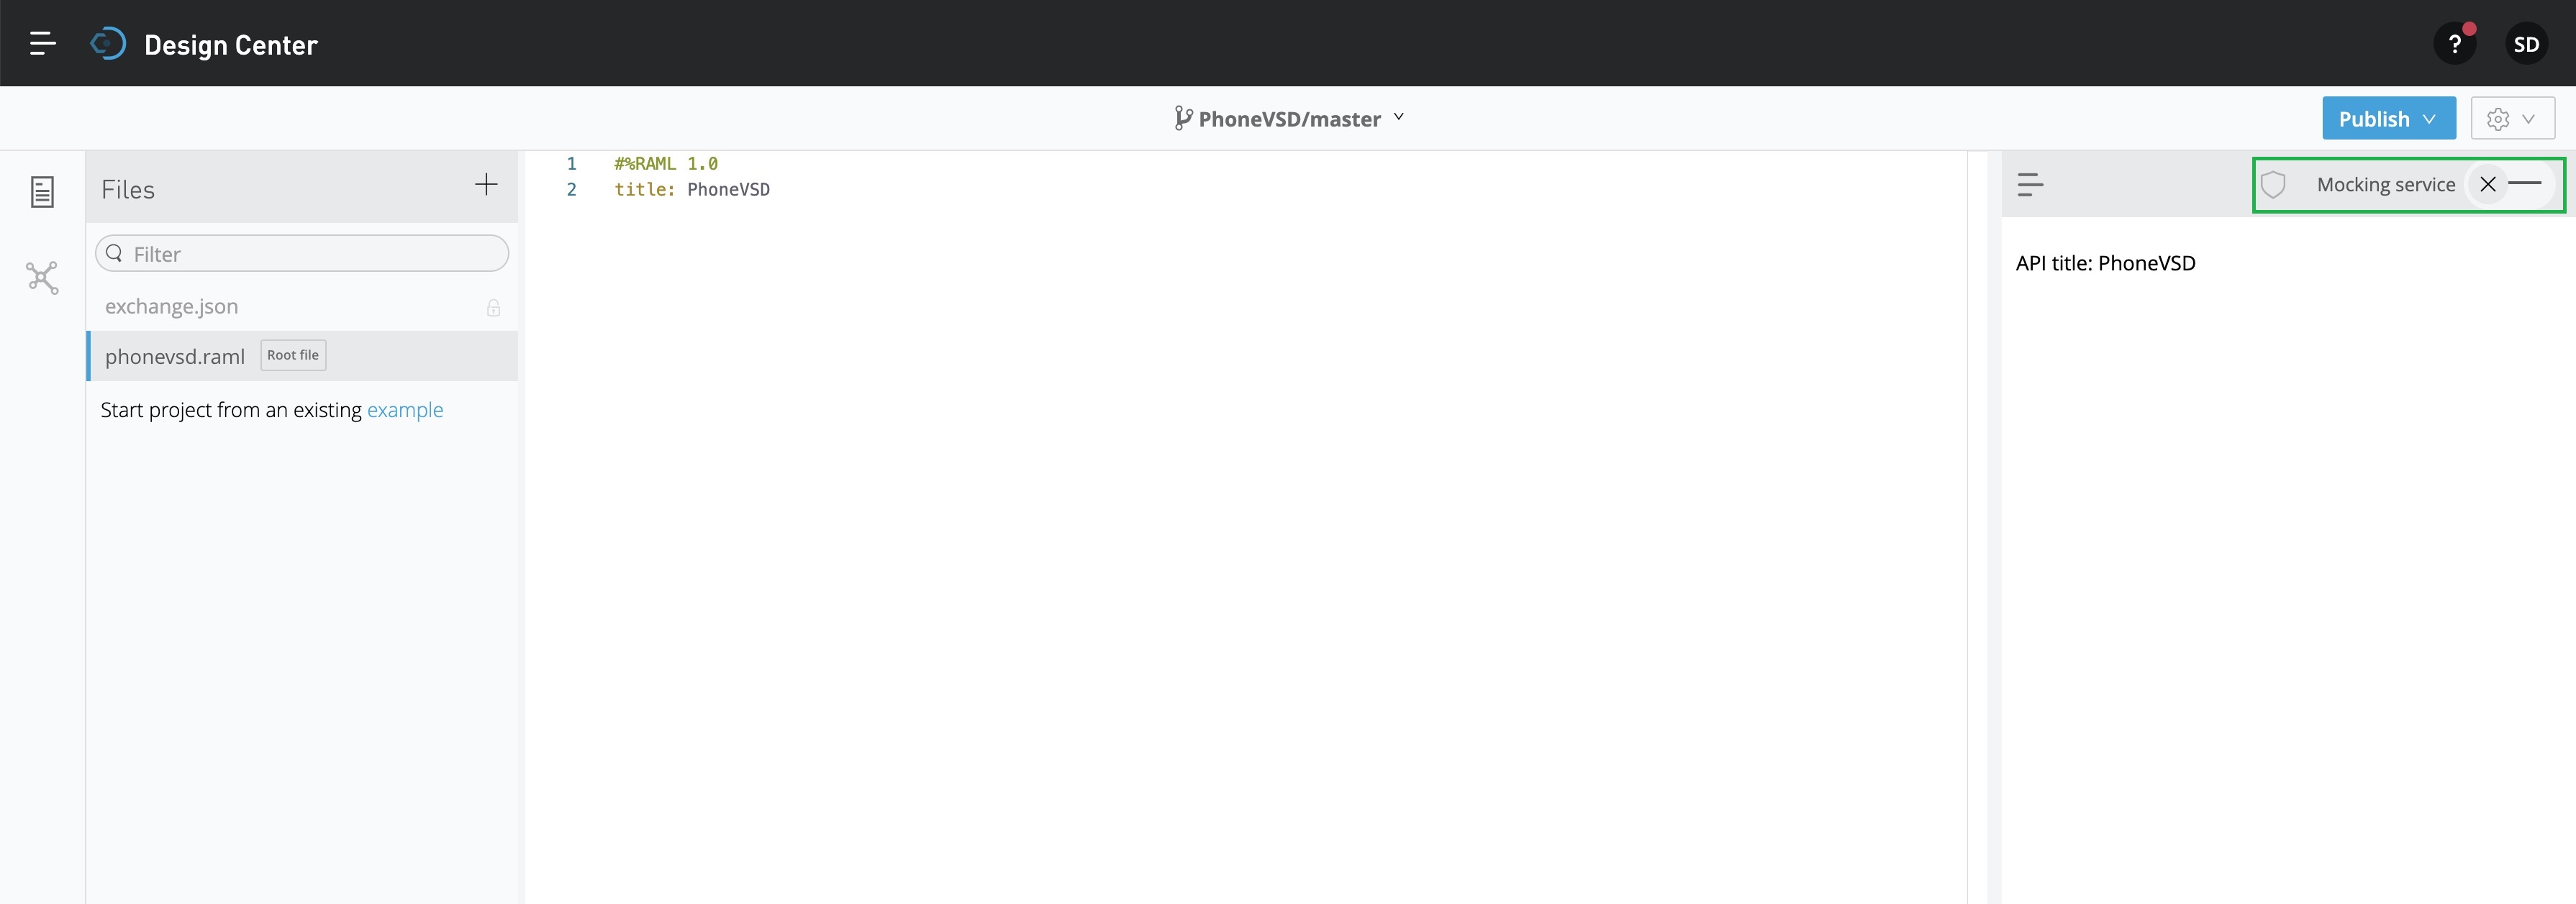
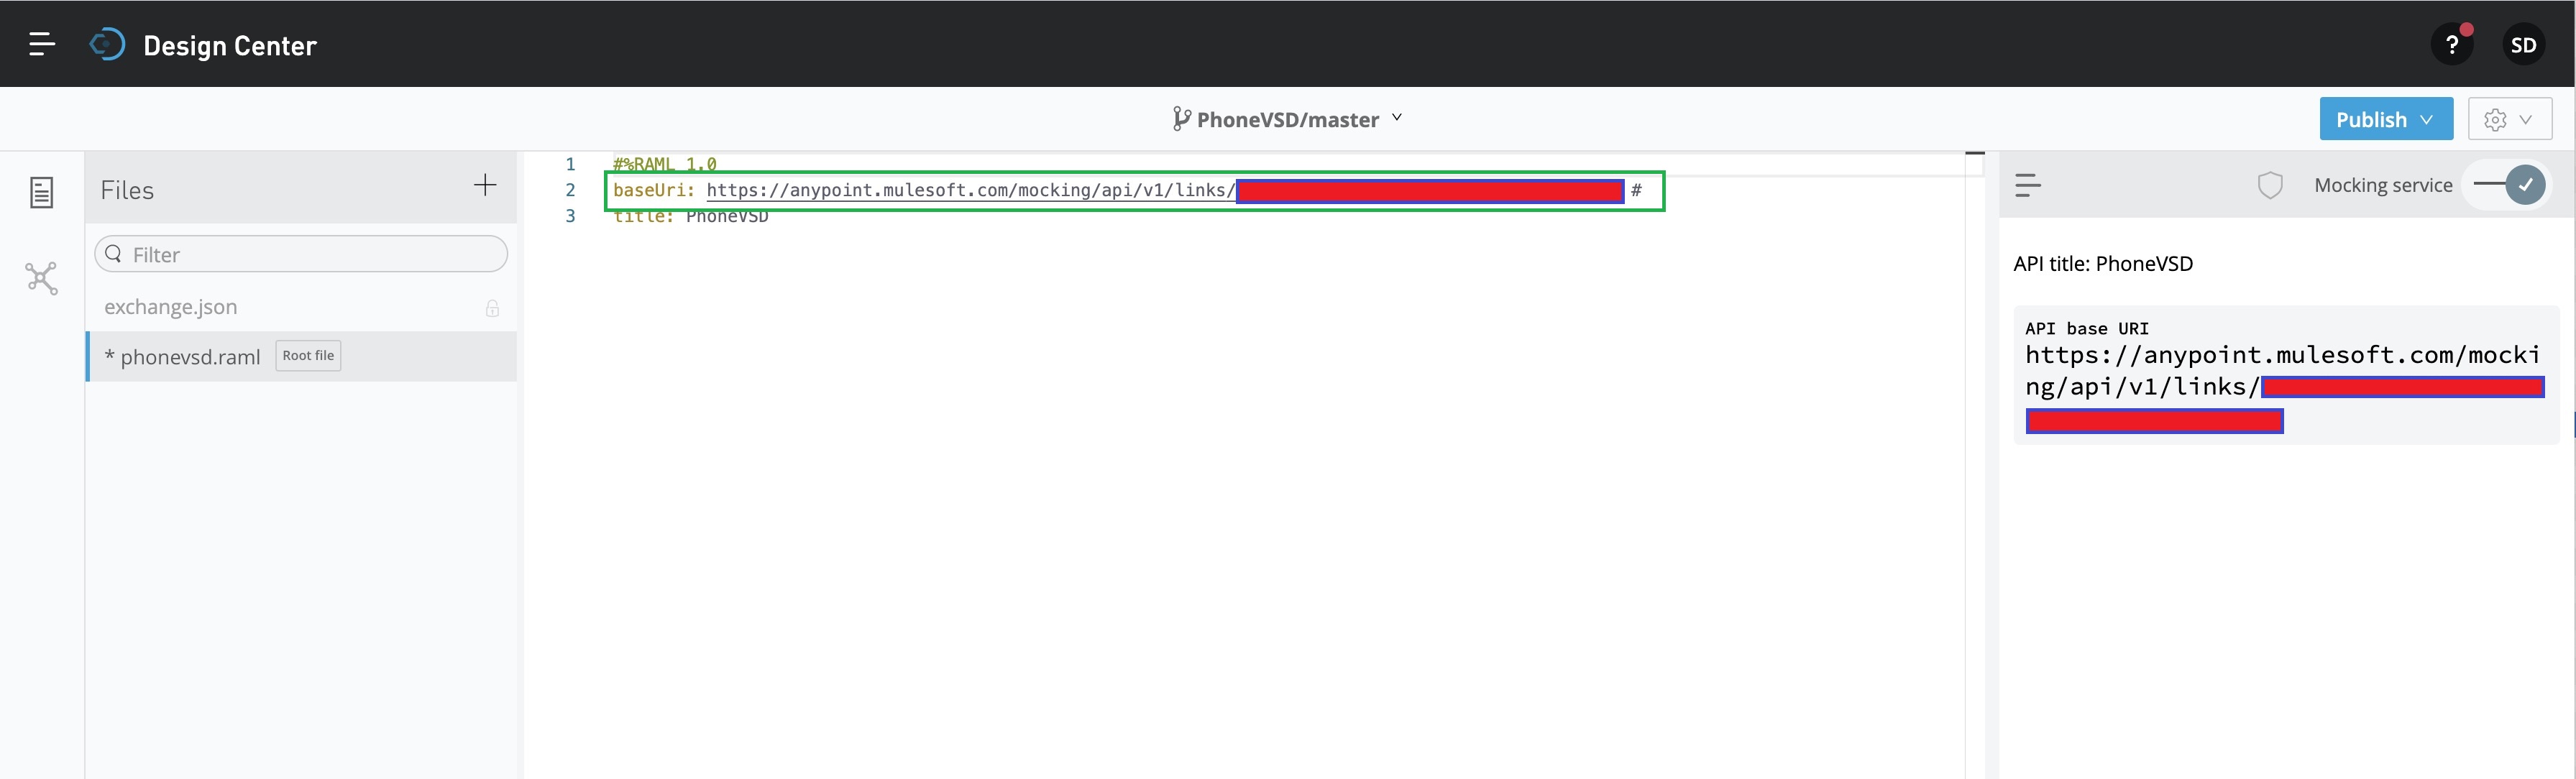
Since we’ll be preparing this for mock API, we need to activate that by clicking the toggle button marked in the GREEN square box on the top-right side. And, this will generate an automated baseUri script as shown below –
Now, we’re ready to develop our RAML code for the mock API. Let’s look into the RAML code.
1. phonevalisd.raml (This is the mock API script, which will send the response of an API request by returning a mock JSON if successful conditions met.)
#%RAML 1.0
# Created By - Satyaki De
# Date: 01-Mar-2020
# Description: This is an Mock API

baseUri: https://anypoint.mulesoft.com/mocking/api/v1/links/09KK0pos-1080-4049-9e04-a093456a64a8/ #
title: PhoneVSD
securitySchemes:
  basic :
    type: Basic Authentication
    displayName: Satyaki's Basic Authentication
    description: API Only works with the basic authentication
protocols:
  - HTTP
description: This is a REST API Json base service to verify any phone numbers.
documentation:
  - title: PHONE VERIFY API
    content: This is a Mock API, which will simulate the activity of a Phone Validation API.
types:
  apiresponse:
    properties:
      valid: boolean
      number: string
      local_format: string
      international_format: string
      country_prefix: string
      country_code: string
      country_name: string
      location: string
      carrier: string
      line_type: string

/validate:
  get:
    queryParameters:
      access_key: string
      number: string
      country_code: string
      format: string
    description: For Validating the phone
    displayName: Validate phone
    protocols:
      - HTTP
    responses:
      403:
        body:
          application/json:
            properties:
              message: string
            example:
              {
                message : "Resource does not exists!"
              }
      400:
        body:
          application/json:
            properties:
              message: string
            example:
              {
                message : "API Key is invalid!"
              }
      200:
        body:
          application/json:
            type: apiresponse
            example:
              {
                "valid":true,
                "number":"17579758240",
                "local_format":"7579758240",
                "international_format":"+17579758240",
                "country_prefix":"+1",
                "country_code":"US",
                "country_name":"United States of America",
                "location":"Nwptnwszn1",
                "carrier":"MetroPCS Communications Inc.",
                "line_type":"mobile"
              }
Let’s quickly explore the critical snippet from the above script.
baseUri: https://anypoint.mulesoft.com/mocking/api/v1/links/86a5097f-1080-4049-9e04-a429219a64a8/ #The above line will be our main URL when we’re planning to invoke that from Python script.
securitySchemes:
    basic :
        type: Basic Authentication
In this script, we’re looking for primary level authentication. Apart from that, we have the options of using OAUTH & many other acceptable formats.
protocols:
- HTTP
In this case, we’re going to use – “HTTP” as our preferred communication protocol.
responses:
      403:
        body:
          application/json:
            properties:
              message: string
            example:
              {
                message : "Resource does not exists!"
              }
      400:
        body:
          application/json:
            properties:
              message: string
            example:
              {
                message : "API Key is invalid!"
              }
      200:
        body:
          application/json:
            type: apiresponse
            example:
              {
                "valid":true,
                "number":"17579758240",
                "local_format":"7579758240",
                "international_format":"+17579758240",
                "country_prefix":"+1",
                "country_code":"US",
                "country_name":"United States of America",
                "location":"Nwptnwszn1",
                "carrier":"MetroPCS Communications Inc.",
                "line_type":"mobile"
              }
We’ve created a provision for a few specific cases of response as part of our business logic & standards.
Once, we’re done with our coding, we need to focus on two places as shown in the below picture –
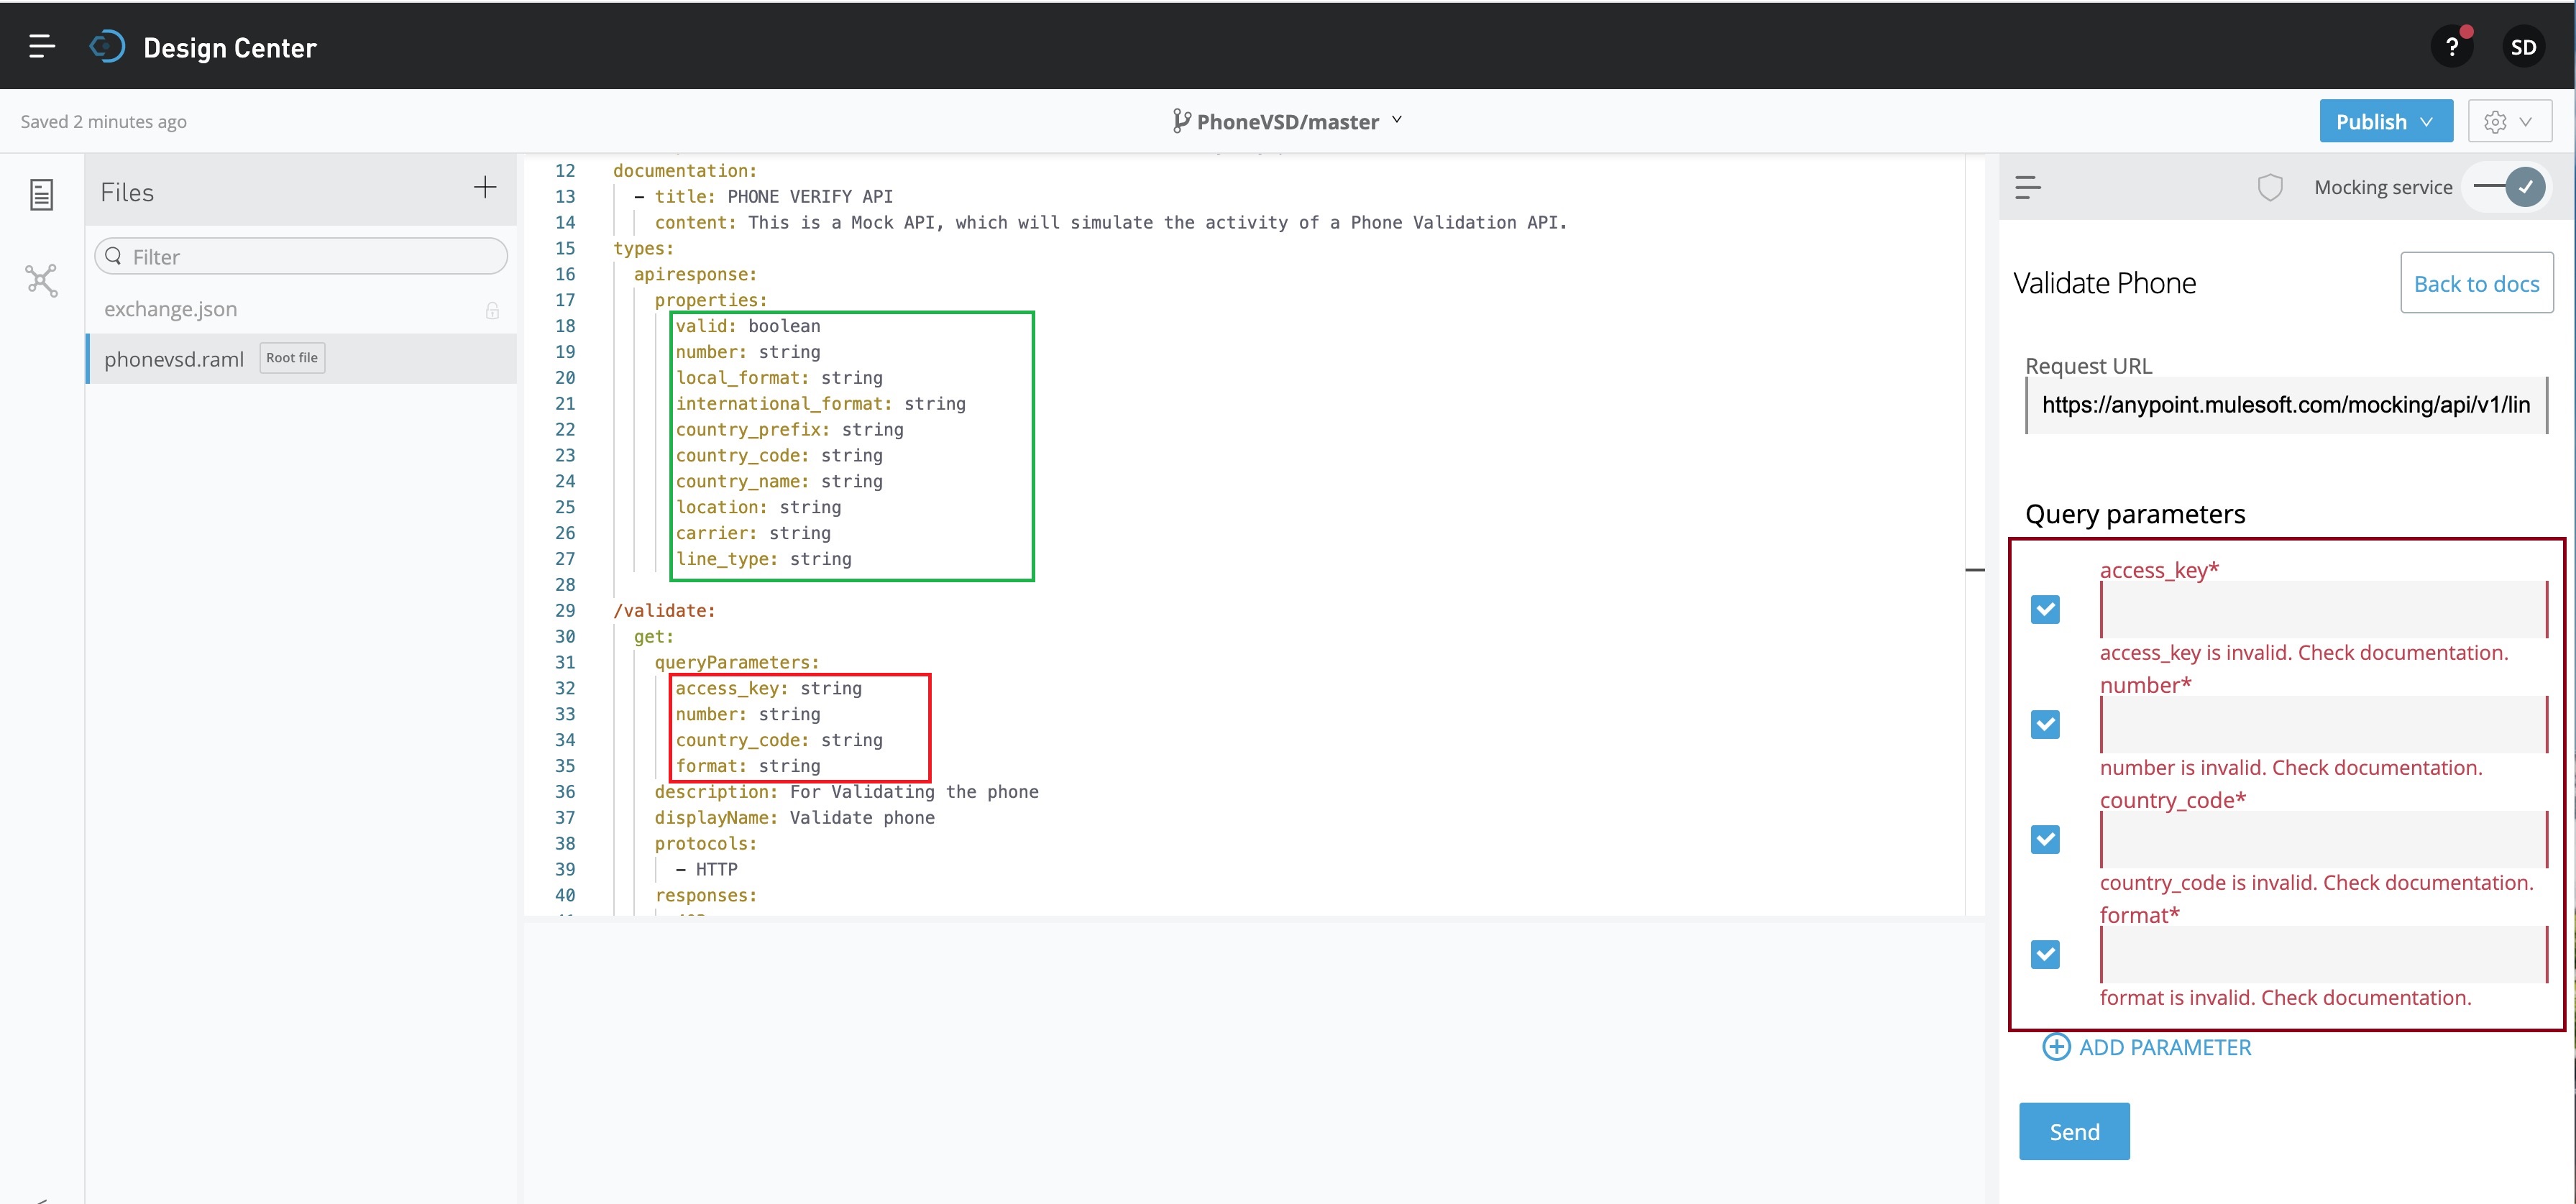
The snippet marked in RED square box, identifying our mandatory input parameters shown in the code as well as the right-hand side of the walls.
To test this mock API locally, you can pass these key parameters as follows –
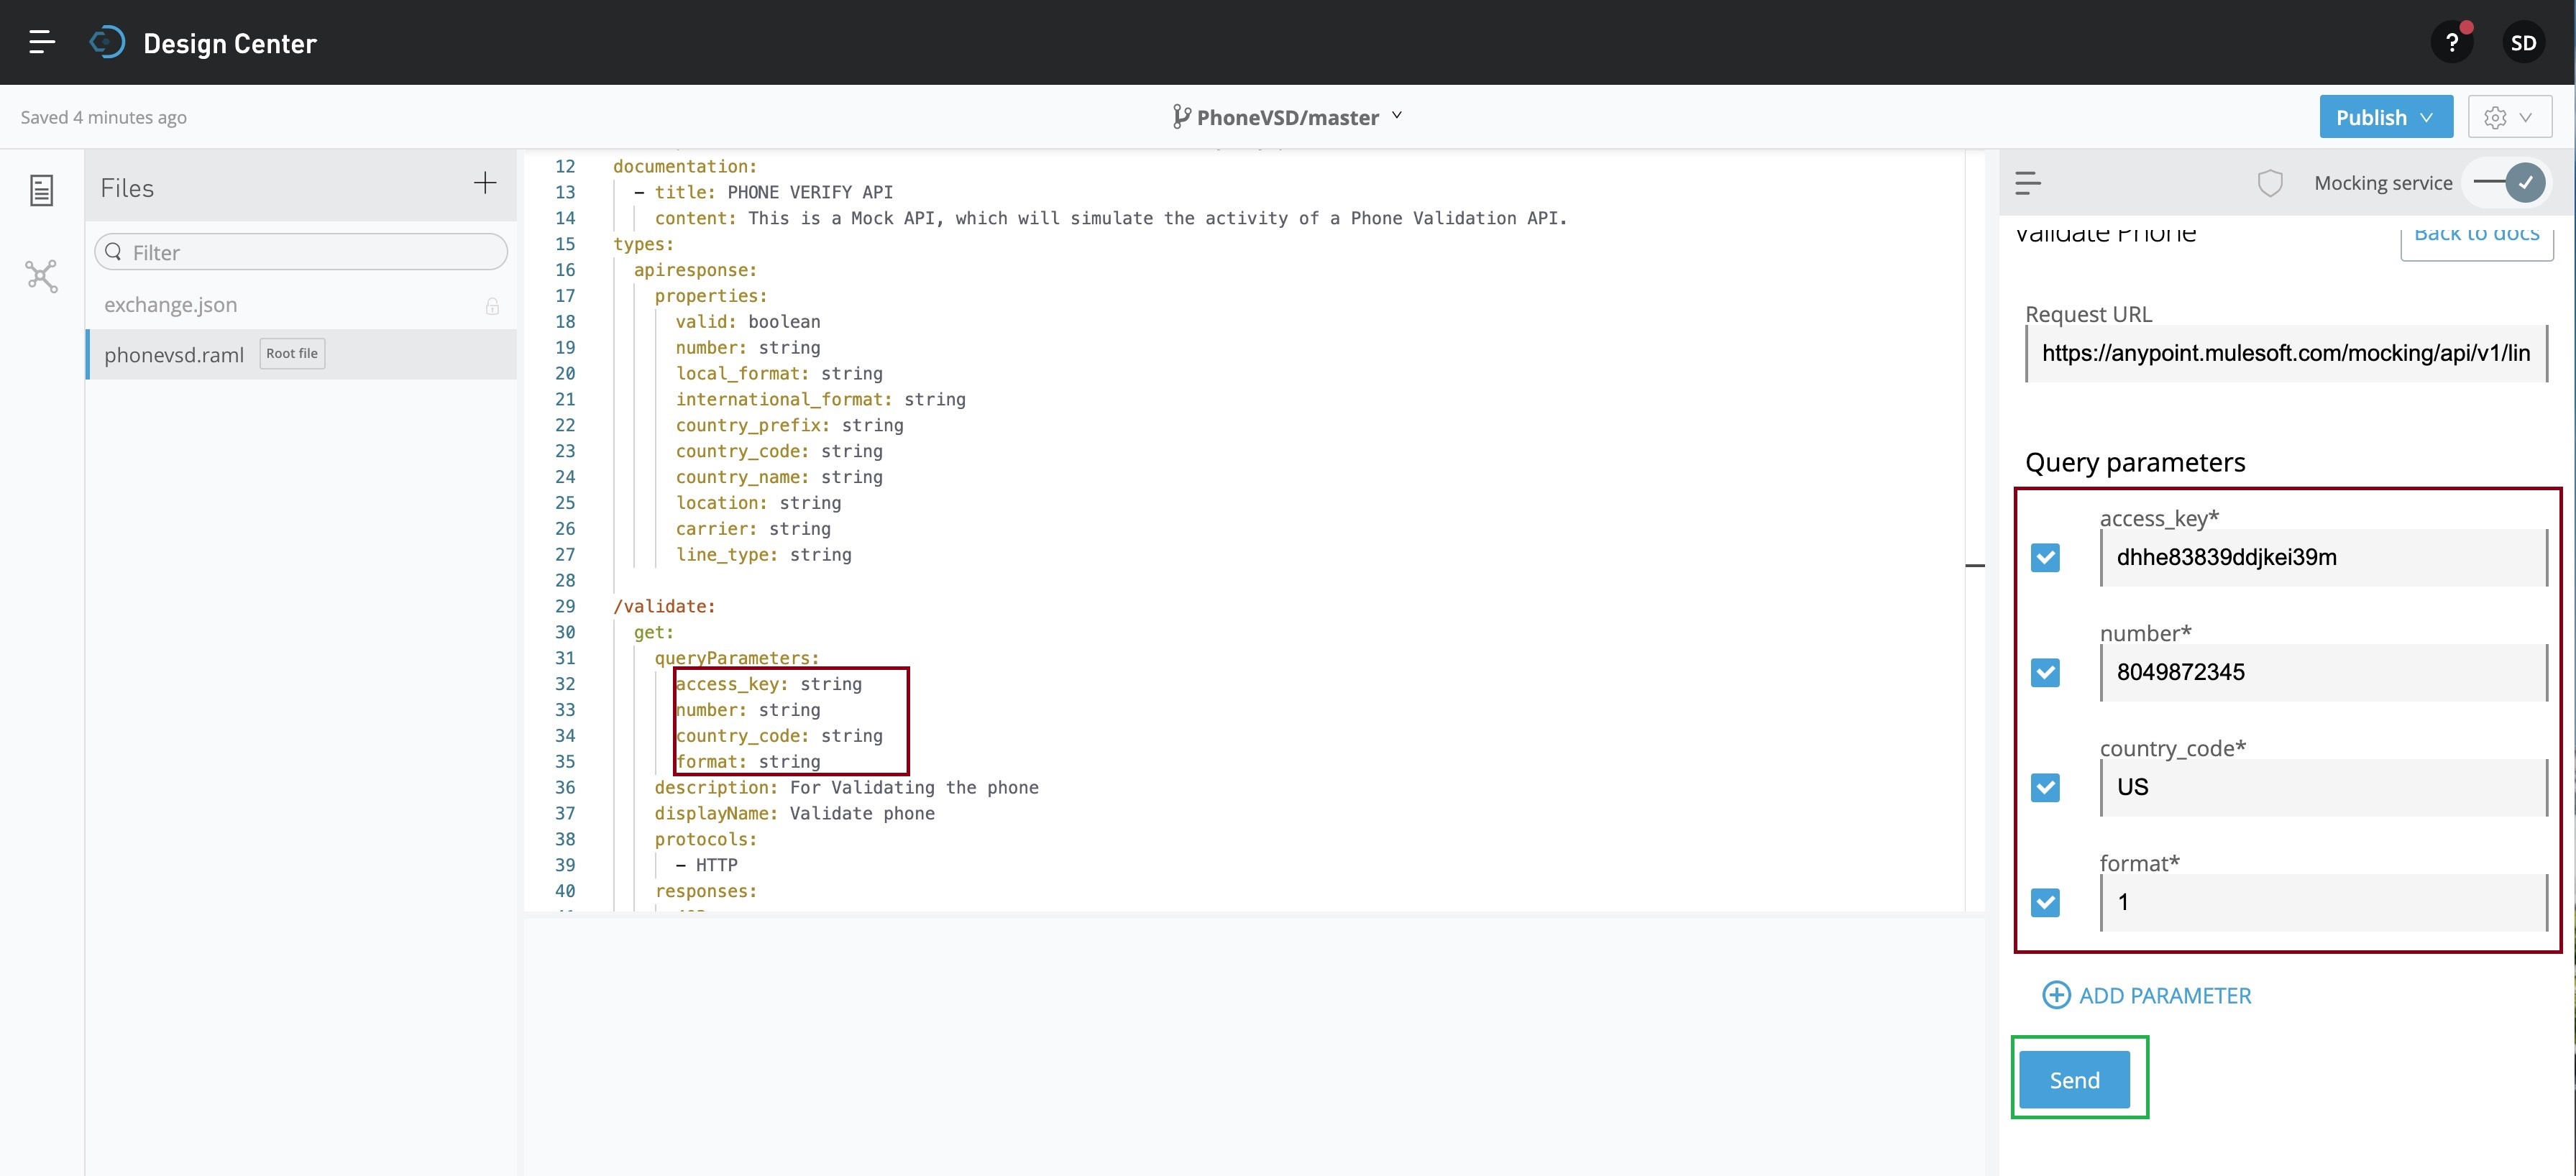
Now, you have to click the Send button marked in a GREEN square box. This will send your query parameters & as per our API response, you can see the output just below the Send button as follows –

Now, we’re good to publish this mock API in the Mulesoft Anywhere portal. This will help us to test it from an external application i.e., Python-based application for our case. So, click the “Publish” button highlighted with the Blue square box. That will prompt the following screen –
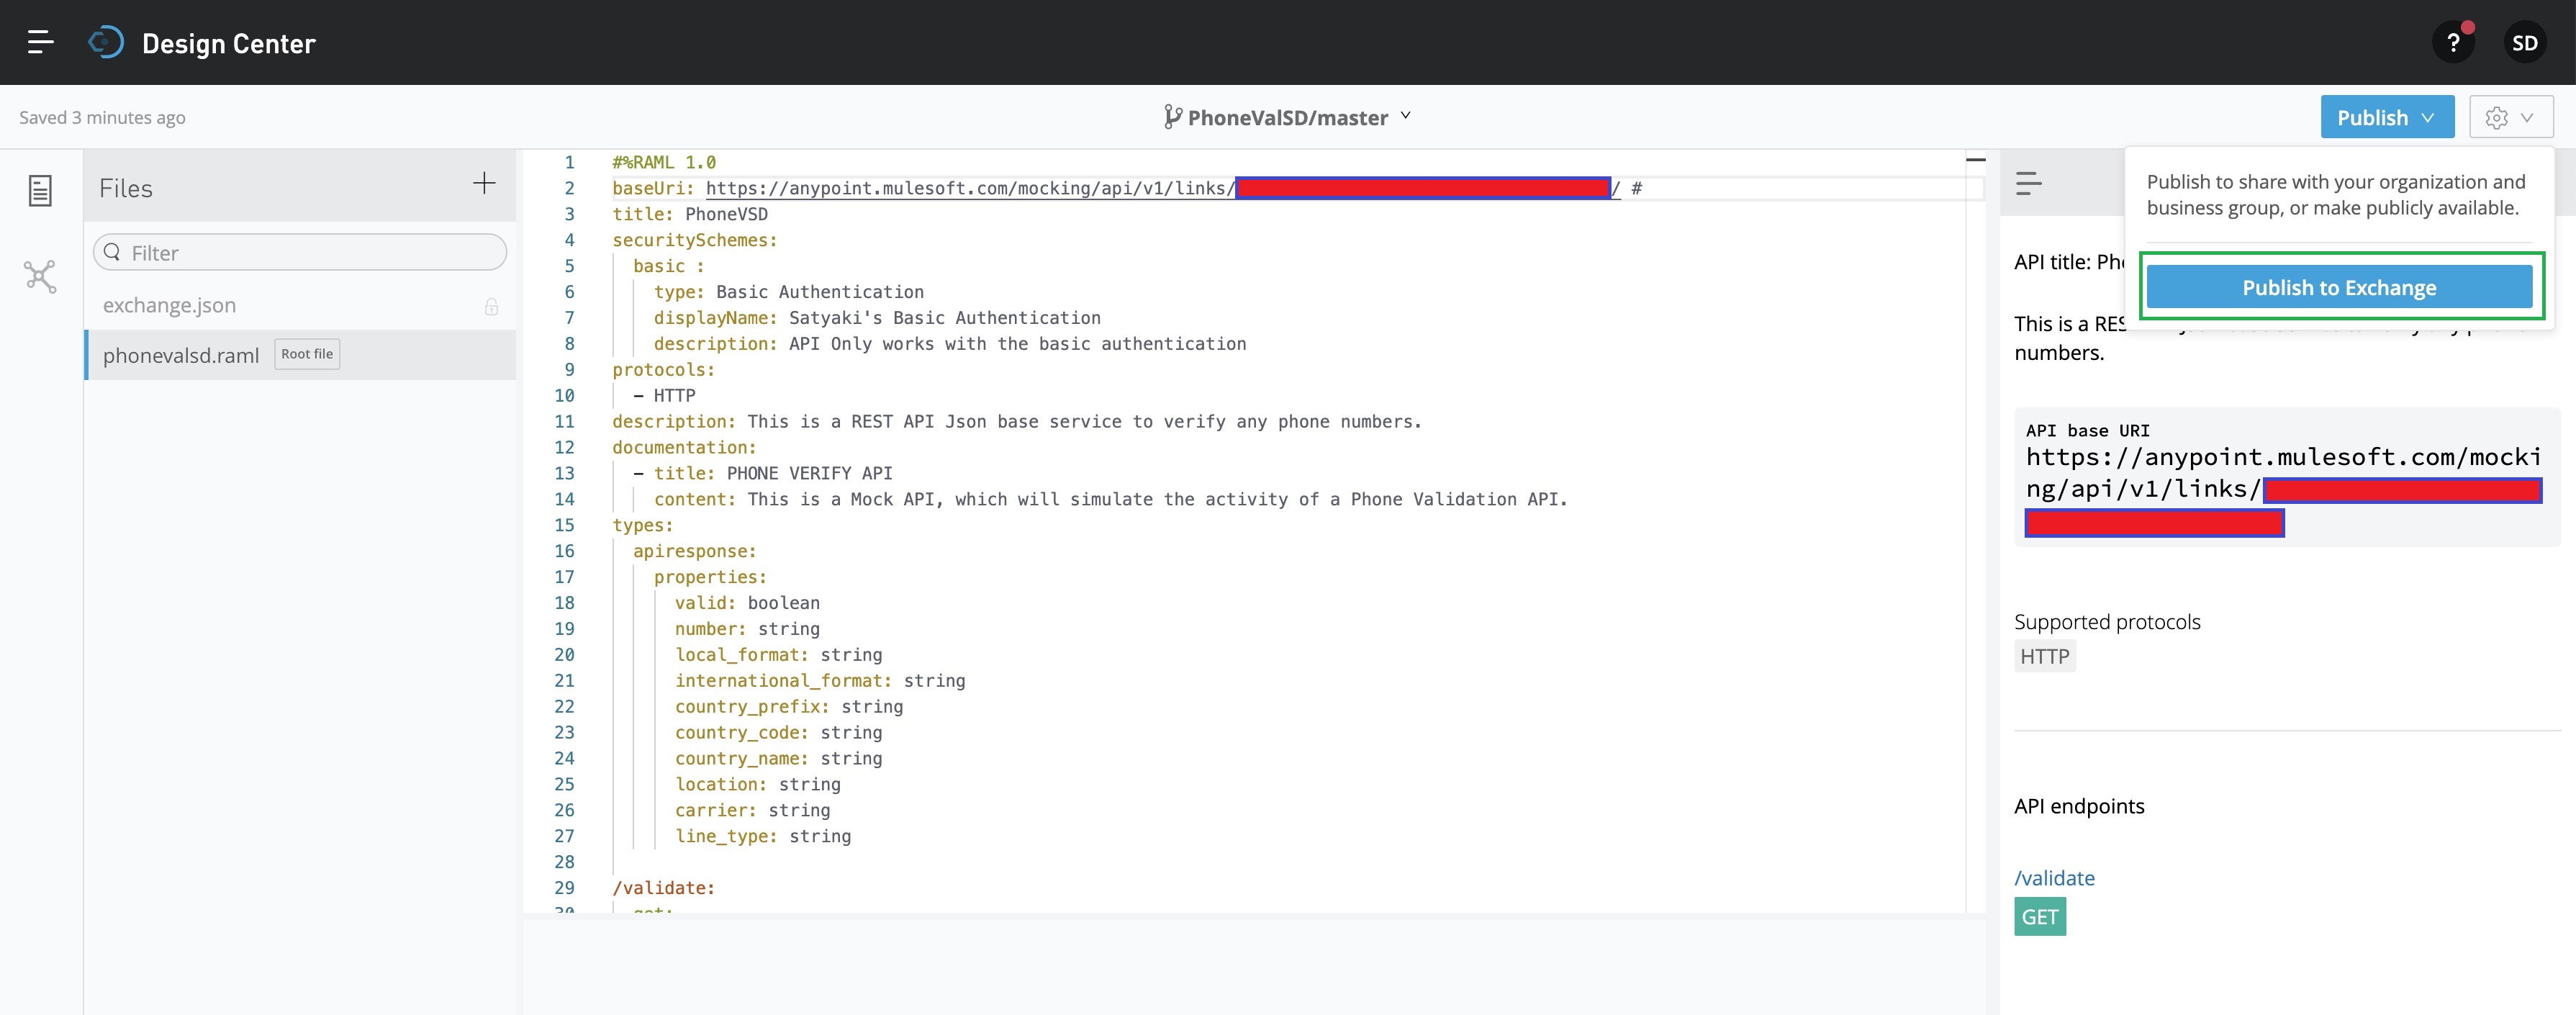
Now, we’ll click the “Public to Exchange” button marked with the GREEN square box. This will prompt the next screen as shown below –
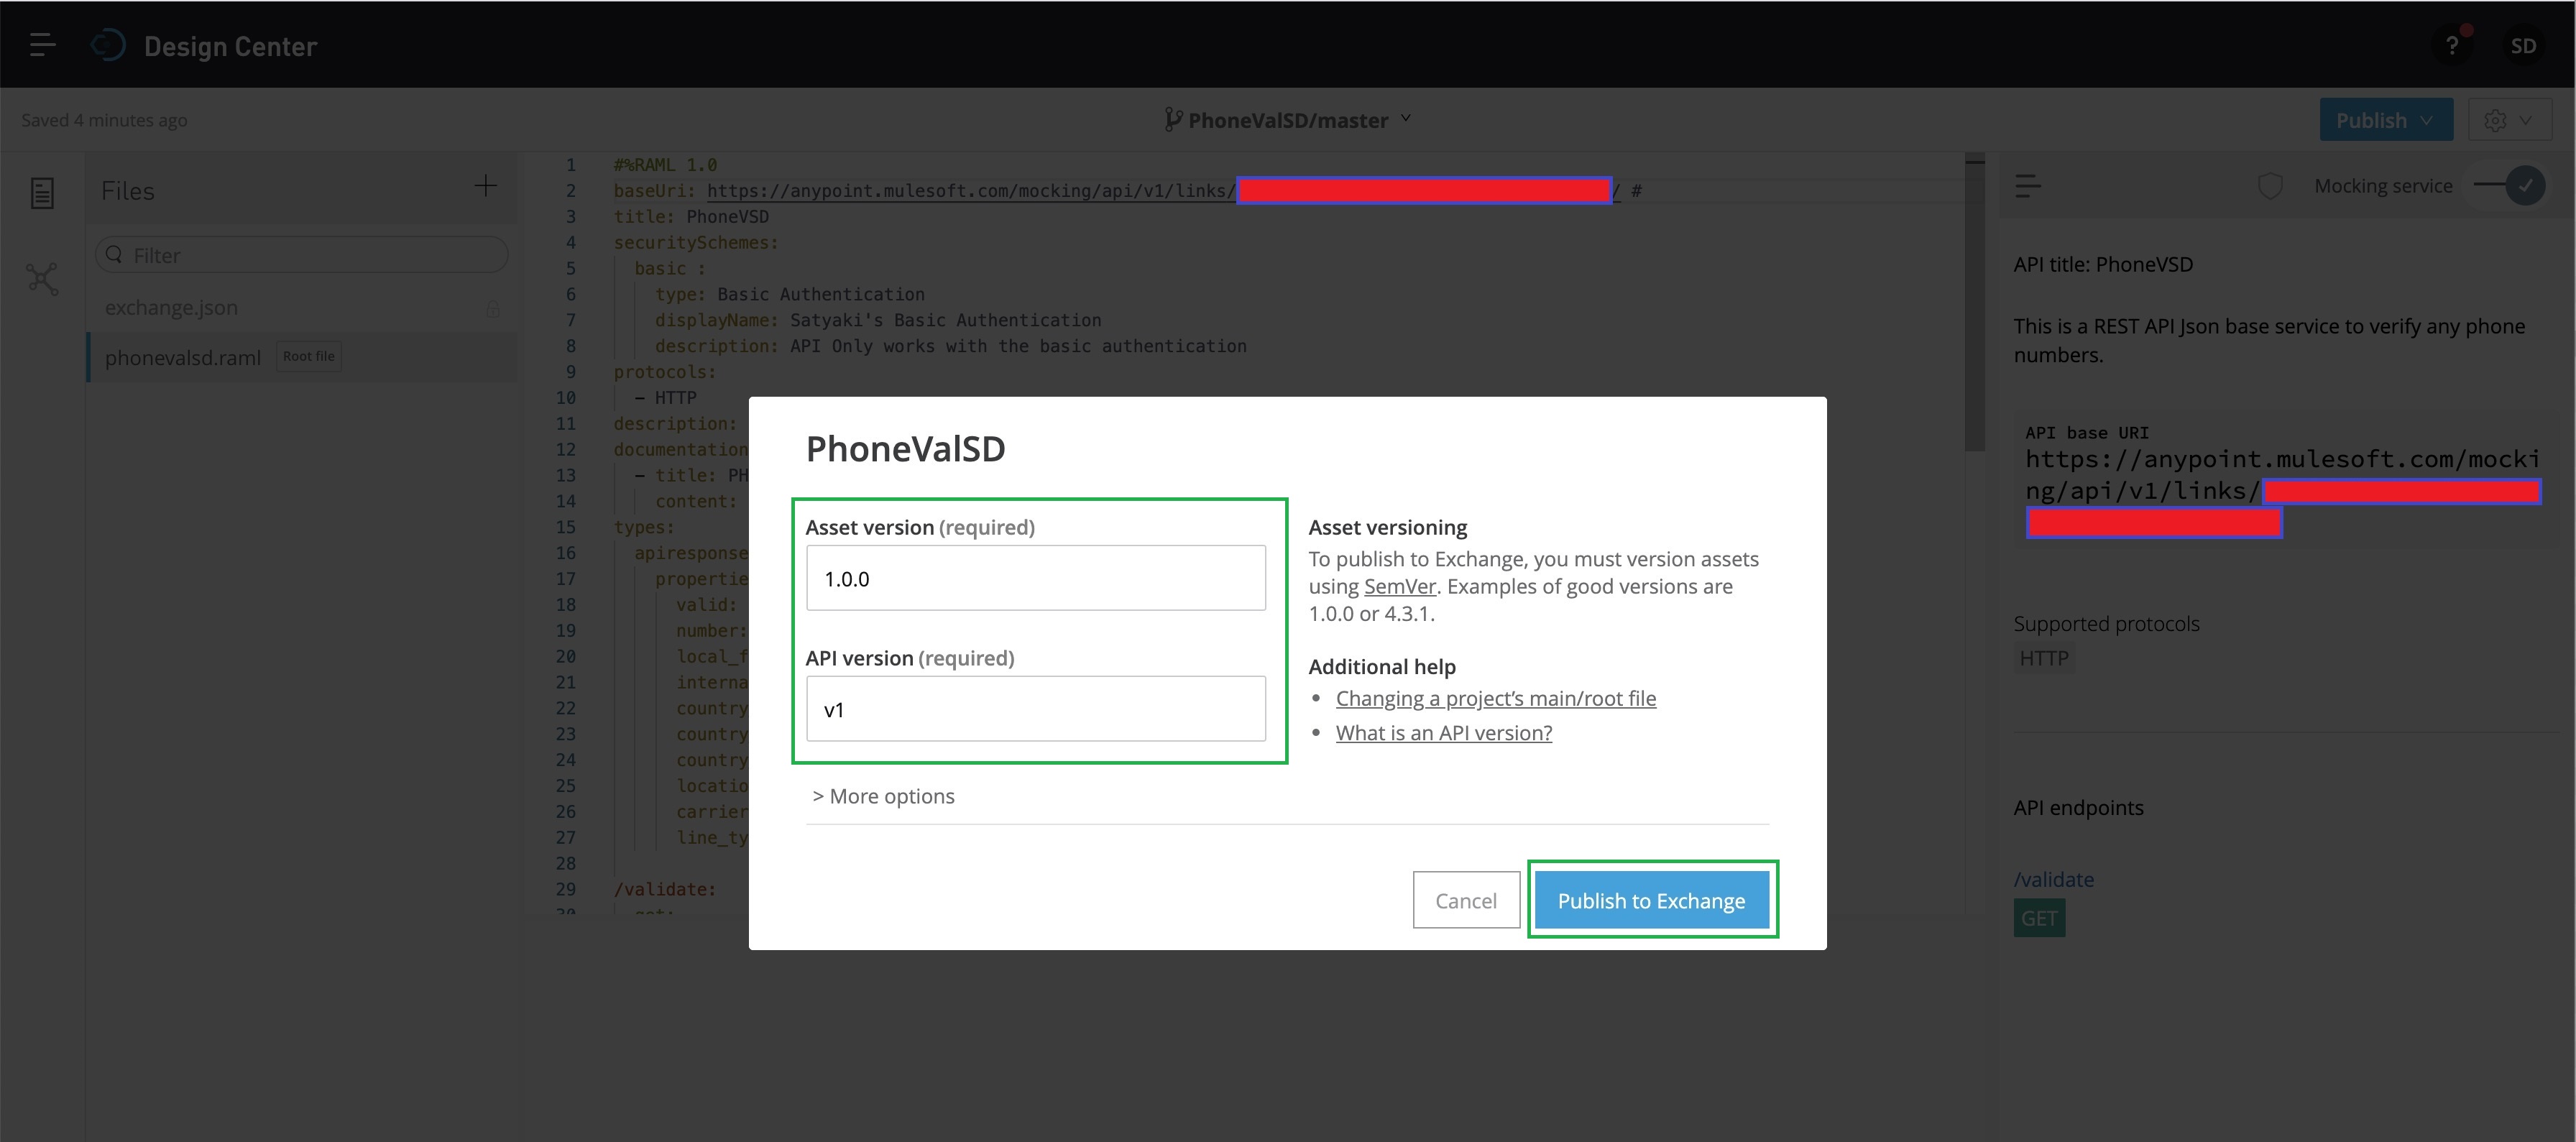
Now, you need to fill up the relevant details & then click – “Publish to Exchange,” as shown above. And, that will lead to the following screen –
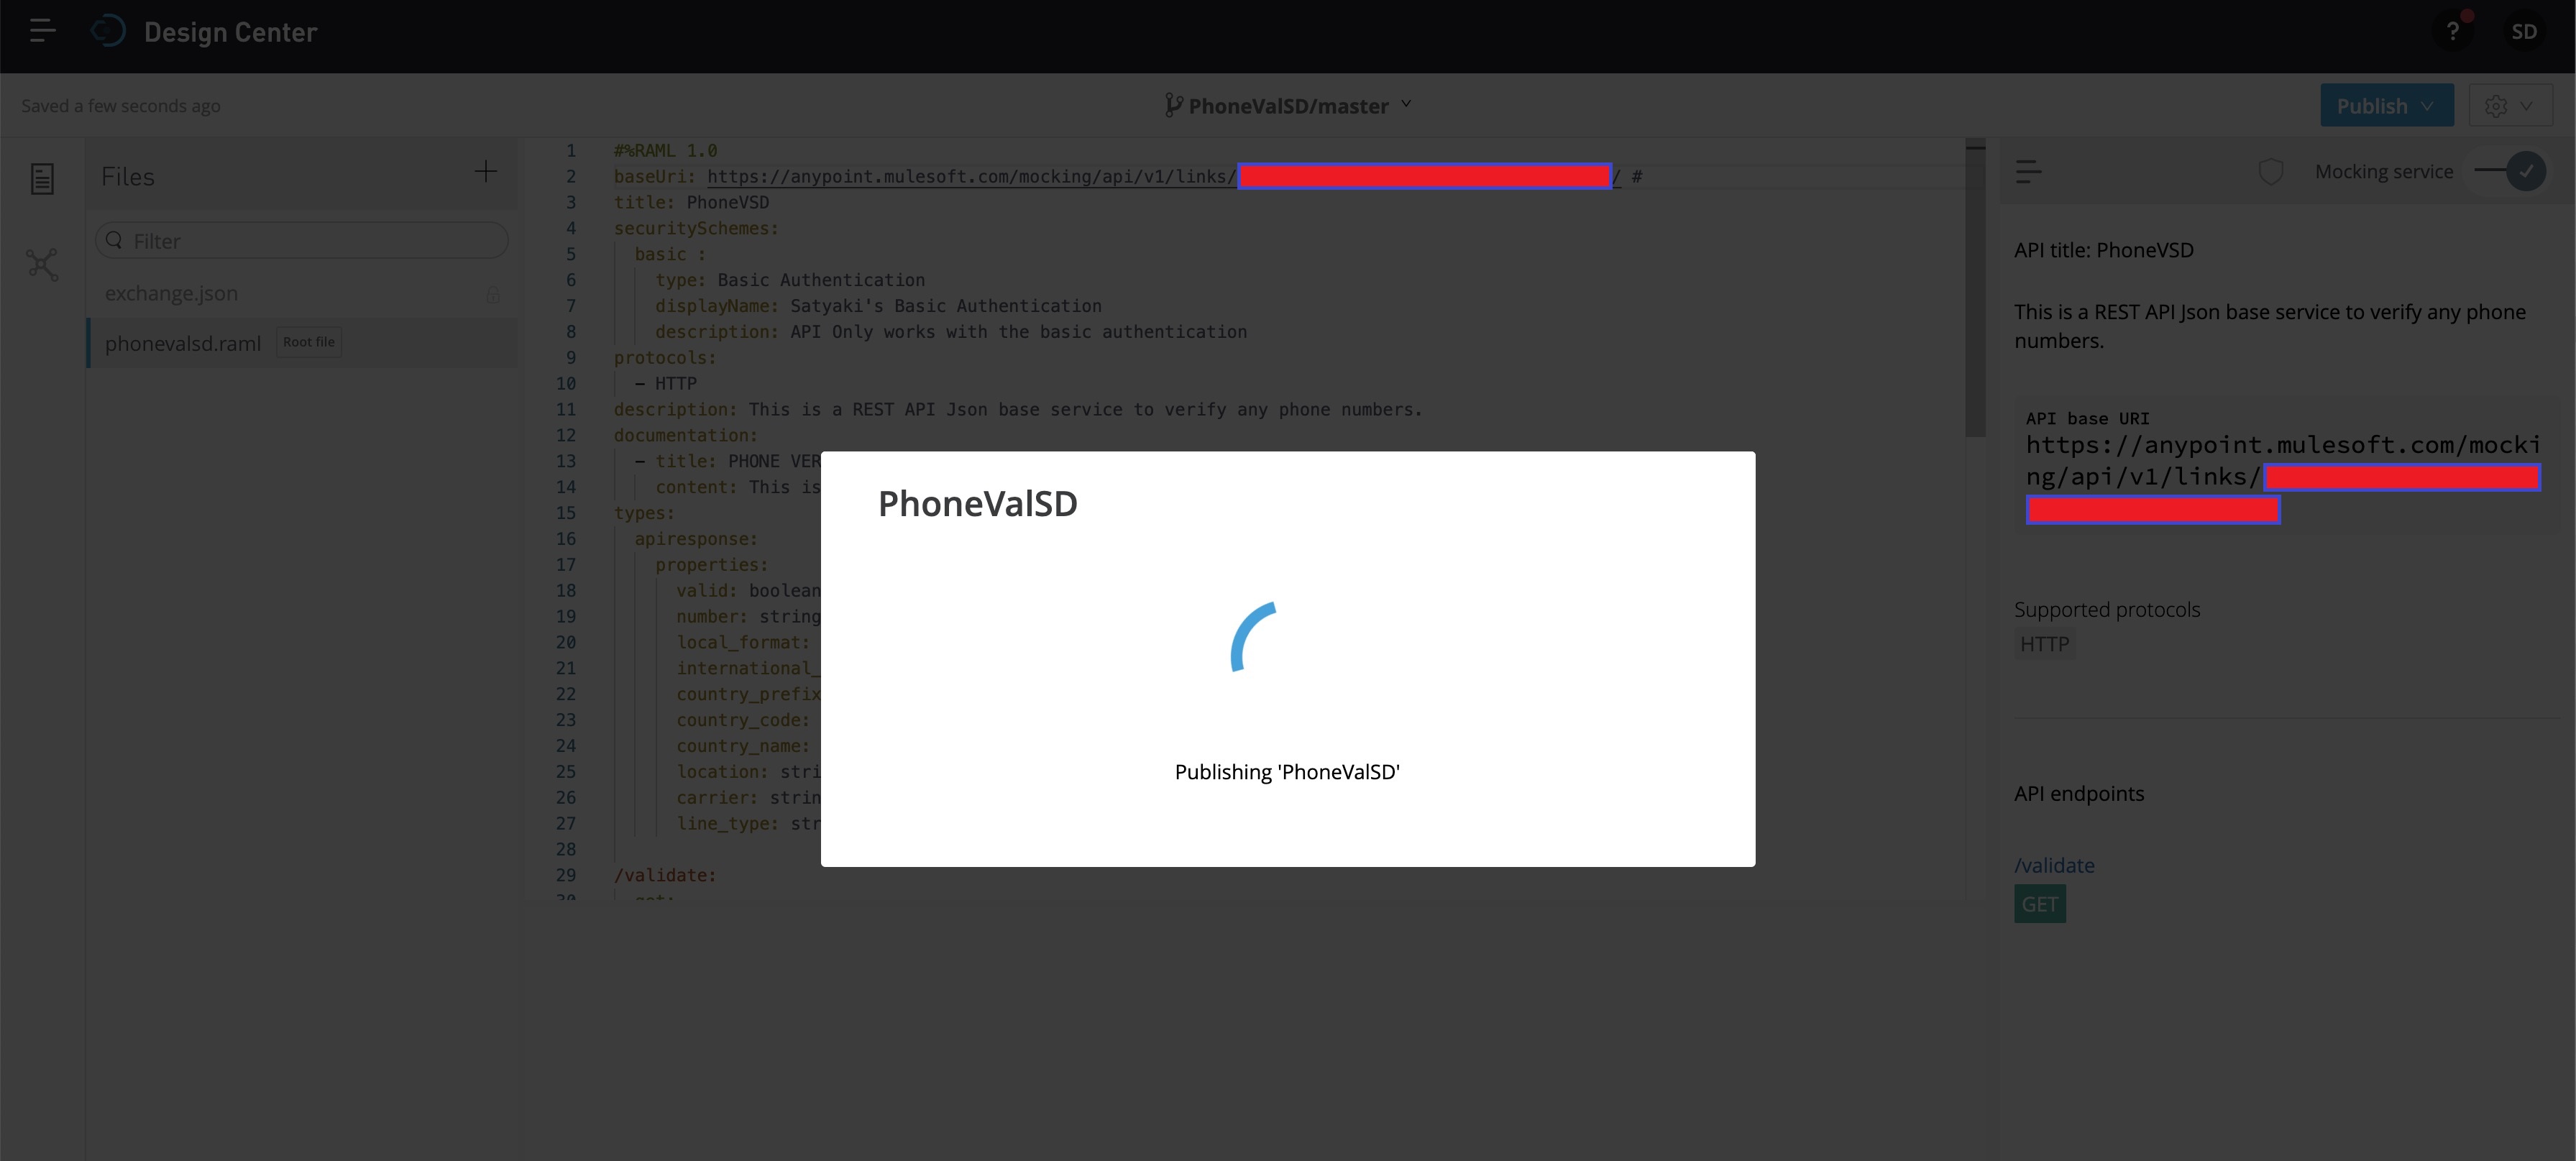
And, after a few second you will see the next screen –
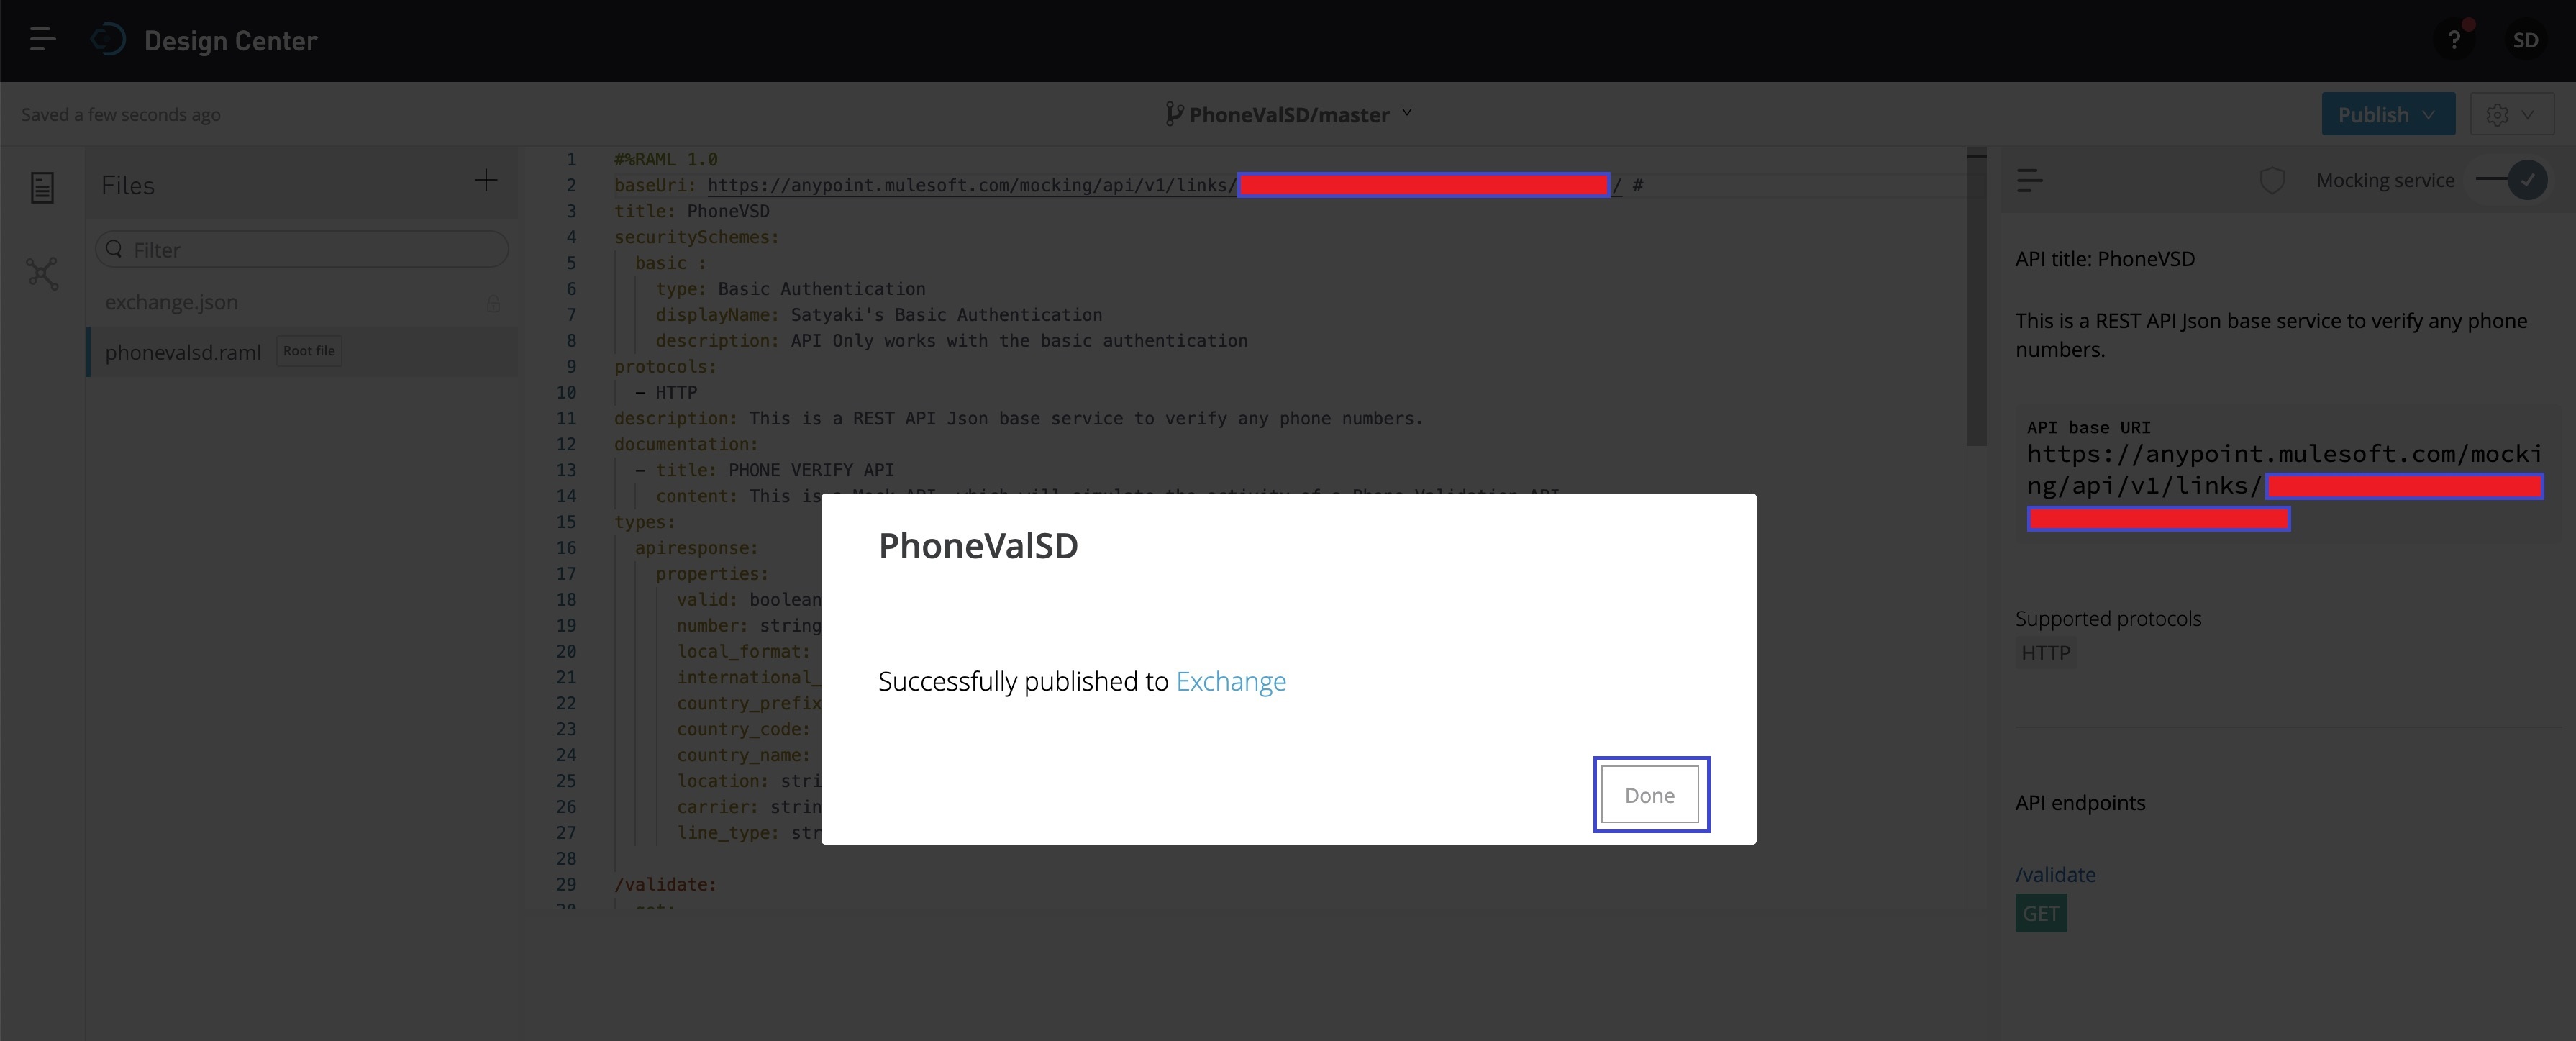
Now, you can click “Done” to close this popup. And, to verify the status, you can check it by clicking the top-left side of the code-editor & then click “Design Center” as shown below –

So, we’re done with our Mulesoft mock API design & deployment. Let’s test it from our Python application. We’ll be only discussing the key snippets here.
2. clsConfig.py (This is the parameter file for our mock API script.)
##############################################
#### Written By: SATYAKI DE               ####
#### Written On: 04-Apr-2020              ####
####                                      ####
#### Objective: This script is a config   ####
#### file, contains all the keys for      ####
#### Mulesoft Mock API. Application will  ####
#### process these information & perform  ####
#### the call to our newly developed Mock ####
#### API in Mulesoft.                     ####
##############################################

import os
import platform as pl

class clsConfig(object):
    Curr_Path = os.path.dirname(os.path.realpath(__file__))

    os_det = pl.system()
    if os_det == "Windows":
        sep = '\\'
    else:
        sep = '/'

    config = {
        'APP_ID': 1,
        'URL': "https://anypoint.mulesoft.com/mocking/api/v1/links/a23e4e71-9c25-317b-834b-10b0debc3a30/validate",
        'CLIENT_SECRET': 'a12345670bacb1e3cec55e2f1234567d',
        'API_TYPE': "application/json",
        'CACHE': "no-cache",
        'CON': "keep-alive",
        'ARCH_DIR': Curr_Path + sep + 'arch' + sep,
        'PROFILE_PATH': Curr_Path + sep + 'profile' + sep,
        'LOG_PATH': Curr_Path + sep + 'log' + sep,
        'REPORT_PATH': Curr_Path + sep + 'report',
        'SRC_PATH': Curr_Path + sep + 'Src_File' + sep,
        'APP_DESC_1': 'Mule Mock API Calling!',
        'DEBUG_IND': 'N',
        'INIT_PATH': Curr_Path
    }
The key snippet from the above script is –
This URL received from our RAML-editor generated by the Mulesoft API Designer studio.
3. clsMuleMockAPI.py (This is the main class to invoke our mock API script.)
##############################################
#### Written By: SATYAKI DE               ####
#### Written On: 30-Jul-2020              ####
#### Modified On 30-Jul-2020              ####
####                                      ####
#### Objective: Main class scripts to     ####
#### invoke mock API.                     ####
##############################################

import json
from clsConfig import clsConfig as cf
import requests
import logging

class clsMuleMockAPI:
    def __init__(self):
        self.url = cf.config['URL']
        self.muleapi_key = cf.config['CLIENT_SECRET']
        self.muleapi_cache = cf.config['CACHE']
        self.muleapi_con = cf.config['CON']
        self.type = cf.config['API_TYPE']

    def searchQry(self, phNumber, cntCode, fmt):
        try:
            url = self.url
            muleapi_key = self.muleapi_key
            muleapi_cache = self.muleapi_cache
            muleapi_con = self.muleapi_con
            type = self.type

            querystring = {"access_key": muleapi_key, "number": phNumber, "country_code": cntCode, "format": fmt}

            print('Input JSON: ', str(querystring))

            headers = {
                'content-type': type,
                'Cache-Control': muleapi_cache,
                'Connection': muleapi_con
            }

            response = requests.request("GET", url, headers=headers, params=querystring)

            ResJson = response.text

            jdata = json.dumps(ResJson)
            ResJson = json.loads(jdata)

            return ResJson

        except Exception as e:
            ResJson = ''
            x = str(e)
            print(x)

            logging.info(x)
            ResJson = {'errorDetails': x}

            return ResJson
And, the key snippet from the above code –
querystring = {"access_key": muleapi_key, "number": phNumber, "country_code": cntCode, "format": fmt}In the above lines, we’re preparing the query string, which will be passed into the API call.
response = requests.request("GET", url, headers=headers, params=querystring)Invoking our API using requests method in python.
4. callMuleMockAPI.py (This is the first calling script to invoke our mock API script through our developed class python script.)
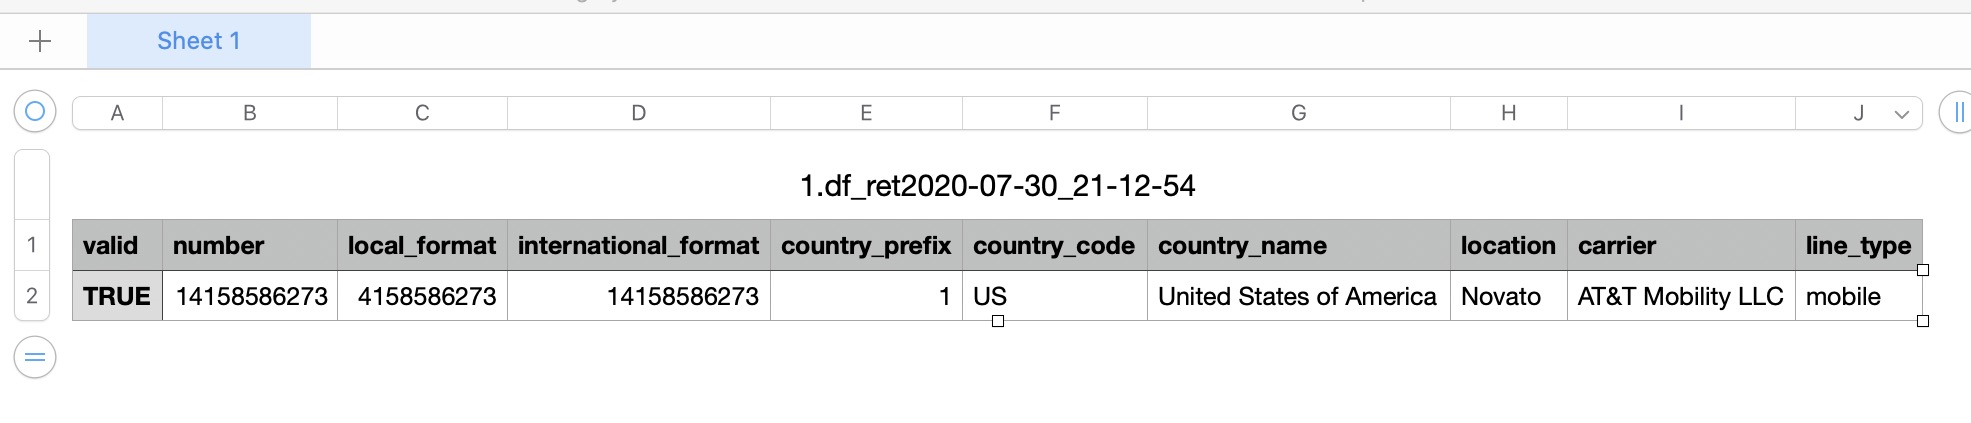
##############################################
#### Written By: SATYAKI DE               ####
#### Written On: 30-Jul-2020              ####
#### Modified On 30-Jul-2020              ####
####                                      ####
#### Objective: Main calling scripts.     ####
##############################################

from clsConfig import clsConfig as cf
import clsL as cl
import logging
import datetime
import clsMuleMockAPI as cw
import pandas as p
import json

# Disbling Warning
def warn(*args, **kwargs):
    pass

import warnings
warnings.warn = warn

# Lookup functions from
# Azure cloud SQL DB

var = datetime.datetime.now().strftime("%Y-%m-%d_%H-%M-%S")

def main():
    try:
        # Declared Variable
        ret_1 = 0
        debug_ind = 'Y'
        res_2 = ''

        # Defining Generic Log File
        general_log_path = str(cf.config['LOG_PATH'])

        # Enabling Logging Info
        logging.basicConfig(filename=general_log_path + 'MockMuleAPI.log', level=logging.INFO)

        # Initiating Log Class
        l = cl.clsL()

        # Moving previous day log files to archive directory
        log_dir = cf.config['LOG_PATH']

        tmpR0 = "*" * 157

        logging.info(tmpR0)
        tmpR9 = 'Start Time: ' + str(var)
        logging.info(tmpR9)
        logging.info(tmpR0)

        print()

        print("Log Directory::", log_dir)
        tmpR1 = 'Log Directory::' + log_dir
        logging.info(tmpR1)

        print('Welcome to Mock Mulesoft API Calling Program: ')
        print('-' * 160)
        print('Please Press 1 for better formatted JSON: (Suitable for reading or debugging) ')
        print('Please Press 2 for unformated JSON: ')
        print()
        input_choice = int(input('Please provide your choice:'))
        print()

        # Create the instance of the Mock Mulesoft API Class
        x2 = cw.clsMuleMockAPI()

        # Let's pass this to our map section
        if input_choice == 1:
            fmt = "1"
            phNumber = str(input('Please provide the Phone Number (Without the country Code):'))
            cntCode  = str(input('Please provide the Country Code (Example: US):'))
            print()

            retJson = x2.searchQry(phNumber, cntCode, fmt )
        elif input_choice == 2:
            fmt = "0"
            phNumber = str(input('Please provide the Phone Number (Without the country Code):'))
            cntCode = str(input('Please provide the Country Code (Example: US):'))
            print()

            retJson = x2.searchQry(phNumber, cntCode, fmt)
        else:
            print('Invalid options!')
            retJson = {'errorDetails': 'Invalid Options!'}

        # Converting JSon to Pandas Dataframe for better readability
        # Capturing the JSON Payload
        res = json.loads(retJson)

        # Printing formatted JSON
        print()
        print('Output JSON::')
        print(json.dumps(res, indent=2))

        # Converting dictionary to Pandas Dataframe
        # df_ret = p.read_json(ret_2, orient='records')
        df_ret = p.io.json.json_normalize(res)
        df_ret.columns = df_ret.columns.map(lambda x: x.split(".")[-1])

        # Removing any duplicate columns
        df_ret = df_ret.loc[:, ~df_ret.columns.duplicated()]

        print()
        print()
        print("-" * 160)

        print('Publishing sample result: ')
        print(df_ret.head())

        # Logging Final Output
        l.logr('1.df_ret' + var + '.csv', debug_ind, df_ret, 'log')

        print("-" * 160)
        print()

        print('Finished Analysis points..')
        print("*" * 160)
        logging.info('Finished Analysis points..')
        logging.info(tmpR0)

        tmpR10 = 'End Time: ' + str(var)
        logging.info(tmpR10)
        logging.info(tmpR0)

    except ValueError as e:
        print(str(e))
        print("Invalid option!")
        logging.info("Invalid option!")

    except Exception as e:
        print("Top level Error: args:{0}, message{1}".format(e.args, e.message))

if __name__ == "__main__":
    main()
The above script is pretty straight forward. First, we’re instantiating our essential class by this line –
# Create the instance of the Mock Mulesoft API Class
x2 = cw.clsMuleMockAPI()
And, then based on the logical condition we’re invoking it as follows –
retJson = x2.searchQry(phNumber, cntCode, fmt )Now, we would like to explore the directory structure both in MAC & Windows –

Topside represents the MAC O/S structure, whereas the bottom part represents the Windows directory structure.
Let’s run the python application to test it.

In this case, the bottom side represents the MAC run, whereas the top side represents Windows run status.
The sample CSV log should look something like this –
Windows:

MAC:
So, we’ve done it.
I’ll be posting another new post in the coming days. Till then, Happy Avenging! 😀
Note: All the data posted here are representational data & available over the internet & for educational purpose only.


You must be logged in to post a comment.