Azure-API calls from python-based OCI function through the oracle API-Gateway.

Today, I’ll be discussing Oracle Cloud Function interaction with Azure-API through Oracle API Gateway using native python. Again, I want to touch on this subject as I didn’t find lots of relevant material using python over the net.

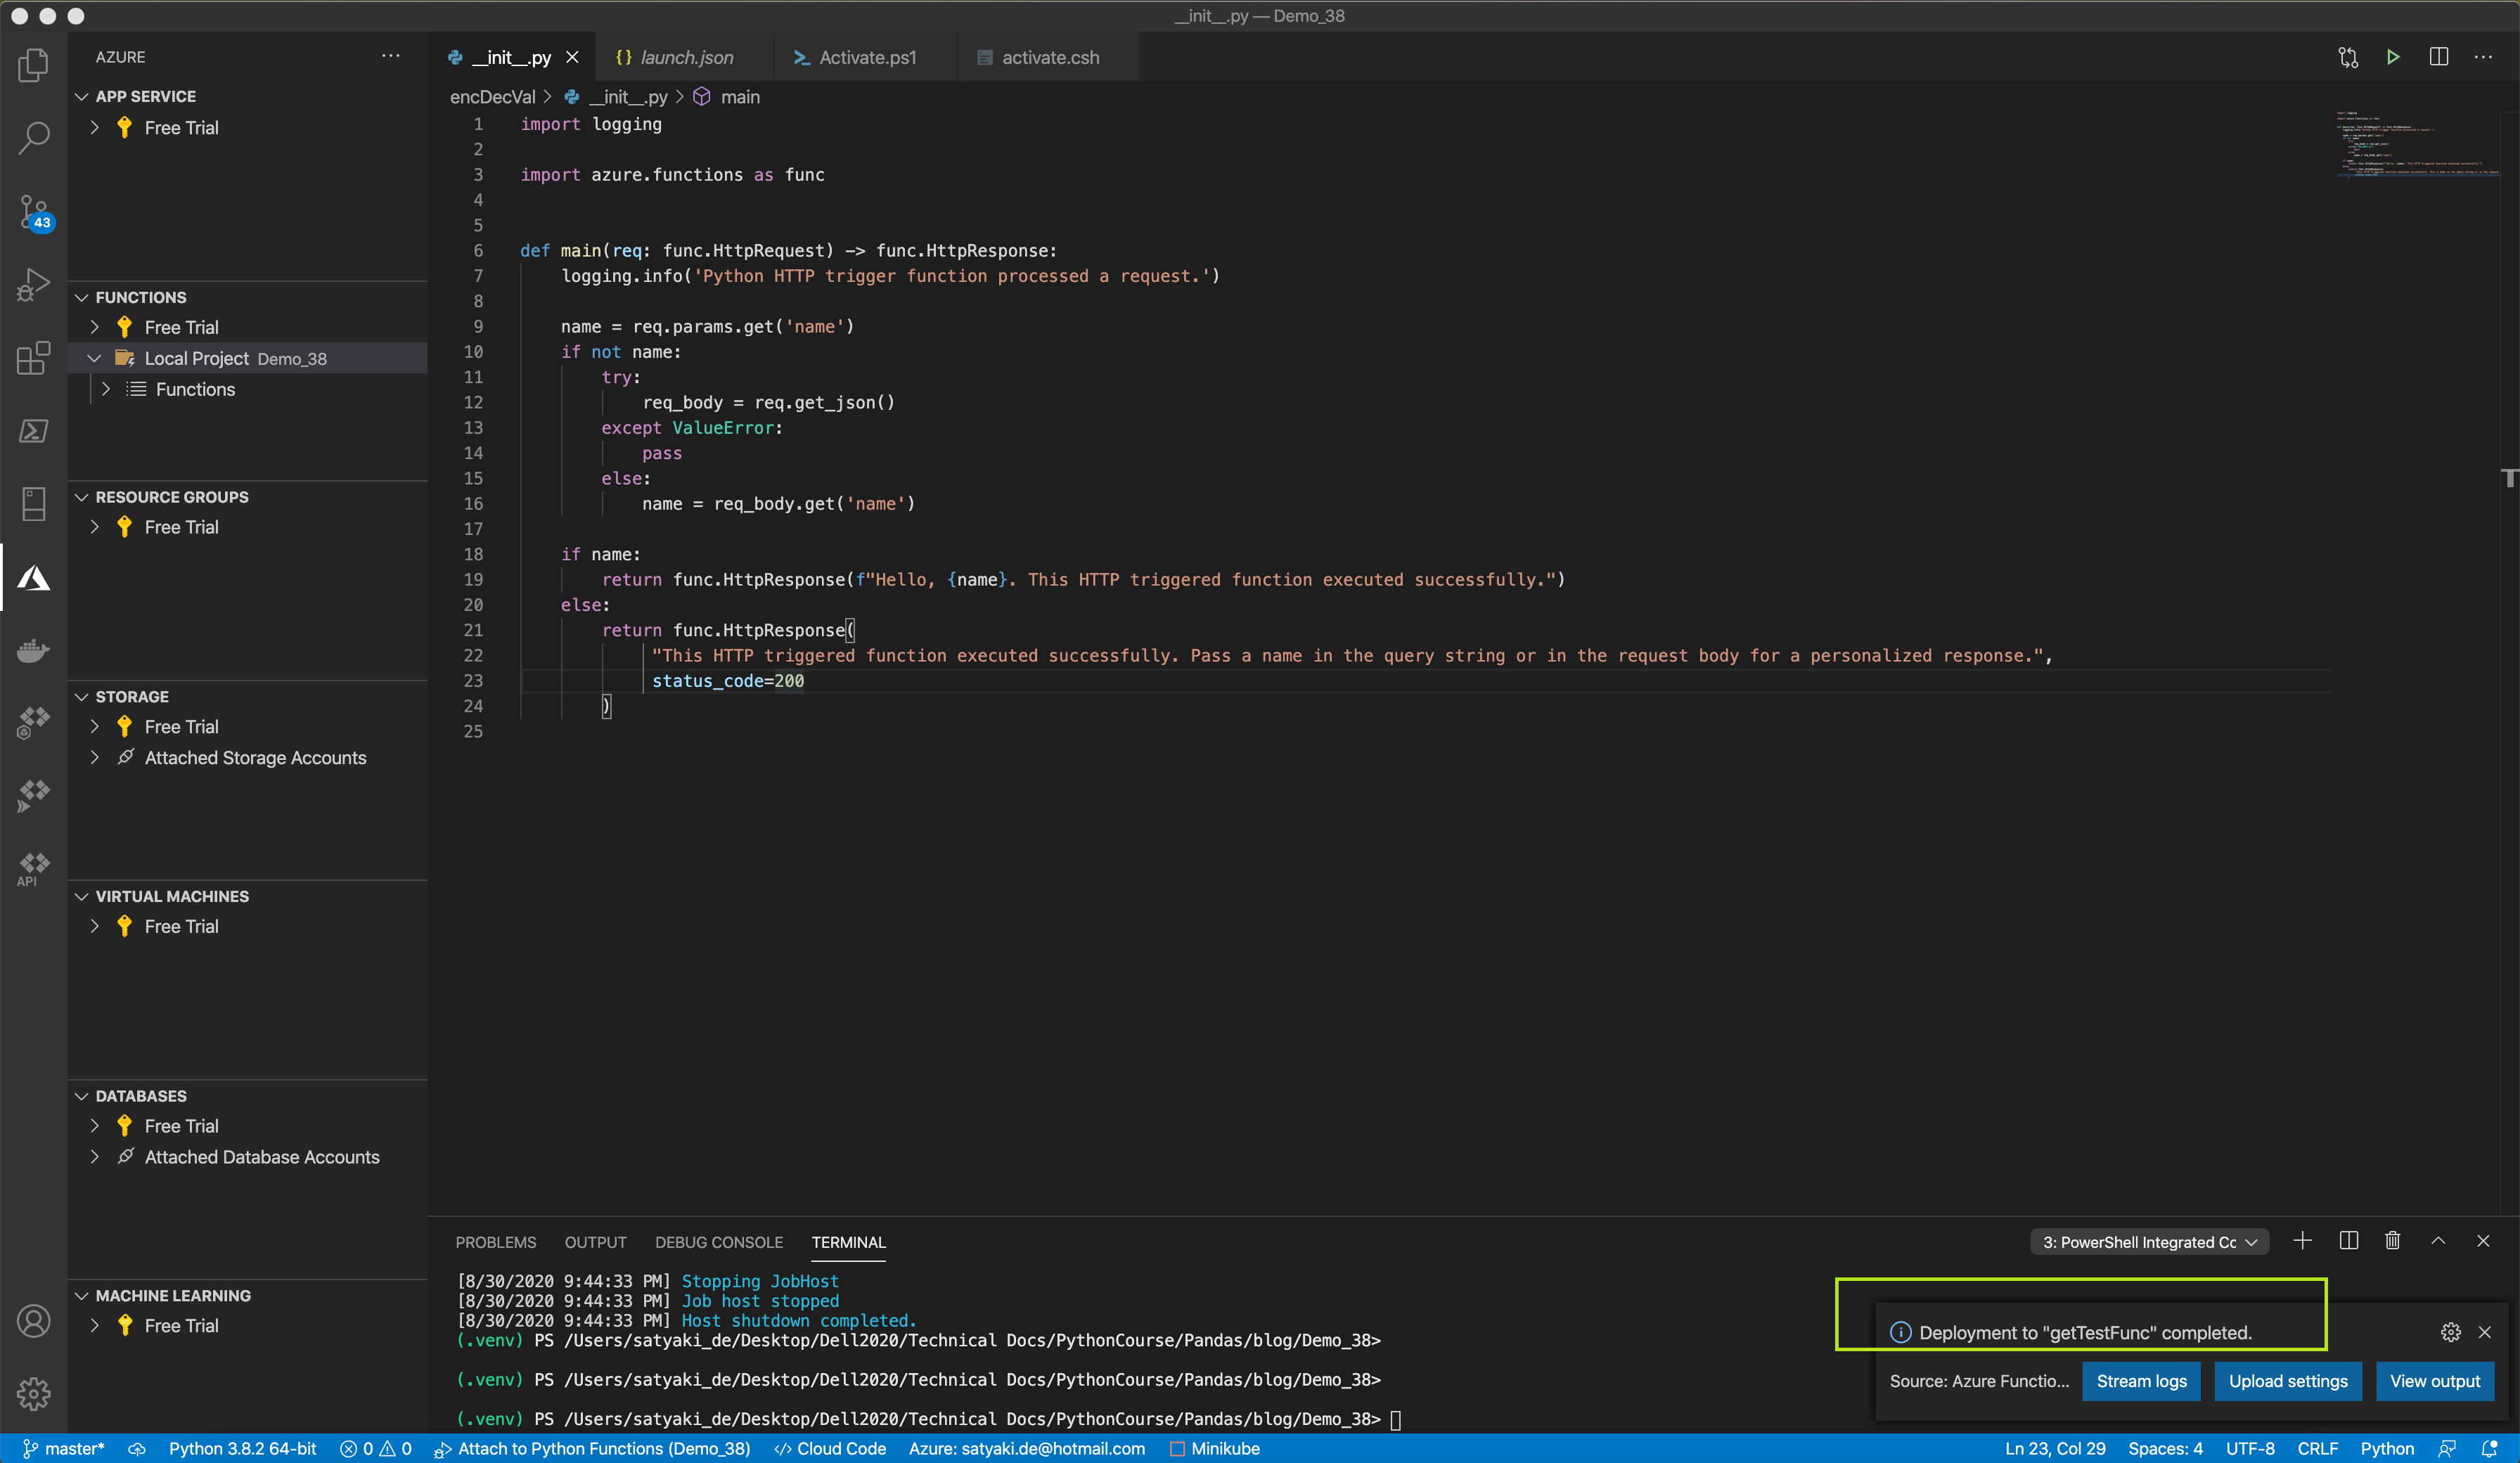
Let’s explore our use case. For this use case, I’ll use an old Azure-API that I’ve developed in early 2019 & shared here during that time.

Now, we need to prepare our environment in Oracle-cloud.

Step 1:

We need to configure the virtual network as shown in the below collage picture, which will depict the step-by-step process to create it. For security reasons, I’ve masked sensitive information. It would help if you captured them from your cloud portal.

VCN creation process

Make sure you choose the correct options & validate at the end, as shown in the below picture.

VCN Creation – Final Step

If all the information provided is correct, then you should see the following screen.

VCN Creation – Final Screen

Step 2:

Now, we need to create an application. As per OCI guidelines, one cannot generate any function or group of functions without the container, known as application.

Creation of Application

From the above collage pic, you can see how we create the application by providing all the necessary inputs.

Step 3:

Now, you need to create the registry as shown below –

Creation of Registry

Your function-container will stay inside it after deployment. To know more about this, click the following link.

Step 4:

If you haven’t generated the auth-token already, then this is the time to render it as shown below –

Generation of Auth-Token

Step 5:

This next piece of information is highly crucial & on many occasions, you need this piece of information.

Object storage namespace

Just keep this information handy. I’ll refer to this step whenever we need it. You can get the details here.

Step 6:

Let’s create the gateway now. Please refer to the following collage pics, showing the step-by-step process.

Creation of Gateway

Make sure you have validated it before you proceed to the next step.

Step 7:

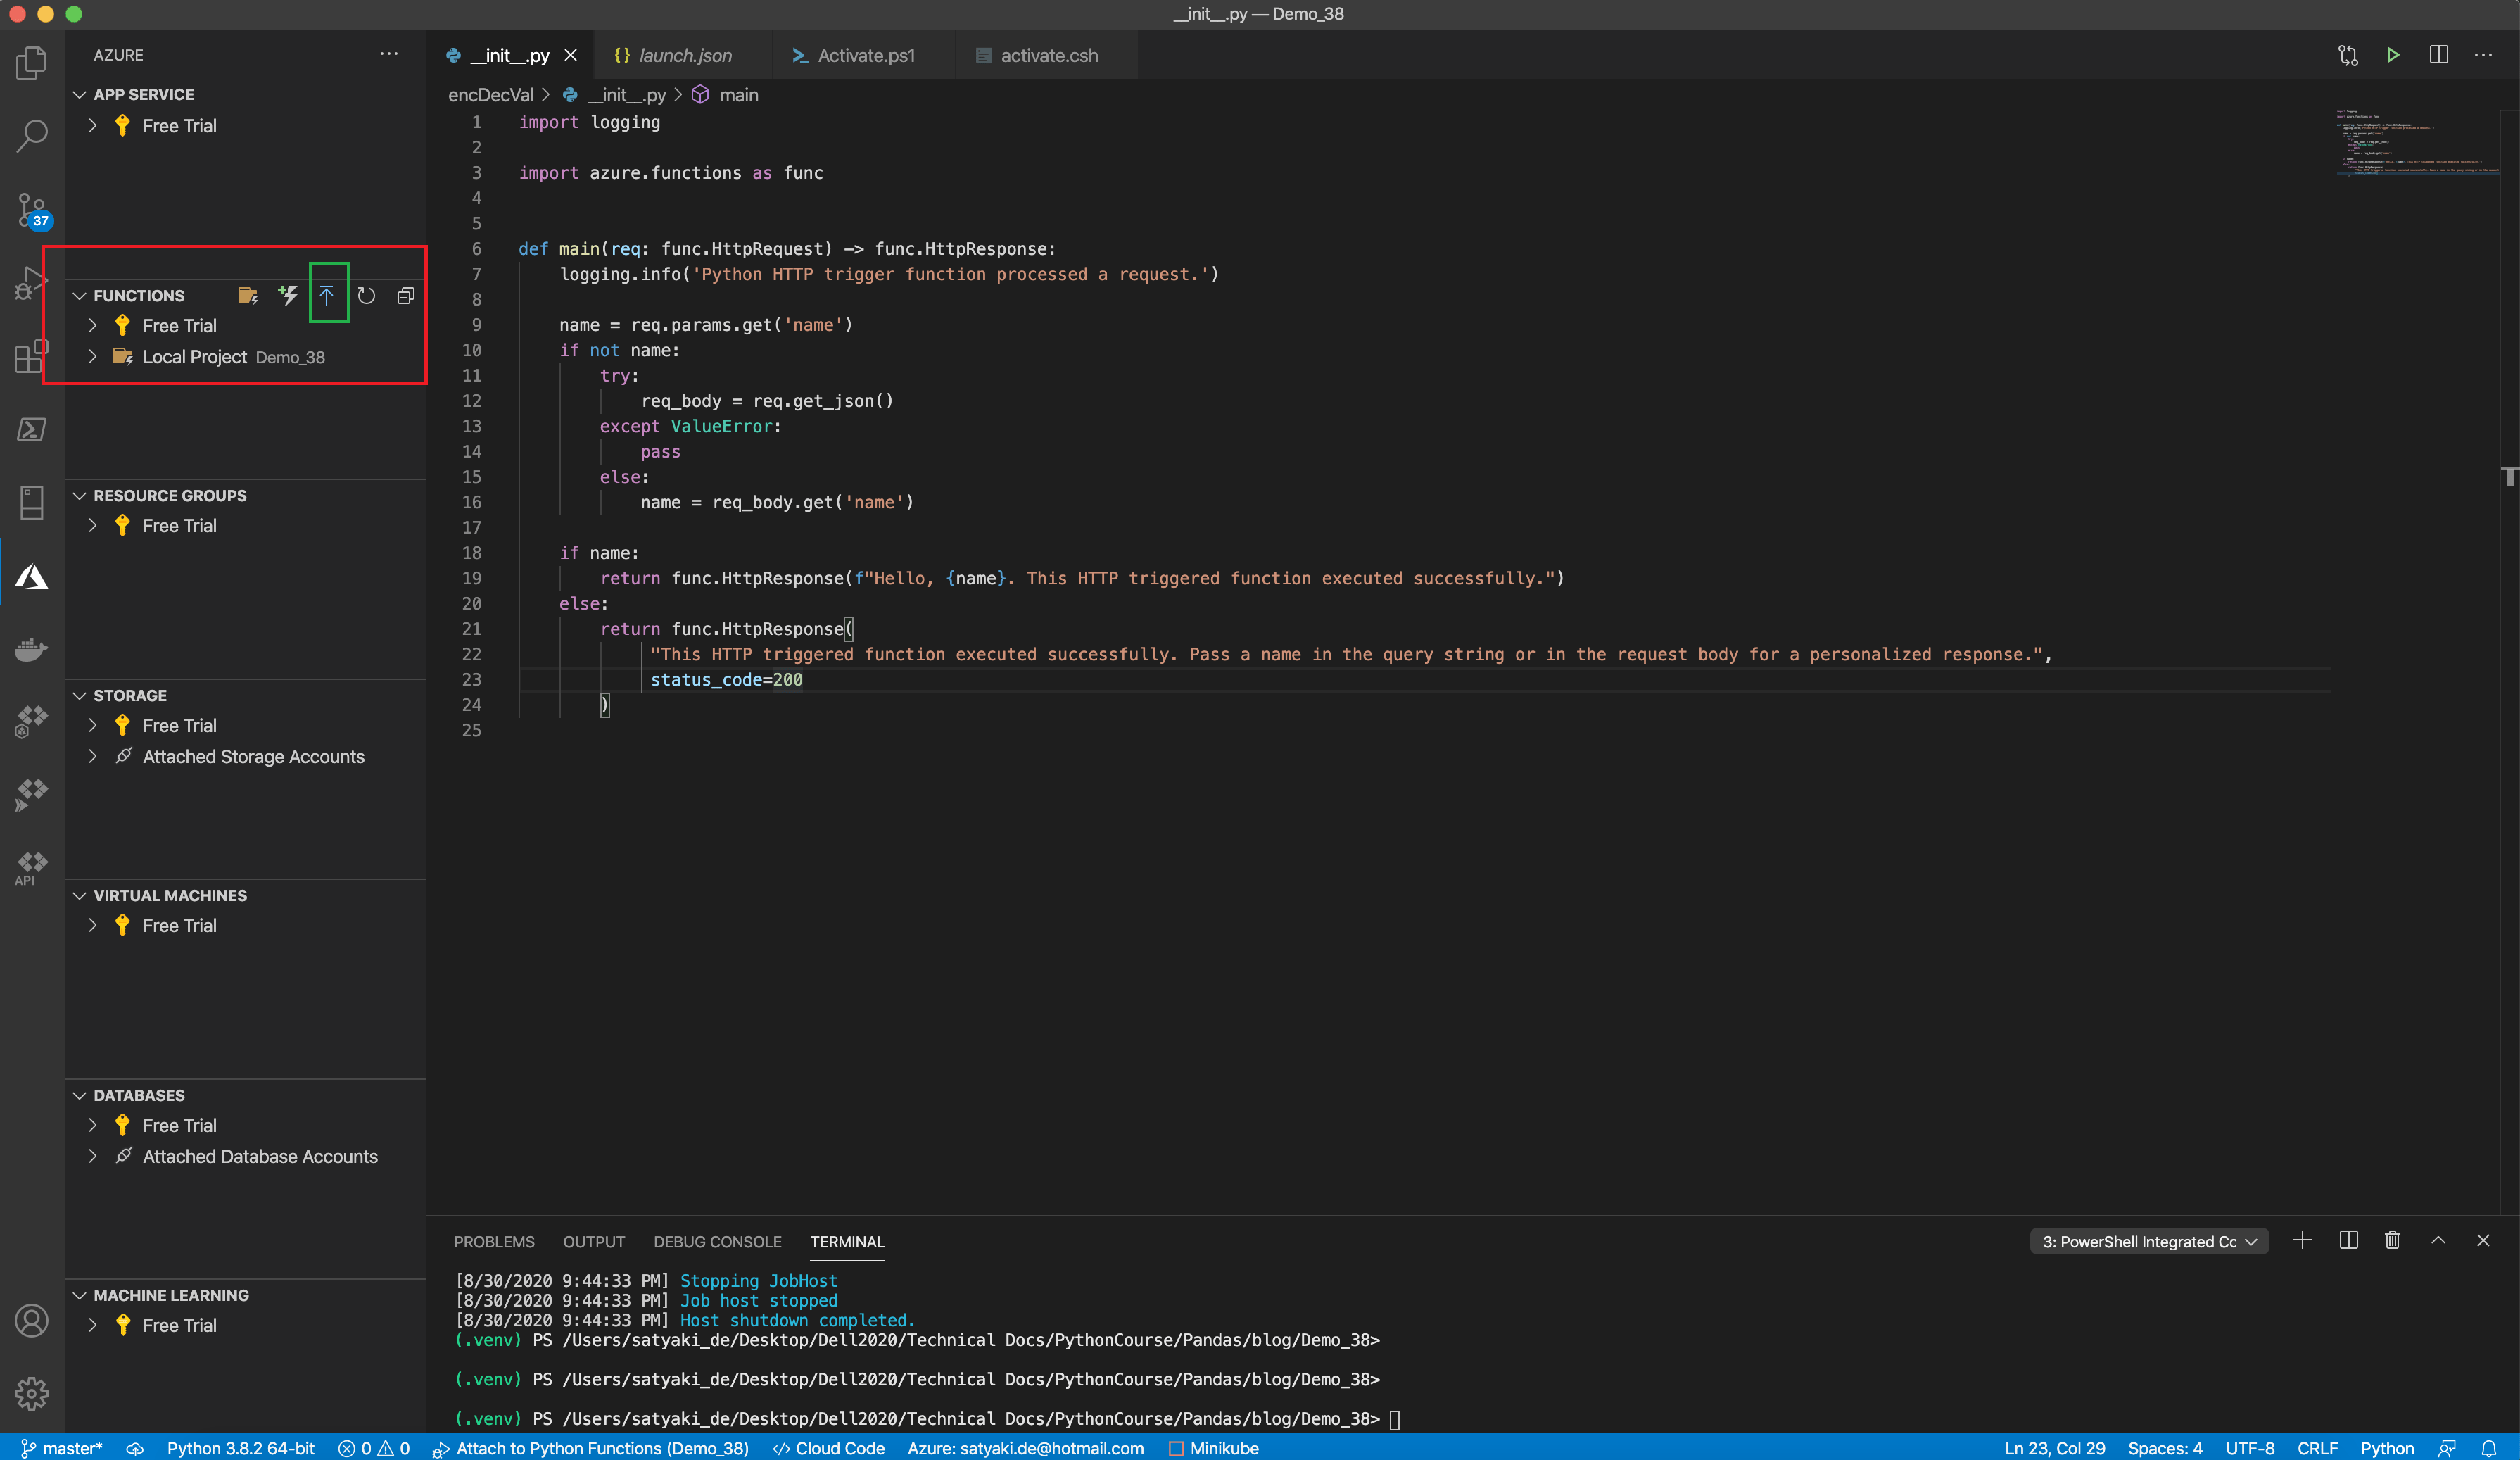
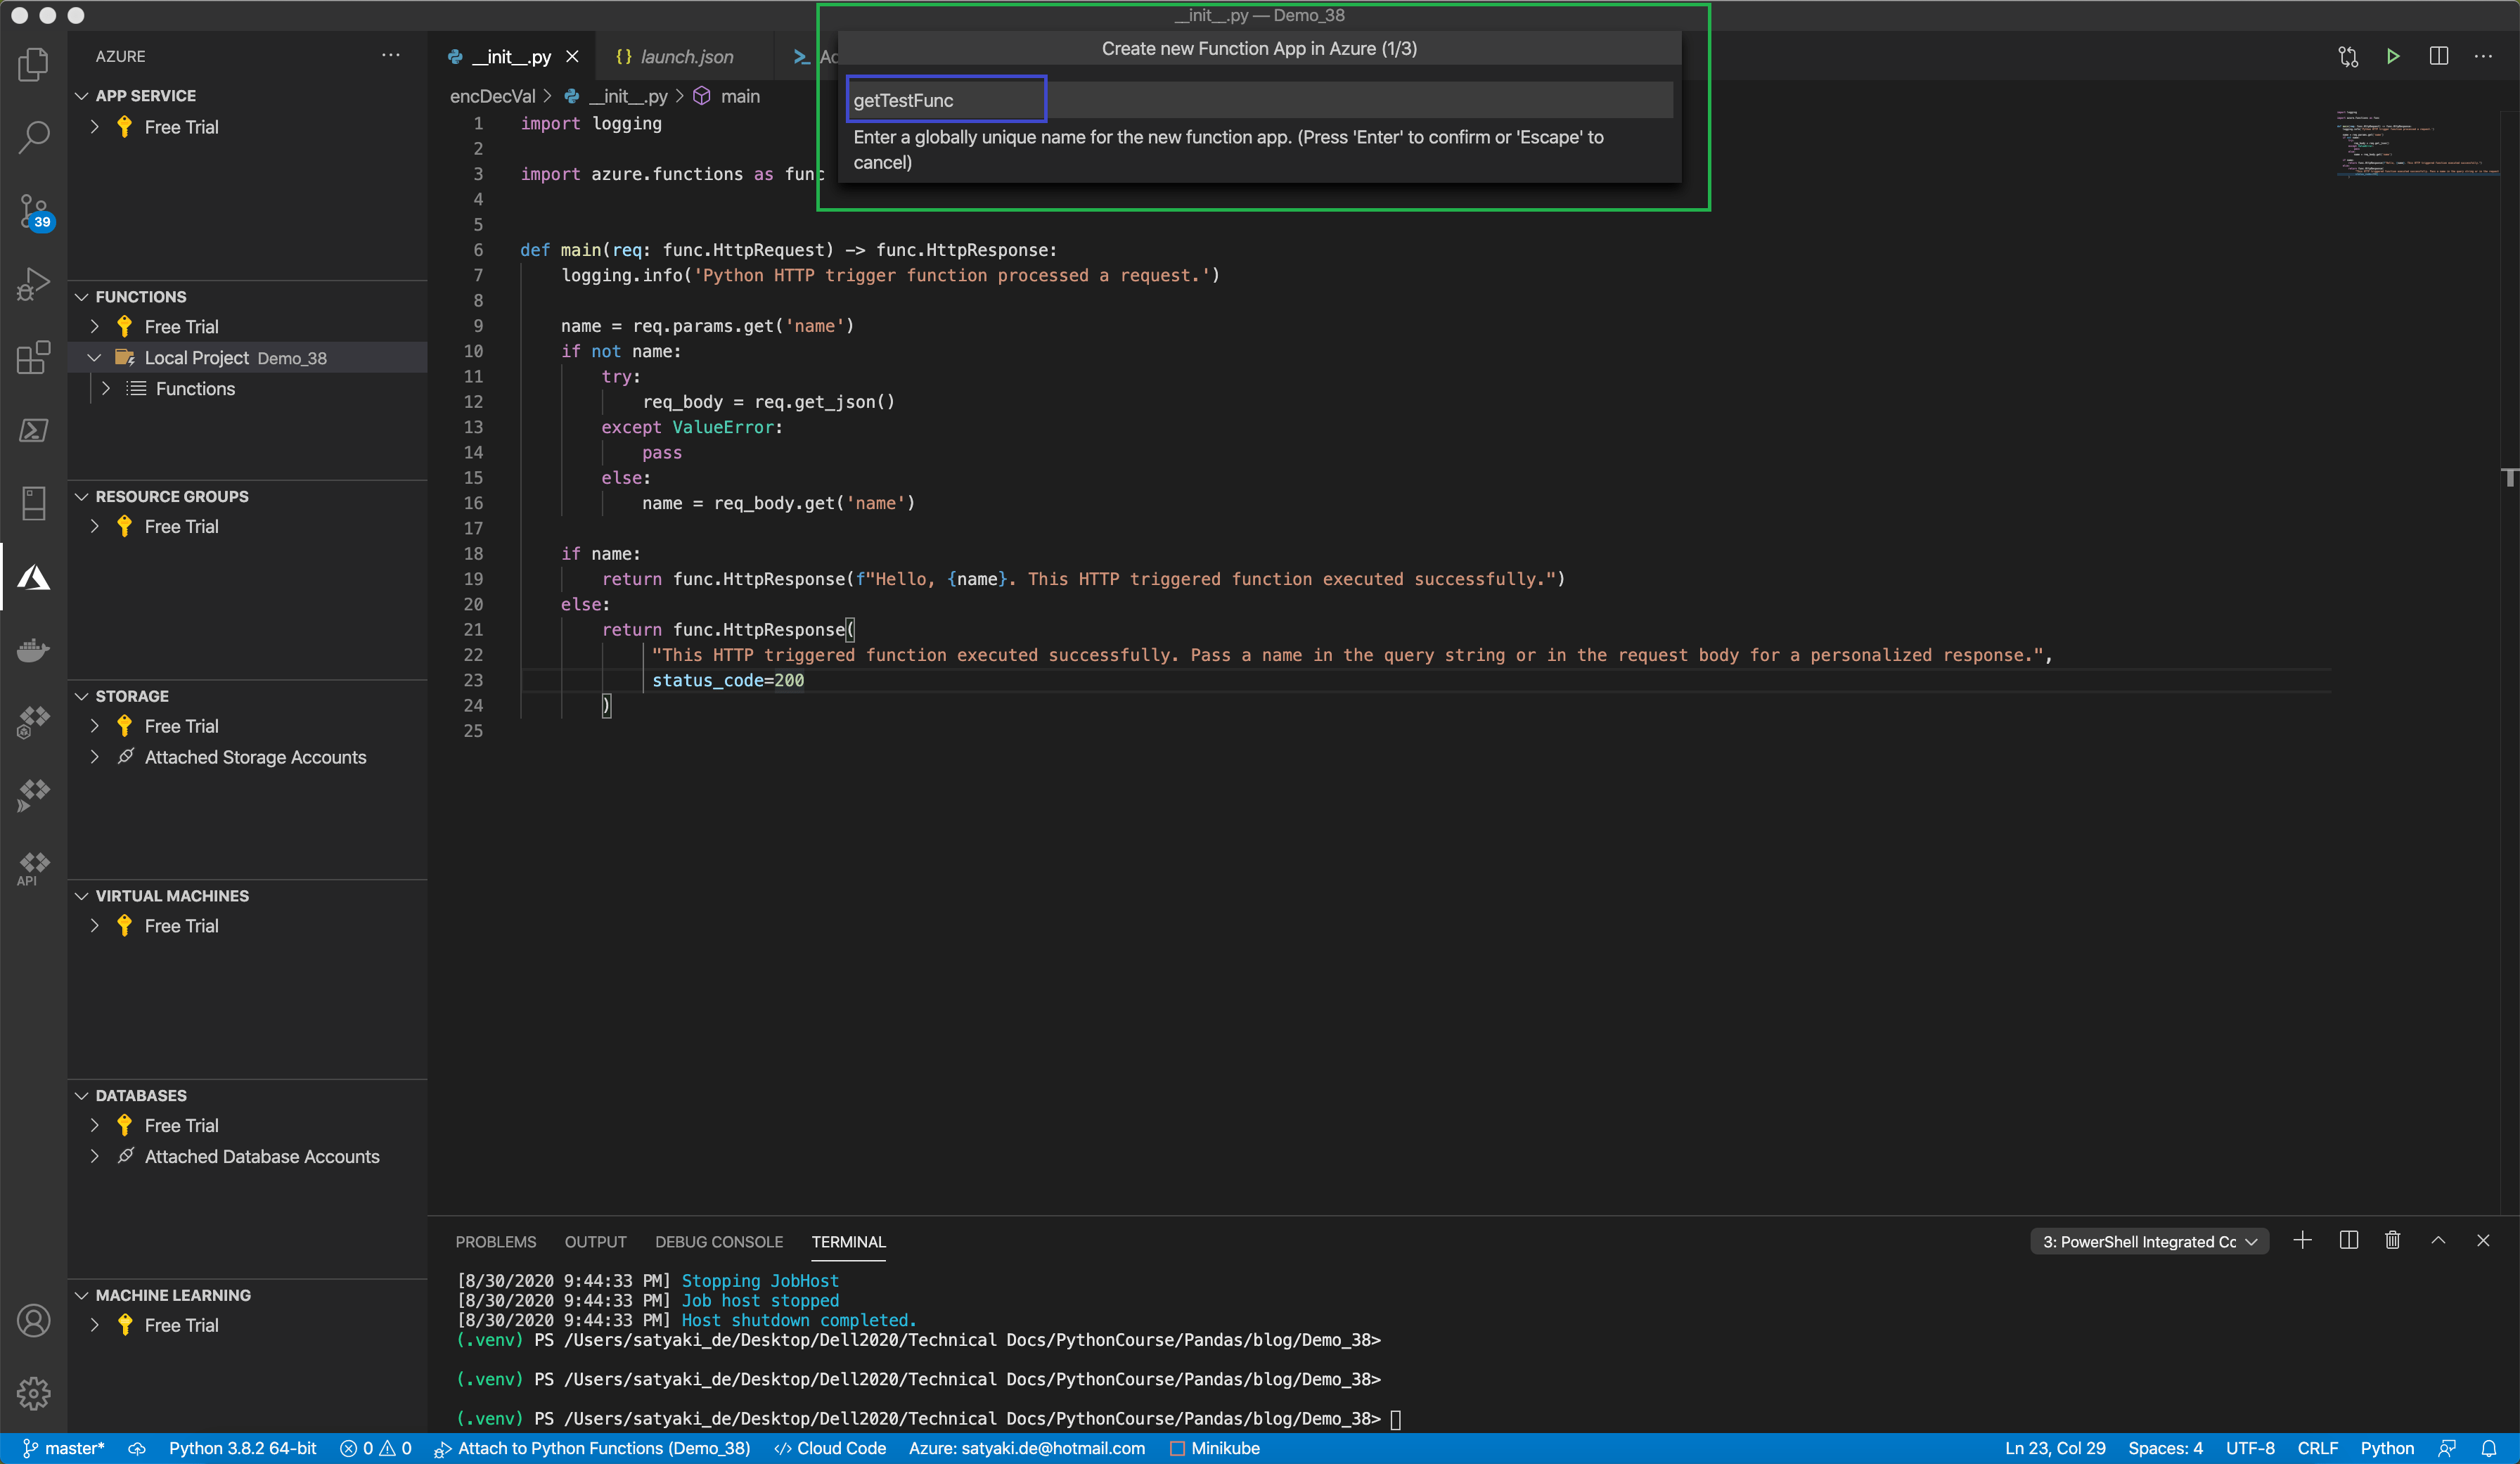
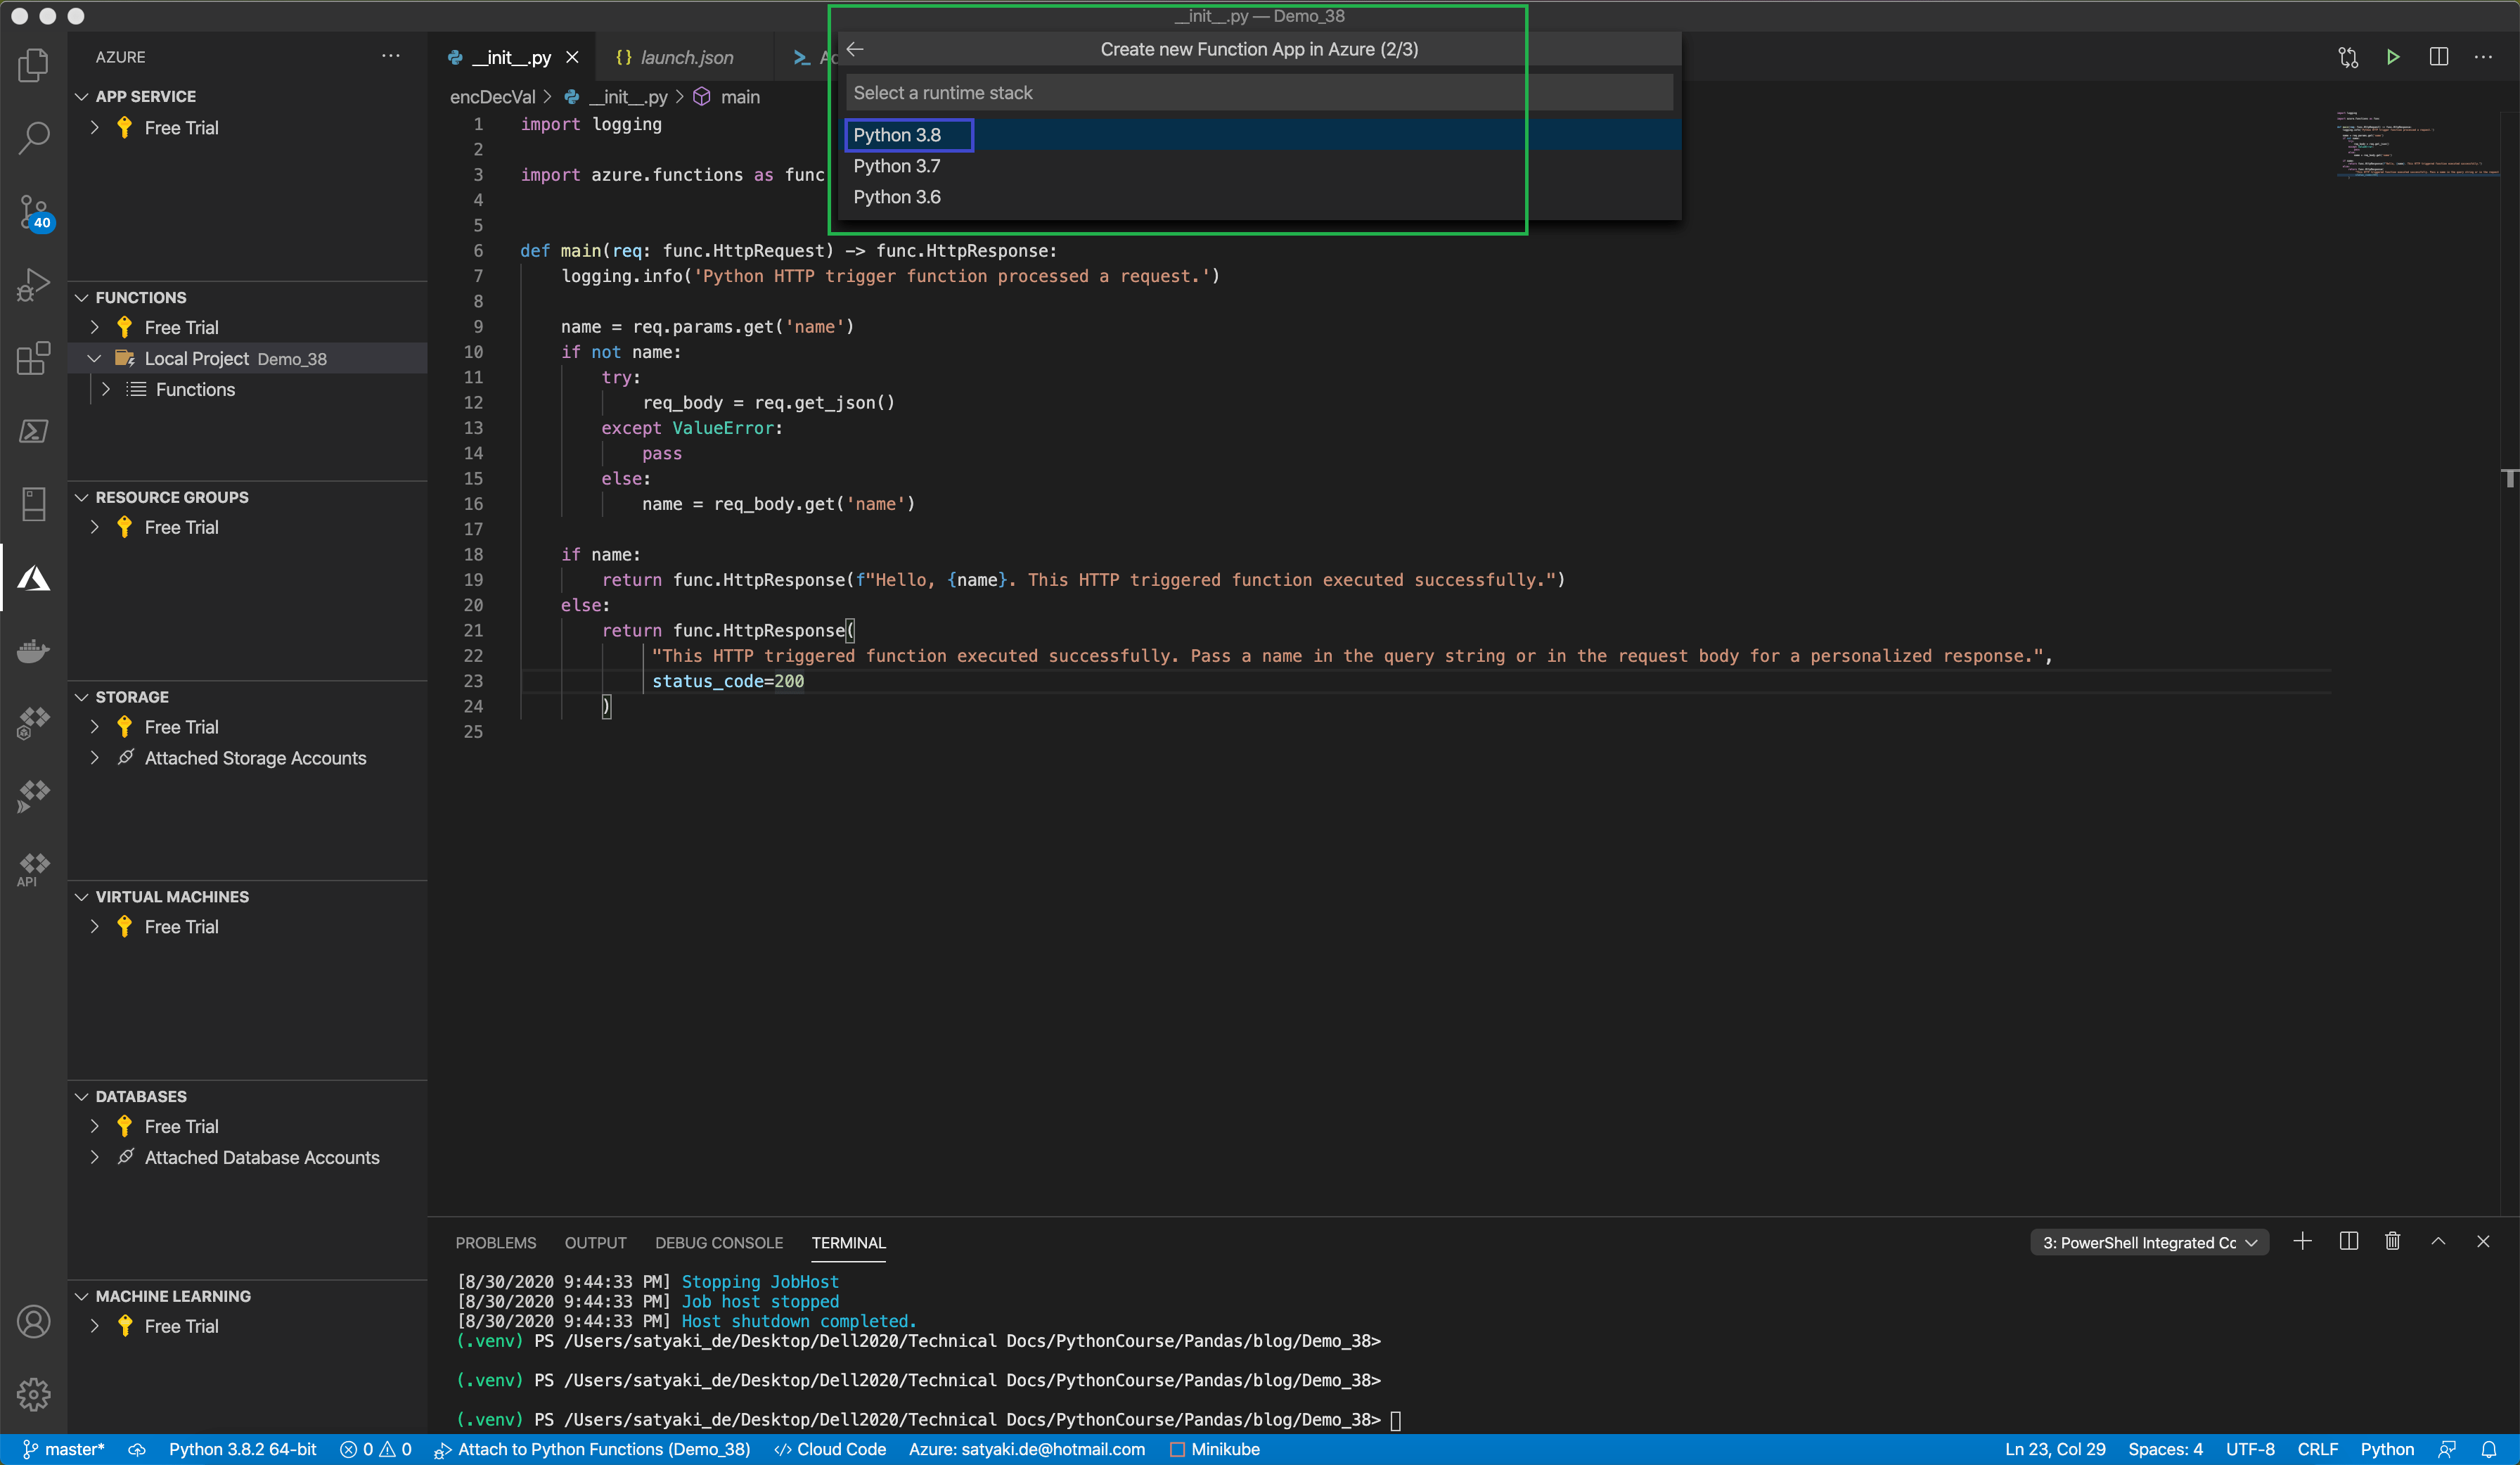
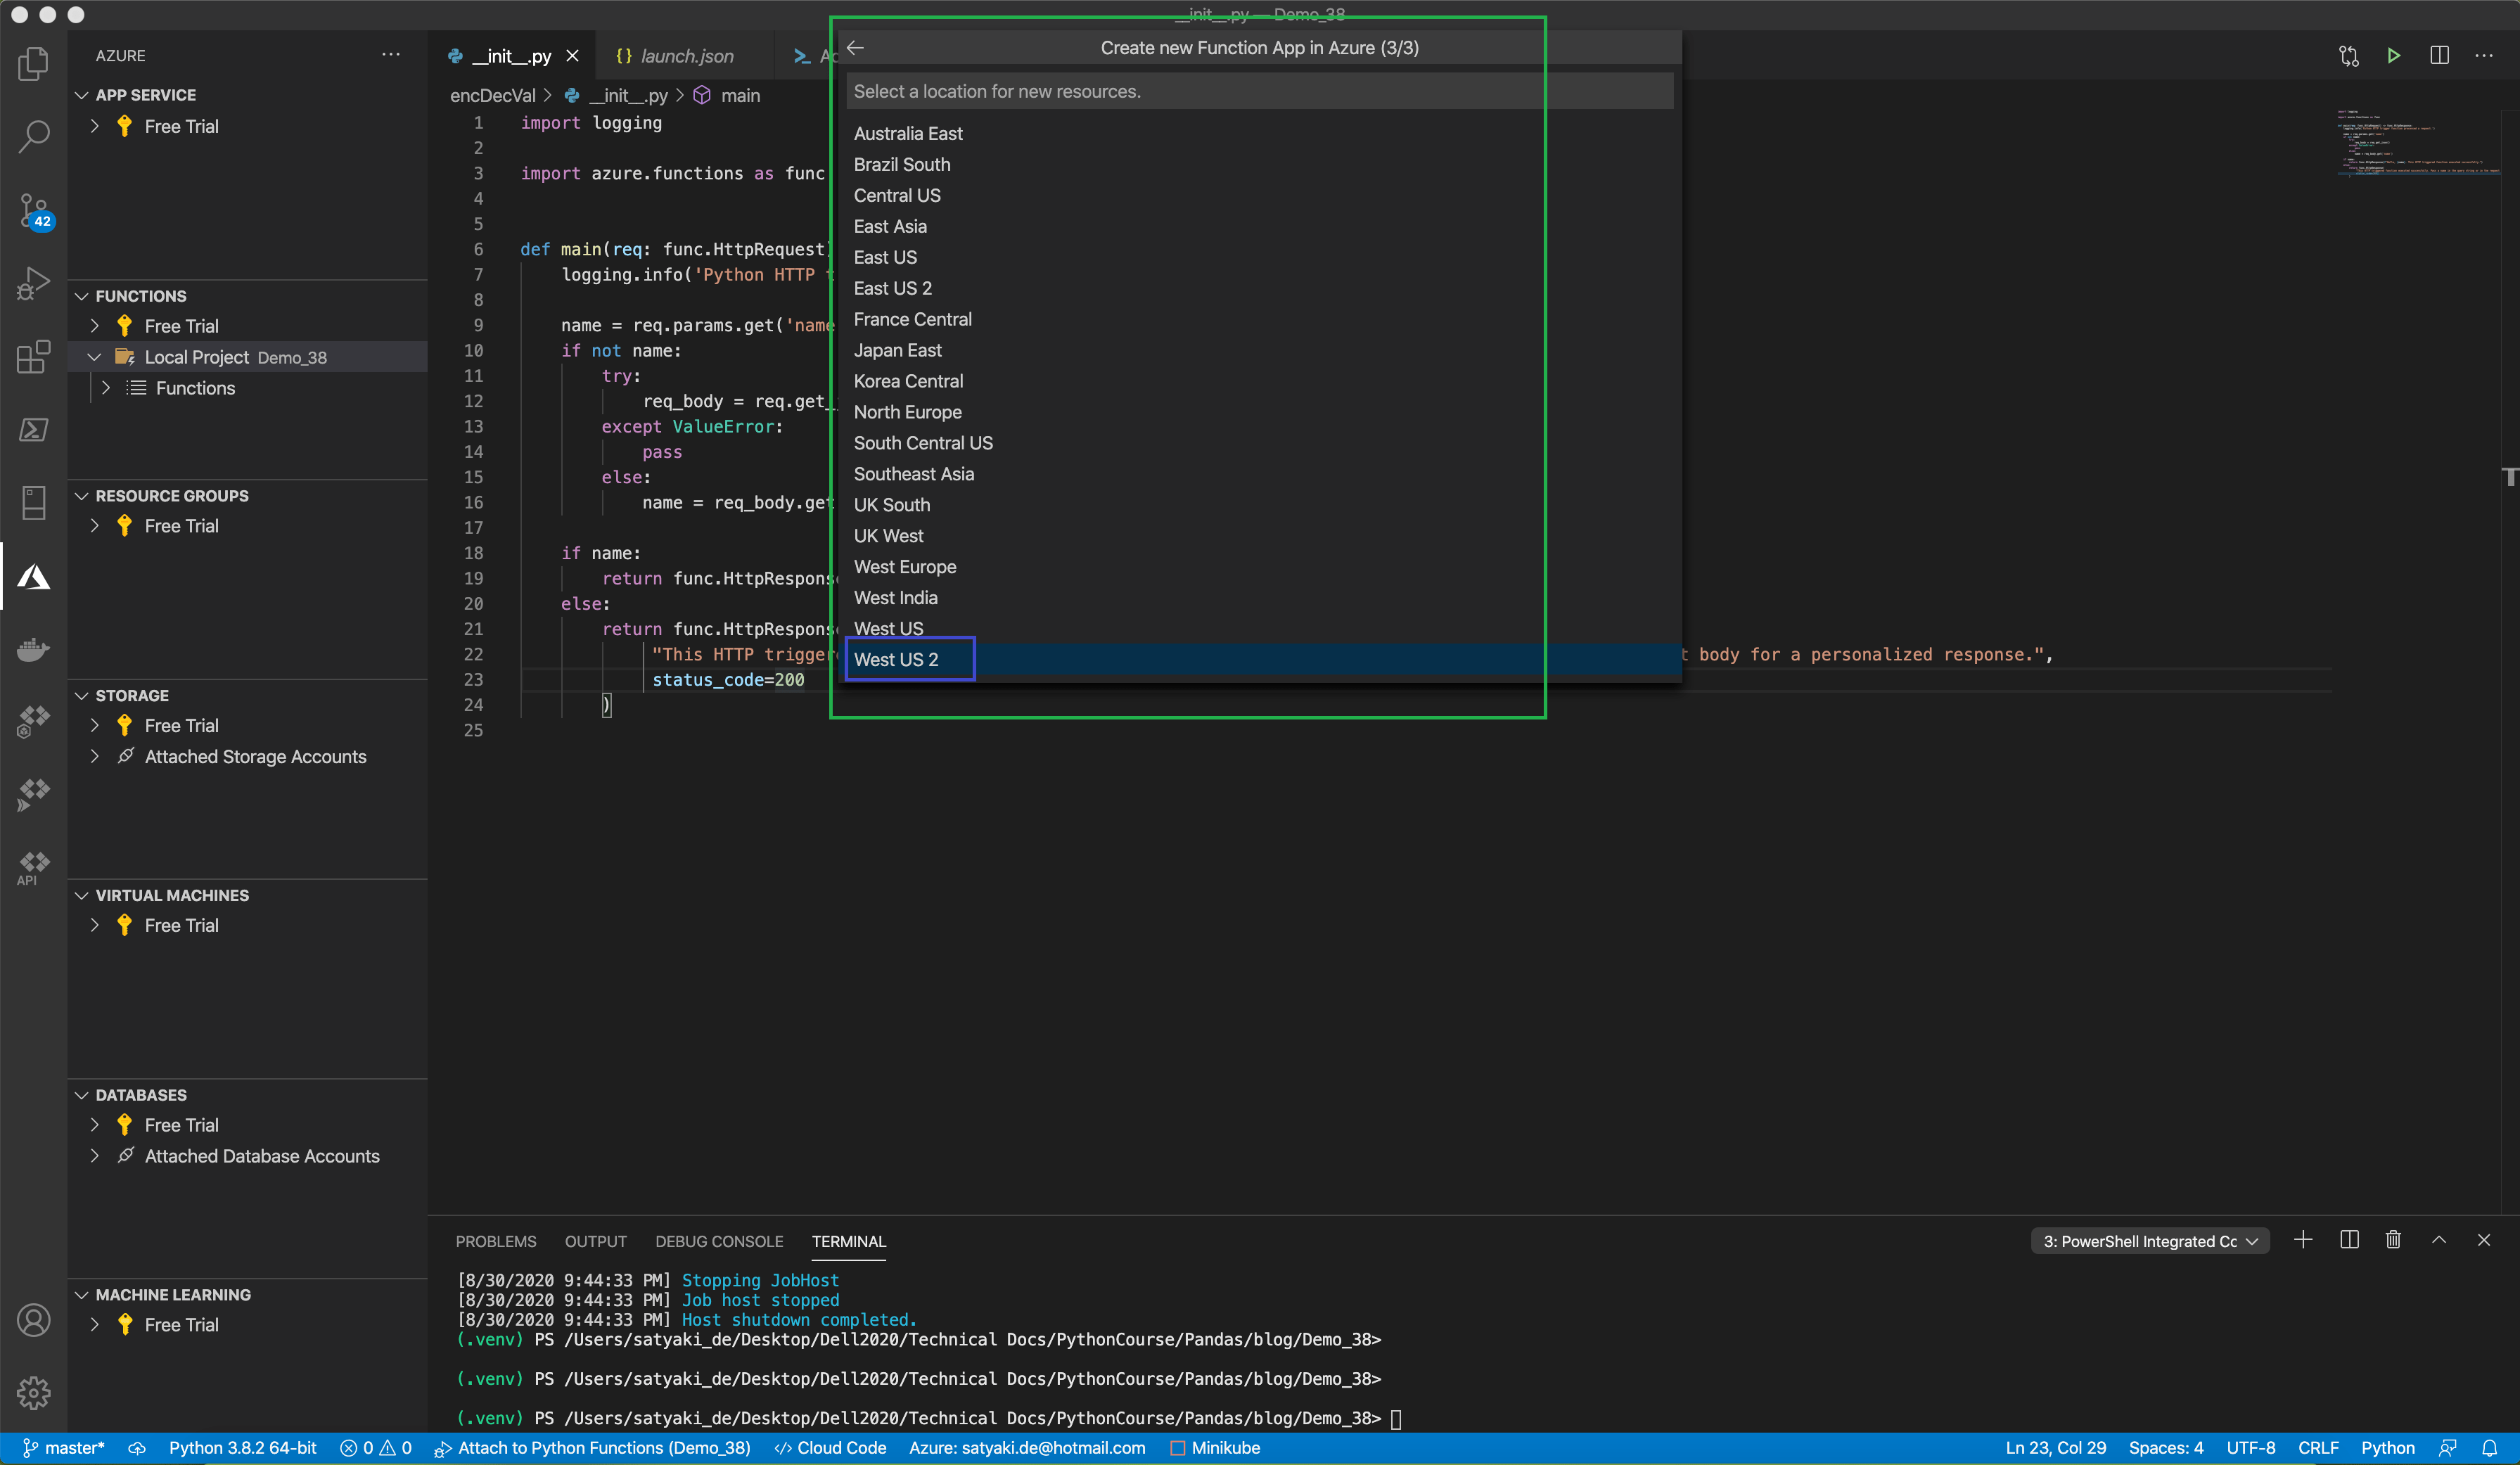
Let’s create the function under the application. I find this GUI option is relatively easier than configuring locally & then push it to the OCI. Let’s follow the process shown in the collage of pics mentioned here –

Creation of Function

So, you need to click executing series of commands as shown above. And, the good thing is the majority of the critical pieces of commands are automatically generated for you. So, you don’t need to spend lots of time finding out this information.

Here, we’ll be executing a series of commands as shown below –

Creation of function – continue

Few necessary commands that I want to discuss here –

fn init --runtime python <function-name>

This command will create a template of scripts based on your supplied language. You need to modify the main script (func.py) later, with your appropriate logic. You can add other scripts as class & refer to that class inside your func.py as well.

For a better deployment & control environment, it is always wise to create a virtual env.

Just like the Azure function, you need to update your requirements.txt file before your deployment command.

pip freeze>requirements.txt

Once we are satisfied with our development; we’ll deploy the application as shown below –

Deployment of function

Again, few relevant command that I want to discuss it here –

fn -v deploy --app <Application-Name>

This command will deploy all the oracle functions if they have any changes & push them to the OCI. During this time, it will check all the dependant packages that you are using & tried to install them one-by-one.

If you have already deployed & you want to upgrade your logic, then the deployment option will show something like this –

Deployment of function – continue

All the commands are pretty standard & marked with a red-square box. Few necessary commands to discuss –

fn invoke <Application-Name> <Function-Name>

And if you are not using any external API. Ideally, the above command should return the output with the default value. But, for our case, we have used Azure-API, which is outside the OCI. Hence, we need to update few more settings before it works.

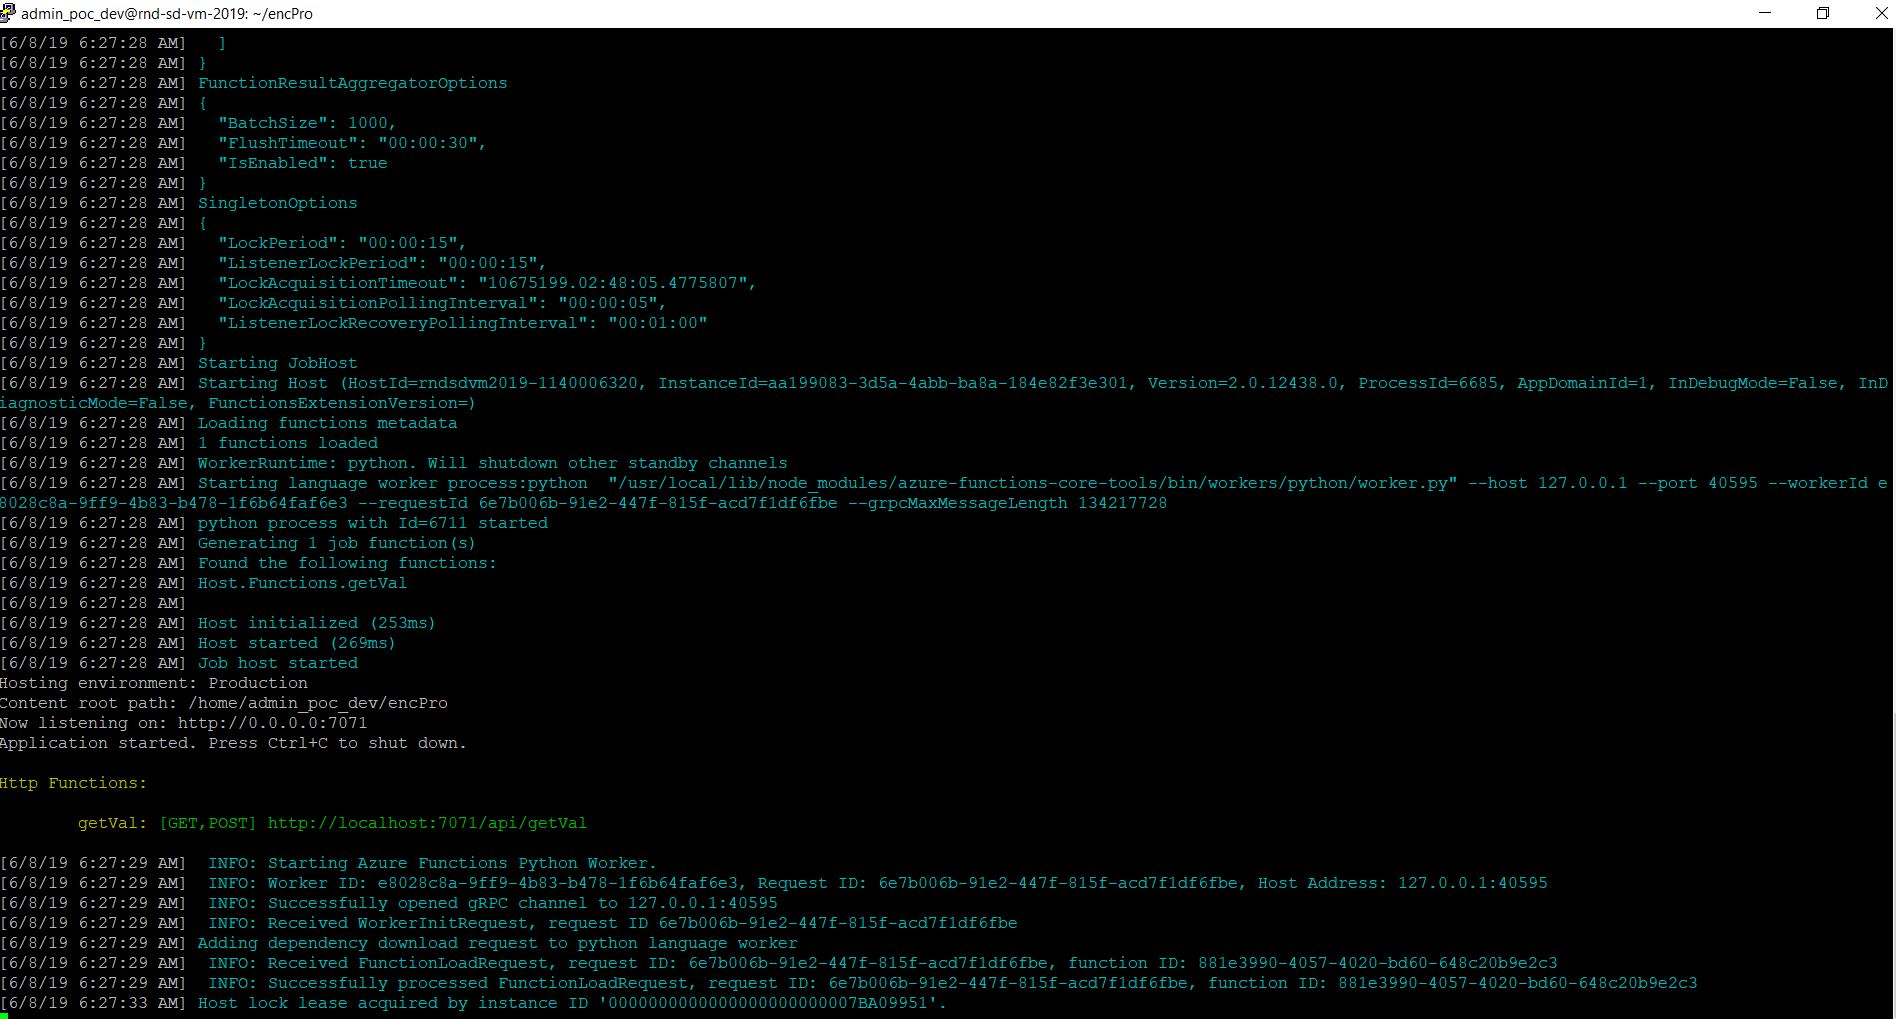
Unlike, Azure-Function, you won’t get the link by default when running them locally using Visual Studio Code editor.

Here, you need to execute the following commands as shown in the above picture –

fn inspect function <Application-Name> <Function-Name>

If your deployment is successful, you will see your function docker-image inside your registry as shown below –

Deployment image of functions

To know more about fn-commands, click the following link.

Step 8:

Now, you need to update some policies, which will help API-Gateway to work.

Update of policy & logging feature

Also, you need to configure your default log for your function, as shown above.

Apart from that, we need to whitelist the port 443 as shown below –

Port whitelisting in VCN

Finally, we need to deploy our existing function into Oracle-Gateway. It would help if you prepared a deployable json object, which will create a channel for the function to interact through the API-gateway deployment.

Deployment of function inside API-Gateway

The deployment json file should looks something like this –

spec.json


{
"routes": [
{
"path": "/getdata",
"methods": [
"GET","POST"
],
"backend": {
"type": "ORACLE_FUNCTIONS_BACKEND",
"functionId": "ocid1.fnfunc.oc1.us-sanjose-1.aaaaxxxxxxxjdjfjfjfjfjfjfjfjfjfjfjfjfjfjfjdsssssss2dfjdfjdjd33376dq"
}
}
]
}

view raw

spec.json

hosted with ❤ by GitHub

You will get more on this from this link.

Make sure that your path prefix should be unique, as shown in the above picture. And, if you want to know the complete steps to prepare your oracle function, you need to go through this master link.

Now, we’re ready to test the application. But, before that, we want to explore the code-base.


Let us explore the codebase now.

1. clsConfig.py ( This is the configuration file for this demo-application)


###############################################
#### Written By: SATYAKI DE ####
#### Written On: 04-Apr-2020 ####
#### ####
#### Objective: This script is a config ####
#### file, contains all the keys for ####
#### Azure 2 OCI API. Application will ####
#### process these information & perform ####
#### the call to our newly developed Azure ####
#### API in OCI. ####
###############################################
import os
import platform as pl
class clsConfig(object):
Curr_Path = os.path.dirname(os.path.realpath(__file__))
os_det = pl.system()
if os_det == "Windows":
sep = '\\'
else:
sep = '/'
conf = {
'APP_ID': 1,
"comp": "ocid1.compartment.oc1..xxxxxxxxxxxxxxxxxxxxxxxxyyyyyyyyyyyyyyyyyyxxxxxx",
"URL":"https://xxxxxxxxxx.yyyyyyyyyyyyyyyy.net/api/getDynamicCovidStats&quot;,
"appType":"application/json",
"conType":"keep-alive",
"limRec":10,
"CACHE":"no-cache",
"colList": "date, state, positive, negative",
"typSel": "Cols",
"LOG_PATH":Curr_Path + sep + 'log' + sep,
"STREAM_NAME":"Covid19-Stream",
"PARTITIONS":1
}

view raw

clsConfig.py

hosted with ❤ by GitHub

2. clsAzureAPI.py ( This is the modified version of old AzureAPI class. We’ve added a new logger, which works inside OCI. No other changes in the man logic. )


##############################################
#### Written By: SATYAKI DE ####
#### Written On: 07-Mar-2021 ####
#### Modified On 07-Mar-2021 ####
#### ####
#### Objective: Calling Azure dynamic API ####
##############################################
import json
from clsConfig import clsConfig as cf
import requests
import logging
class clsAzureAPI:
def __init__(self):
self.url = cf.conf['URL']
self.azure_cache = cf.conf['CACHE']
self.azure_con = cf.conf['conType']
self.type = cf.conf['appType']
self.typSel = cf.conf['typSel']
self.typVal = cf.conf['colList']
def searchQry(self):
try:
url = self.url
api_cache = self.azure_cache
api_con = self.azure_con
type = self.type
typSel = self.typSel
typVal = self.typVal
querystring = {"typeSel": typSel, "typeVal": typVal}
strMsg = 'Input JSON: ' + str(querystring)
logging.getLogger().info(strMsg)
headers = {
'content-type': type,
'Cache-Control': api_cache,
'Connection': api_con
}
response = requests.request("GET", url, headers=headers, params=querystring)
ResJson = response.text
jdata = json.dumps(ResJson)
ResJson = json.loads(jdata)
return ResJson
except Exception as e:
ResJson = ''
x = str(e)
print(x)
logging.info(x)
ResJson = {'errorDetails': x}
return ResJson

view raw

clsAzureAPI.py

hosted with ❤ by GitHub

3. func.py ( Main calling script. This one auto-genarated by OCI, while creating the functions. We’ve modified it as per our logic. )


##############################################
#### Written By: SATYAKI DE ####
#### Written On: 20-Mar-2021 ####
#### Modified On 20-Mar-2021 ####
#### ####
#### Objective: Calling Azure dynamic API ####
##############################################
import io
import json
import logging
from fdk import response
import clsAzureAPI as ca
# Disbling Warning
def warn(*args, **kwargs):
pass
import warnings
warnings.warn = warn
def handler(ctx, data: io.BytesIO = None):
try:
email = "default@gmail.com"
# Checking individual elements
try:
body = json.loads(data.getvalue())
email = body.get("email")
except (Exception, ValueError) as ex:
logging.getLogger().info('error parsing json payload: ' + str(ex))
logging.getLogger().info("Calling Oracle Python getCovidData function!")
# Create the instance of the Mock Mulesoft API Class
x1 = ca.clsAzureAPI()
# Let's pass this to our map section
retJson = x1.searchQry()
# Converting JSon to Pandas Dataframe for better readability
# Capturing the JSON Payload
resJson = json.loads(retJson)
return response.Response(
ctx, response_data=json.dumps(
{"status":"Success", "message": resJson}),
headers={"Content-Type": "application/json"}
)
except Exception as e:
x = str(e)
return response.Response(
ctx, response_data=json.dumps(
{"status":"Failed", "message": x}),
headers={"Content-Type": "application/json"}
)

view raw

func.py

hosted with ❤ by GitHub

Key snippet that we want to discuss here –

        # Checking individual elements
        try:
            body = json.loads(data.getvalue())
            email = body.get("email")
        except (Exception, ValueError) as ex:
            logging.getLogger().info('error parsing json payload: ' + str(ex))

Checking the individual element in the input payload.

        # Create the instance of the Mock Mulesoft API Class
        x1 = ca.clsAzureAPI()

        # Let's pass this to our map section
        retJson = x1.searchQry()

        # Converting JSon to Pandas Dataframe for better readability
        # Capturing the JSON Payload
        resJson = json.loads(retJson)

Now, we’re calling the azure-API class & receiving the response into a JSON variable.

return response.Response(
            ctx, response_data=json.dumps(
                {"status":"Success", "message": resJson}),
            headers={"Content-Type": "application/json"}
        )

Sending final response to the client.

4. func.yaml ( Main configuration script. This one auto-genarated by OCI, while creating the functions. )


schema_version: 20180708
name: getcoviddata
version: 0.0.1
runtime: python
entrypoint: /python/bin/fdk /function/func.py handler
memory: 256

view raw

func.yaml

hosted with ❤ by GitHub


Let’s run it from postman –

Invoking OCI-Function from Postman

During this demo, I’ve realized that the Oracle function yet to get maturity compared to AWS Lambda or Azure function using python. I almost faced similar challenges, which I faced nearly two years back when I tried to implement Azure function using python. However, I’m optimistic that the Oracle Cloud function will mature itself & share an integrated GUI environment to deploy python-based components straight from the IDE, rather than implementing through a CLI-driven approach. Correct me in case if I missed the IDE, which supports this feature.


You can explore my Git associated with this project & download the code from here.

So, finally, we’ve done it. 😀

I’ll bring some more exciting topic in the coming days from the Python verse.

Till then, Happy Avenging! 😀

Note: All the data & scenarios posted here are representational data & scenarios that are available over the internet & for educational purpose only. Also, I’ve used template SDK provided by Oracle & customized it to satisfy our business cases.

Creating a micro-service using integrated Azure Python-based function inside the Visual Studio Code

Hi Guys!

Today, We will revisit one of the previous posts & demonstrate the latest micro-service approach using the Integrated azure python function using Microsoft visual studio code. We will be using the same code base except for minor changes in our code. Please refer to the old post for a detailed discussion on the code-base.

We have created a new Microsoft Azure account & tested this for the audience. We want to thank Microsoft for testing their cool tools & allow us to explore & document them & even allow us to present our scenario here.

If you successfully register, you will be able to see the following page inside the azure function –

Right-hand side is showing the credit is given by the Microsoft

You need to install Microsoft Visual Studio Code, which you’ll get it from this link.

One can see the following landing page if they open this application –

Initial landing screen in Visual Studio Code

We need to install the above component marked with a white square box. After this, we need to install other important nuget from the Microsoft visual studio code. Among them, we need to first install – Azure Function by searching it as shown below –

Click the Green Install button to install this nuget

After installing, we can see the following screen –

Left-hand side shows azure available components after login

Microsoft suggests everyone for a two-stage authentication. In that way, after providing the essential credentials, the system will ask for the code that should have pushed to the registered, trusted device. After successful entry, one can see the following confirmation screen –

Two-Stage Authentication

At this moment, we can see the following screen if our two-stage authentication is successful –

Yellow-box depicting the subscription details

To create a new function, we’ll be creating a new project marked in the red-square box in the given picture –

Creating a new project under Azure Function

It will lead to a series of following screens, which will create a dummy template for our azure function –

1. We need to choose our preferred language i.e. Python in this case
2. We need to choose specific Python version out of multiple options
3. We need to choose the trigger type as HTTP
4. We need to give a meaningful name
5. We need select the authorization level. In this case, we’ll choose Anonymous

After these sequences mentioned above of steps, finally, we will come down to the next landing page –

6. Left-hand side contains the file explorer, right-hand side contains the code snippet

Visual Studio Code provides a handy interface to run or debug the azure function. Please refer the following screen for the reference –

This will generate a local end-point link marked in Red-Square box

Following is the way to test the azure application from Postman –

Test the local end-point captured from the previous step

Visual studio code puts all the existing debugging options available for the Azure function in Python, similar to all other Microsoft languages.

One might encounter failure when trying to run or debug the python function locally due to library binding issues with the azure virtual environment.

To solve the above problem, we need to update “Activate.ps1” – PATH variable as shown below –

Need to add the Library entry in-front of the bin path marked in RED

To deploy this function, the following series of steps that we need to follow –

The Green-box within the Red-Box shown the deployment options for the newly developed Azure function
We need to give a unique name for our Azure Function
Providing an unique name for the function
Selecting correct python version
Selecting the desired region i.e. West US 2

After this step, a series of the intermediate message will be shown at the bottom-right of the screen & finally the following message will be displayed if the deployment is successful –

See the bottom right-hand message enclosed within the green-square box

Now, we can see this created azure function from the portal itself –

Deployed function running successfully

Now, we can test this deployed function through postman as follows –

Successfully returned the response

However, we need to remember one thing before deploying the package that we need to capture all the dependent Python packages as shown in the following screen –

All the key packages should be placed inside your requirements.txt file

Similarly, we have converted our old Azure function as part of this new drive. Please find the main script, which we have modified –

  1. __init__.py
###########################################
#### Written By: SATYAKI DE            ####
#### Written On: 08-Jun-2019           ####
#### Package Flask package needs to    ####
#### install in order to run this      ####
#### script.                           ####
####                                   ####
#### Objective: Main Calling scripts.  ####
#### This is an autogenrate scripts.   ####
#### However, to meet the functionality####
#### we've enhanced as per our logic.  ####
###########################################
__all__ = ['clsFlask']

import logging
import azure.functions as func
import json

# from getVal.clsFlask import clsFlask
from . import clsFlask as cflask

getVal = cflask.clsFlask()

def main(req: func.HttpRequest) -> func.HttpResponse:
    logging.info('Python Encryption function processed a request.')

    str_val = 'Input Payload:: ' + str(req.get_json())
    str_1 = str(req.get_json())

    logging.info(str_val)

    ret_val = {}
    DataIn = ''
    dGroup = ''
    dTemplate = ''
    flg = ''

    if (str_1 != ''):
        try:
            req_body = req.get_json()
            dGroup = req_body.get('dataGroup')

            try:
                DataIn = req_body.get('data')
                strV15 = 'If Part:: ' + str(DataIn)

                logging.info(strV15)

                if ((DataIn == '') | (DataIn == None)):
                    raise ValueError

                flg = 'Y'
            except ValueError:
                DataIn = req_body.get('edata')
                strV15 = 'Else Part:: ' + str(DataIn)
                logging.info(strV15)
                flg = 'N'
            except:
                DataIn = req_body.get('edata')
                strV15 = 'Else Part:: ' + str(DataIn)
                logging.info(strV15)
                flg = 'N'

            dTemplate = req_body.get('dataTemplate')

        except ValueError:
            pass

    strV5 = "Encrypt Decrypt Flag:: " + flg
    logging.info(strV5)

    if (flg == 'Y'):

        if ((DataIn != '') & ((dGroup != '') & (dTemplate != ''))):

            logging.info("Encryption Started!")
            ret_val = getVal.getEncryptProcess(dGroup, DataIn, dTemplate)
            strVal2 = 'Return Payload:: ' + str(ret_val)
            logging.info(strVal2)

            # Forming Proper JSON
            encVal = {"dataEncrypt": ret_val}

            xval = json.dumps(encVal)

            return func.HttpResponse(xval)
        else:
            return func.HttpResponse(
                 "Please pass a data in the request body",
                 status_code=400
            )
    else:

        if ((DataIn != '') & ((dGroup != '') & (dTemplate != ''))):

            logging.info("Decryption Started!")
            ret_val2 = getVal.getDecryptProcess(dGroup, DataIn, dTemplate)
            strVal3 = 'Return Payload:: ' + str(ret_val)
            logging.info(strVal3)

            # Forming Proper JSON
            decVal = {"dataDecrypt": ret_val2}

            xval1 = json.dumps(decVal)

            return func.HttpResponse(xval1)
        else:
            return func.HttpResponse(
                "Please pass a data in the request body",
                status_code=400
            )

Only the change part, we are going to discuss here.

from . import clsFlask as cflask

getVal = cflask.clsFlask()

We will deploy our azure function after making necessary changes to the code & we can review our deployed encryption function from the following screen –

Newly deployed encryption function

We can test this newly deployed advanced Azure function from Postman as shown below –

Encryption API testing through Postman

Following are the sequence of steps, by which we can explore the Azure monitor & log analytics & can extract meaningful data point out of our Azure function execution details –

Getting debug info from the last executed event marked within the RED-square box
Retrieving individual execution debug details
Querying execution data point from Log Analytics

So, finally, we have done it. We have successfully incorporated our old azure function & convert that as per the latest platform provided by the Microsoft Azure cloud. 🙂

I’ll bring some more exciting topic in the coming days from the Python verse.

Till then, Happy Avenging! 😀

Note: All the data & scenario posted here are representational data & scenarios & available over the internet & for educational purpose only.

Join 77 other subscribers

Explaining new Python library

Hi Guys!

Here is the post as to how to call this Dnpr library & what are the current limitations of this library.

Before we start let’s post the calling script & then explain how we can use them –

##############################################
#### Written By: SATYAKI DE               ####
#### Written On: 08-Sep-2019              ####
####                                      ####
#### Objective: Main calling scripts.     ####
##############################################

from dnpr.clsDnpr import clsDnpr
import datetime as dt
import json

# Disbling Warning
def warn(*args, **kwargs):
    pass

import warnings
warnings.warn = warn

# Lookup functions from


def main():
    try:
        srcJson = [
                    {"FirstName": "Satyaki", "LastName": "De", "Sal": 1000},
                    {"FirstName": "Satyaki", "LastName": "De", "Sal": 1000},
                    {"FirstName": "Archi", "LastName": "Bose", "Sal": 500},
                    {"FirstName": "Archi", "LastName": "Bose", "Sal": 7000},
                    {"FirstName": "Deb", "LastName": "Sen", "Sal": 9500}
                  ]

        print("=" * 157)
        print("Checking distinct function!")
        print("=" * 157)
        print()

        print("*" * 157)
        print("Input Data: ")
        srcJsonFormat = json.dumps(srcJson, indent=1)
        print(str(srcJsonFormat))
        print("*" * 157)

        # Initializing the class
        t = clsDnpr()

        print("1. Checking distinct functionality!")

        var1 = dt.datetime.now().strftime("%Y-%m-%d %H-%M-%S")
        print("Start Time: ", str(var1))

        # Invoking the distinct function
        tarJson = t.distinct(srcJson)

        print("*" * 157)
        print("Output Data: ")
        tarJsonFormat = json.dumps(tarJson, indent=1)
        print(str(tarJsonFormat))
        print("*" * 157)

        if not tarJson:
            print()
            print("No relevant output data!")
            print("*" * 157)
        else:
            print()
            print("Relevant output data comes!")
            print("*" * 157)

        var2 = dt.datetime.now().strftime("%Y-%m-%d %H-%M-%S")
        print("End Time: ", str(var2))

        print("=" * 157)
        print("End of distinct function!")
        print("=" * 157)

        print("2. Checking nvl functionality!")

        srcJson_1 = [
            {"FirstName": "Satyaki", "LastName": "", "Sal": 1000},
            {"FirstName": "Archi", "LastName": "Bose", "Sal": 500},
            {"FirstName": "Deb", "LastName": "", "Sal": 9500}
        ]

        var3 = dt.datetime.now().strftime("%Y-%m-%d %H-%M-%S")
        print("Start Time: ", str(var3))

        strDef = 'FNU'
        print("Default Value: ", strDef)
        srcColName = 'LastName'
        print('Candidate Column for NVL: ', srcColName)

        # Invoking the nvl function
        tarJson_1 = t.nvl(srcJson_1, srcColName, strDef)

        print("*" * 157)
        print("Output Data: ")
        tarJsonFormat_1 = json.dumps(tarJson_1, indent=1)
        print(str(tarJsonFormat_1))
        print("*" * 157)

        if not tarJson_1:
            print()
            print("No relevant output data!")
            print("*" * 157)
        else:
            print()
            print("Relevant output data comes!")
            print("*" * 157)

        var4 = dt.datetime.now().strftime("%Y-%m-%d %H-%M-%S")
        print("End Time: ", str(var4))

        print("=" * 157)
        print("End of nvl function!")
        print("=" * 157)

        print("3. Checking partition-by functionality!")

        srcJson_2 = [
            {"FirstName": "Satyaki", "LastName": "", "Sal": 1000},
            {"FirstName": "Satyaki", "LastName": "", "Sal": 700},
            {"FirstName": "Archi", "LastName": "Bose", "Sal": 500},
            {"FirstName": "Deb", "LastName": "", "Sal": 9500},
            {"FirstName": "Archi", "LastName": "Bose", "Sal": 4500},
        ]

        var5 = dt.datetime.now().strftime("%Y-%m-%d %H-%M-%S")
        print("Start Time: ", str(var5))

        GrList = ['FirstName', 'LastName']
        print("Partition By Columns::: ", str(GrList))
        grOperation = 'Max'
        print('Operation toe be performed: ', grOperation)
        strCandidateColumnName = 'Sal'
        print('Column Name on which the aggregate function will take place: ', strCandidateColumnName)

        # Invoking the partition by function - MAX
        tarJson_1 = t.partitionBy(srcJson_2, GrList, grOperation, strCandidateColumnName)

        print("*" * 157)
        print("Output Data: ")
        tarJsonFormat_1 = json.dumps(tarJson_1, indent=1)
        print(str(tarJsonFormat_1))
        print("*" * 157)

        if not tarJson_1:
            print()
            print("No relevant output data!")
            print("*" * 157)
        else:
            print()
            print("Relevant output data comes!")
            print("*" * 157)

        var6 = dt.datetime.now().strftime("%Y-%m-%d %H-%M-%S")
        print("End Time: ", str(var6))

        var7 = dt.datetime.now().strftime("%Y-%m-%d %H-%M-%S")
        print("Start Time: ", str(var7))

        grOperation_1 = 'Min'
        print('Operation toe be performed: ', grOperation_1)

        # Invoking the Partition By function - MIN
        tarJson_2 = t.partitionBy(srcJson_2, GrList, grOperation_1, strCandidateColumnName)

        print("*" * 157)
        print("Output Data: ")
        tarJsonFormat_2 = json.dumps(tarJson_2, indent=1)
        print(str(tarJsonFormat_2))
        print("*" * 157)

        if not tarJson_2:
            print()
            print("No relevant output data!")
            print("*" * 157)
        else:
            print()
            print("Relevant output data comes!")
            print("*" * 157)

        var8 = dt.datetime.now().strftime("%Y-%m-%d %H-%M-%S")
        print("End Time: ", str(var8))

        var9 = dt.datetime.now().strftime("%Y-%m-%d %H-%M-%S")
        print("Start Time: ", str(var9))

        grOperation_2 = 'Avg'
        print('Operation toe be performed: ', grOperation_2)

        # Invoking the Partition By function - Avg
        tarJson_3 = t.partitionBy(srcJson_2, GrList, grOperation_2, strCandidateColumnName)

        print("*" * 157)
        print("Output Data: ")
        tarJsonFormat_3 = json.dumps(tarJson_3, indent=1)
        print(str(tarJsonFormat_3))
        print("*" * 157)

        if not tarJson_3:
            print()
            print("No relevant output data!")
            print("*" * 157)
        else:
            print()
            print("Relevant output data comes!")
            print("*" * 157)

        var10 = dt.datetime.now().strftime("%Y-%m-%d %H-%M-%S")
        print("End Time: ", str(var10))

        var11 = dt.datetime.now().strftime("%Y-%m-%d %H-%M-%S")
        print("Start Time: ", str(var11))

        grOperation_3 = 'Sum'
        print('Operation toe be performed: ', grOperation_3)

        # Invoking the Partition By function - Sum
        tarJson_4 = t.partitionBy(srcJson_2, GrList, grOperation_3, strCandidateColumnName)

        print("*" * 157)
        print("Output Data: ")
        tarJsonFormat_4 = json.dumps(tarJson_4, indent=1)
        print(str(tarJsonFormat_4))
        print("*" * 157)

        if not tarJson_4:
            print()
            print("No relevant output data!")
            print("*" * 157)
        else:
            print()
            print("Relevant output data comes!")
            print("*" * 157)

        var12 = dt.datetime.now().strftime("%Y-%m-%d %H-%M-%S")
        print("End Time: ", str(var12))

        print("=" * 157)
        print("End of partition function!")
        print("=" * 157)

        print("4. Checking regular expression functionality!")
        print()

        var13 = dt.datetime.now().strftime("%Y-%m-%d %H-%M-%S")
        print("Start Time: ", str(var13))

        print('::Function Regex_Like:: ')
        print()

        tarColumn = 'FirstName'
        print('Target Column for Rexex_Like: ', tarColumn)
        inpPattern = r"\bSa"
        print('Input Pattern: ', str(inpPattern))

        # Invoking the regex_like function
        tarJson = t.regex_like(srcJson, tarColumn, inpPattern)

        print('End of Function Regex_Like!')
        print()

        print("*" * 157)
        print("Output Data: ")
        tarJsonFormat = json.dumps(tarJson, indent=1)
        print(str(tarJsonFormat))
        print("*" * 157)

        if not tarJson:
            print()
            print("No relevant output data!")
            print("*" * 157)
        else:
            print()
            print("Relevant output data comes!")
            print("*" * 157)

        var14 = dt.datetime.now().strftime("%Y-%m-%d %H-%M-%S")
        print("End Time: ", str(var14))

        var15 = dt.datetime.now().strftime("%Y-%m-%d %H-%M-%S")
        print("Start Time: ", str(var15))

        print('::Function Regex_Replace:: ')
        print()

        tarColumn = 'FirstName'
        print('Target Column for Rexex_Replace: ', tarColumn)
        inpPattern = r"\bSa"
        print('Input Pattern: ', str(inpPattern))
        replaceString = 'Ka'
        print('Replacing Character: ', replaceString)

        # Invoking the regex_replace function
        tarJson = t.regex_replace(srcJson, tarColumn, inpPattern, replaceString)

        print('End of Function Rexex_Replace!')
        print()

        print("*" * 157)
        print("Output Data: ")
        tarJsonFormat = json.dumps(tarJson, indent=1)
        print(str(tarJsonFormat))
        print("*" * 157)

        if not tarJson:
            print()
            print("No relevant output data!")
            print("*" * 157)
        else:
            print()
            print("Relevant output data comes!")
            print("*" * 157)

        var16 = dt.datetime.now().strftime("%Y-%m-%d %H-%M-%S")
        print("End Time: ", str(var16)) 

        var17 = dt.datetime.now().strftime("%Y-%m-%d %H-%M-%S")
        print("Start Time: ", str(var17))

        print('::Function Regex_Substr:: ')
        print()

        tarColumn = 'FirstName'
        print('Target Column for Regex_Substr: ', tarColumn)
        inpPattern = r"\bSa"
        print('Input Pattern: ', str(inpPattern))

        # Invoking the regex_substr function
        tarJson = t.regex_substr(srcJson, tarColumn, inpPattern)

        print('End of Function Regex_Substr!')
        print()

        print("*" * 157)
        print("Output Data: ")
        tarJsonFormat = json.dumps(tarJson, indent=1)
        print(str(tarJsonFormat))
        print("*" * 157)

        if not tarJson:
            print()
            print("No relevant output data!")
            print("*" * 157)
        else:
            print()
            print("Relevant output data comes!")
            print("*" * 157)

        var18 = dt.datetime.now().strftime("%Y-%m-%d %H-%M-%S")
        print("End Time: ", str(var18))

        print("=" * 157)
        print("End of regular expression function!")
        print("=" * 157)


    except ValueError:
        print("No relevant data to proceed!")

    except Exception as e:
        print("Top level Error: args:{0}, message{1}".format(e.args, e.message))

if __name__ == "__main__":
    main()

Let’s explain the key lines –

As of now, the source payload that it will support is mostly simple JSON.

As you can see, we’ve relatively started with the simple JSON containing an array of elements.

# Initializing the class
t = clsDnpr()

In this line, you can initiate the main library.

Let’s explore the different functions, which you can use on JSON.

1. Distinct:

Let’s discuss the distinct function on  JSON. This function can be extremely useful if you use NoSQL, which doesn’t offer any distinct features. Or, if you are dealing with or expecting your source with duplicate JSON inputs.

Let’s check our sample payload for distinct –

Sample_Payload_Distinct

Here is the basic syntax & argument that it is expecting –

distinct(Input Json) returnOutput Json

So, all you have to ensure that you are passing a JSON input string.

As per our example –

# Invoking the distinct function
tarJson = t.distinct(srcJson)

And, here is the output –

Distinct_Output

If you compare the source JSON. You would have noticed that there are two identical entries with the name “Satyaki” is now replaced by one unique entries.

Limitation: Currently, this will support only basic JSON. However, I’m working on it to support that much more complex hierarchical JSON in coming days.

2. NVL:

NVL is another feature that I guess platform like JSON should have. So, I built this library specially handles the NULL data scenario, where the developer may want to pass a default value in place of NULL.

Hence, the implementation of this function.

Here is the sample payload for this –

Sample_Payload_NVL

In this case, if there is some business logic that requires null values replaced with some default value for LastName say e.g. FNU. This function will help you to implement that logic.

Here is the basic syntax & argument that it is expecting –

nvl(
     Input Json, 
     Prospective Null Column Name, 
     Dafult Value in case of Null
   ) return Output Json

And, here is the code implementation –

strDef = ‘FNU’
print(“Default Value: “, strDef)
srcColName = ‘LastName’
print(‘Candidate Column for NVL: ‘, srcColName)

# Invoking the nvl function
tarJson_1 = t.nvl(srcJson_1, srcColName, strDef)

So, in the above lines, this code will replace the Null value with the “FNU” for the column LastName.

And, Here is the output –

NVL_Output

3. Partition_By:

I personally like this function as this gives more power to manipulate any data in JSON levels such as Avg, Min, Max or Sum. This might be very useful in order to implement some basic aggregation on the fly.

Here is the basic syntax & argument that it is expecting –

partition_by(
              Input Json, 
              Group By Column List, 
              Group By Operation, 
              Candidate Column Name, 
              Output Column Name
            ) return Output Json

Now, we would explore the sample payload for all these functions to test –

Sample_payload_PartitionBy

Case 1:

In this case, we’ll calculate the maximum salary against FirstName & LastName. However, I want to print the Location in my final JSON output.

So, if you see the sample data & let’s make it tabular for better understanding –

PartitionMAX_SourceTab

So, as per our business logic, our MAX aggregate would operate only on FirstName & LastName. Hence, the calculation will process accordingly.

In that case, the output will look something like –

PartitionMAX_FinTab

As you can see, from the above picture two things happen. It will remove any duplicate entries. In this case, Satyaki has exactly two identical rows. So, it removes one. However, as part of partition by clause, it keeps two entries of Archi as the location is different. Deb will be appearing once as expected.

Let’s run our application & find out the output –

MAX_PartitionBy

So, we meet our expectation.

Case 2:

Same, logic will be applicable for Min as well.

Hence, as per the table, we should expect the output as –

PartitionMIN_FinTab

And, the output of our application run is –

MIN_PartitionBy

So, this also come as expected.

Case 3:

Let’s check for average –

PartitionAVG_FinTab

The only thing I wanted to point out, as we’ve two separate entries for Satyaki. So, the average will contain the salary from both the value as rightfully so. Hence, the average of (1000+700)/2 = 850.

Let’s run our application –

AVG_PartitionBy

So, we’ve achieved our target.

Case 4:

Let’s check for Sum.

PartitionSUM_FinTab

Now, let’s run our application –

SUM_PartitionBy

In the next installment, we’ll be discussing the last function from this package i.e. Regular Expression in JSON.

I hope, you’ll like this presentation.

Let me know – if you find any special bug. I’ll look into that.

Till then – Happy Avenging!

Note: All the data posted here are representational data & available over the internet & for educational purpose only.

Building an Azure Function using Python (Crossover between Reality Stone & Time Stone in Python Verse)

Hi Guys!

Today, we’ll be discussing a preview features from Microsoft Azure. Building an Azure function using Python on it’s Linux/Ubuntu VM. Since this is a preview feature, we cannot implement this to production till now. However, my example definitely has more detailed steps & complete code guide compared to whatever available over the internet.

In this post, I will take one of my old posts & enhance it as per this post. Hence, I’ll post those modified scripts. However, I won’t discuss the logic in details as most of these scripts have cosmetic changes to cater to this requirement.

In this post, we’ll only show Ubuntu run & there won’t be Windows or MAC comparison.

Initial Environment Preparation:

  1. Set-up new virtual machine on Azure.
  2. Set-up Azure function environments on that server.

Set-up new virtual machine on Azure:

I’m not going into the details of how to create Ubuntu VM on Microsoft Azure. You can refer the steps in more information here.

After successful creation, the VM will look like this –

Azure VM - Ubuntu

Detailed information you can get after clicking this hyperlink over the name of the VM.

Azure-VM Basic Details

You have to open port 7071 for application testing from the local using postman.

You can get it from the network option under VM as follows –

Network-Configuration

Make sure that you are restricting these ports to specific network & not open to ALL traffic.

So, your VM is ready now.

To update Azure CLI, you need to use the following commands –

sudo apt-get update && sudo apt-get install –only-upgrade -y azure-cli

Set-up Azure function environments on that server:

To set-up the environment, you don’t have to go for Python installation as by default Ubuntu in Microsoft Azure comes up with desired Python version, i.e., Python3.6. However, to run the python application, you need to install the following app –

  1. Microsoft SDK. You will get the details from this link.
  2. Installing node-js. You will get the details from this link.
  3. You need to install a docker. However, as per Microsoft official version, this is not required. But, you can create a Docker container to distribute the python function in Azure application. I would say you can install this just in case if you want to continue with this approach. You will get the details over here. If you want to know details about the Docker. And, how you want to integrate python application. You can refer to this link.
  4. Your desired python packages. In this case, we’ll be modifying this post – “Encryption/Decryption, JSON, API, Flask Framework in Python (Crossover between Reality Stone & Time Stone in Python Verse).” We’ll be modifying a couple of lines only to cater to this functionality & deploying the same as an Azure function.
  5. Creating an Azure function template on Ubuntu. The essential detail you’ll get it from here. However, over there, it was not shown in detailed steps of python packages & how you can add all the dependencies to publish it in details. It was an excellent post to start-up your knowledge.

Let’s see these components status & very brief details –

Microsoft SDK:

To check the dot net version. You need to type the following commands in Ubuntu –

dotnet –info

And, the output will look like this –

DotNet-Version

Node-Js:

Following is the way to verify your node-js version & details –

node -v

npm -v

And, the output looks like this –

Node-Js

Docker:

Following is the way to test your docker version –

docker -v

And, the output will look like this –

Docker-Version

Python Packages:

Following are the python packages that we need to run & publish that in Azure cloud as an Azure function –

pip freeze | grep -v “pkg-resources” > requirements.txt

And, the output is –

Requirements

You must be wondered that why have I used this grep commands here. I’ve witnessed that on many occassion in Microsoft Azure’s Linux VM it produces one broken package called resource=0.0.0, which will terminate the deployment process. Hence, this is very crucial to eliminate those broken packages.

Now, we’re ready for our python scripts. But, before that, let’s see the directory structure over here –

Win_Vs_Ubuntu-Cloud

Creating an Azure Function Template on Ubuntu: 

Before we post our python scripts, we’ll create these following components, which is essential for our Python-based Azure function –

  • Creating a group:

              Creating a group either through Azure CLI or using a docker, you can proceed. The commands for Azure CLI is as follows –

az group create –name “rndWestUSGrp” –location westus

It is advisable to use double quotes for parameters value. Otherwise, you might land-up getting the following error – “Error: “resourceGroupName” should satisfy the constraint – “Pattern”: /^[-w._]+$/“.

I’m sure. You don’t want to face that again. And, here is the output –

CreateDeploymentGroup

Note that, here I haven’t used the double-quotes. But, to avoid any unforeseen issues – you should use double-quotes. You can refer the docker command from the above link, which I’ve shared earlier.

Now, you need to create one storage account where the metadata information of your function will be stored. You will create that as follows –

az storage account create –name cryptpy2019 –location westus –resource-group rndWestUSGrp –sku Standard_LRS

And, the output will look like this –

AccountCreate_1

Great. Now, we’ll create a virtual environment for Python3.6.

python3.6 -m venv .env
source .env/bin/activate

Python-VM

Now, we’ll create a local function project.

func init encPro

And, the output you will get is as follows –

Local-Function

Inside this directory, you’ll see the following files –

Local-Function-Details

You need to edit the host.json with these default lines –

{
 “version”: “2.0”,
 “extensionBundle”: {
                                       “id”: “Microsoft.Azure.Functions.ExtensionBundle”,
                                       “version”: “[1.*, 2.0.0)”
                                     }
}

And, the final content of these two files (excluding the requirements.txt) will look like this –

Configuration

Finally, we’ll create the template function by this following command –

func new

This will follow with steps finish it. You need to choose Python as your programing language. You need to choose an HTTP trigger template. Once you created that successfully, you’ll see the following files –

func_New

Note that, our initial function name is -> getVal.

By default, Azure will generate some default code inside the __init__.py. The details of those two files can be found here.

Since we’re ready with our environment setup. We can now discuss our Python scripts –

1. clsConfigServer.py (This script contains all the parameters of the server.)

###########################################
#### Written By: SATYAKI DE        ########
#### Written On: 10-Feb-2019       ########
####                               ########
#### Objective: Parameter File     ########
###########################################

import os
import platform as pl

# Checking with O/S system
os_det = pl.system()

class clsConfigServer(object):
    Curr_Path = os.path.dirname(os.path.realpath(__file__))

    if os_det == "Windows":
        config = {
            'FILE': 'acct_addr_20180112.csv',
            'SRC_FILE_PATH': Curr_Path + '\\' + 'src_file\\',
            'PROFILE_FILE_PATH': Curr_Path + '\\' + 'profile\\',
            'HOST_IP_ADDR': '0.0.0.0',
            'DEF_SALT': 'iooquzKtqLwUwXG3rModqj_fIl409vemWg9PekcKh2o=',
            'ACCT_NBR_SALT': 'iooquzKtqLwUwXG3rModqj_fIlpp1vemWg9PekcKh2o=',
            'NAME_SALT': 'iooquzKtqLwUwXG3rModqj_fIlpp1026Wg9PekcKh2o=',
            'PHONE_SALT': 'iooquzKtqLwUwXG3rMM0F5_fIlpp1026Wg9PekcKh2o=',
            'EMAIL_SALT': 'iooquzKtqLwU0653rMM0F5_fIlpp1026Wg9PekcKh2o='
        }
    else:
        config = {
            'FILE': 'acct_addr_20180112.csv',
            'SRC_FILE_PATH': Curr_Path + '/' + 'src_file/',
            'PROFILE_FILE_PATH': Curr_Path + '/' + 'profile/',
            'HOST_IP_ADDR': '0.0.0.0',
            'DEF_SALT': 'iooquzKtqLwUwXG3rModqj_fIl409vemWg9PekcKh2o=',
            'ACCT_NBR_SALT': 'iooquzKtqLwUwXG3rModqj_fIlpp1vemWg9PekcKh2o=',
            'NAME_SALT': 'iooquzKtqLwUwXG3rModqj_fIlpp1026Wg9PekcKh2o=',
            'PHONE_SALT': 'iooquzKtqLwUwXG3rMM0F5_fIlpp1026Wg9PekcKh2o=',
            'EMAIL_SALT': 'iooquzKtqLwU0653rMM0F5_fIlpp1026Wg9PekcKh2o='
        }

2. clsEnDec.py (This script is a lighter version of encryption & decryption of our previously discussed scenario. Hence, we won’t discuss in details. You can refer my earlier post to understand the logic of this script.)

###########################################
#### Written By: SATYAKI DE        ########
#### Written On: 25-Jan-2019       ########
#### Package Cryptography needs to ########
#### install in order to run this  ########
#### script.                       ########
####                               ########
#### Objective: This script will   ########
#### encrypt/decrypt based on the  ########
#### hidden supplied salt value.   ########
###########################################

from cryptography.fernet import Fernet
import logging

from getVal.clsConfigServer import clsConfigServer as csf

class clsEnDec(object):

    def __init__(self):
        # Calculating Key
        self.token = str(csf.config['DEF_SALT'])

    def encrypt_str(self, data, token):
        try:
            # Capturing the Salt Information
            t1 = self.token
            t2 = token

            if t2 == '':
                salt = t1
            else:
                salt = t2

            logging.info("Encrypting the value!")

            # Checking Individual Types inside the Dataframe
            cipher = Fernet(salt)
            encr_val = str(cipher.encrypt(bytes(data,'utf8'))).replace("b'","").replace("'","")

            strV1 = "Encrypted value:: " + str(encr_val)
            logging.info(strV1)

            return encr_val

        except Exception as e:
            x = str(e)
            print(x)
            encr_val = ''

            return encr_val

    def decrypt_str(self, data, token):
        try:
            # Capturing the Salt Information
            t1 = self.token
            t2 = token

            if t2 == '':
                salt = t1
            else:
                salt = t2

            logging.info("Decrypting the value!")

            # Checking Individual Types inside the Dataframe
            cipher = Fernet(salt)
            decr_val = str(cipher.decrypt(bytes(data,'utf8'))).replace("b'","").replace("'","")

            strV2 = "Decrypted value:: " + str(decr_val)
            logging.info(strV2)

            return decr_val

        except Exception as e:
            x = str(e)
            print(x)
            decr_val = ''

            return decr_val

3. clsFlask.py (This is the main server script that will the encrypt/decrypt class from our previous scenario. This script will capture the requested JSON from the client, who posted from the clients like another python script or third-party tools like Postman.)

###########################################
#### Written By: SATYAKI DE            ####
#### Written On: 25-Jan-2019           ####
#### Package Flask package needs to    ####
#### install in order to run this      ####
#### script.                           ####
####                                   ####
#### Objective: This script will       ####
#### encrypt/decrypt based on the      ####
#### supplied salt value. Also,        ####
#### this will capture the individual  ####
#### element & stored them into JSON   ####
#### variables using flask framework.  ####
###########################################

from getVal.clsConfigServer import clsConfigServer as csf
from getVal.clsEnDec import clsEnDecAuth

getVal = clsEnDec()

import logging

class clsFlask(object):
    def __init__(self):
        self.xtoken = str(csf.config['DEF_SALT'])

    def getEncryptProcess(self, dGroup, input_data, dTemplate):
        try:
            # It is sending default salt value
            xtoken = self.xtoken

            # Capturing the individual element
            dGroup = dGroup
            input_data = input_data
            dTemplate = dTemplate

            # This will check the mandatory json elements
            if ((dGroup != '') & (dTemplate != '')):

                # Based on the Group & Element it will fetch the salt
                # Based on the specific salt it will encrypt the data
                if ((dGroup == 'GrDet') & (dTemplate == 'subGrAcct_Nbr')):
                    xtoken = str(csf.config['ACCT_NBR_SALT'])

                    strV1 = "xtoken: " + str(xtoken)
                    logging.info(strV1)
                    strV2 = "Flask Input Data: " + str(input_data)
                    logging.info(strV2)

                    #x = cen.clsEnDecAuth()
                    ret_val = getVal.encrypt_str(input_data, xtoken)
                elif ((dGroup == 'GrDet') & (dTemplate == 'subGrName')):
                    xtoken = str(csf.config['NAME_SALT'])

                    strV1 = "xtoken: " + str(xtoken)
                    logging.info(strV1)
                    strV2 = "Flask Input Data: " + str(input_data)
                    logging.info(strV2)

                    #x = cen.clsEnDecAuth()
                    ret_val = getVal.encrypt_str(input_data, xtoken)
                elif ((dGroup == 'GrDet') & (dTemplate == 'subGrPhone')):
                    xtoken = str(csf.config['PHONE_SALT'])

                    strV1 = "xtoken: " + str(xtoken)
                    logging.info(strV1)
                    strV2 = "Flask Input Data: " + str(input_data)
                    logging.info(strV2)

                    #x = cen.clsEnDecAuth()
                    ret_val = getVal.encrypt_str(input_data, xtoken)
                elif ((dGroup == 'GrDet') & (dTemplate == 'subGrEmail')):
                    xtoken = str(csf.config['EMAIL_SALT'])

                    strV1 = "xtoken: " + str(xtoken)
                    logging.info(strV1)
                    strV2 = "Flask Input Data: " + str(input_data)
                    logging.info(strV2)

                    #x = cen.clsEnDecAuth()
                    ret_val = getVal.encrypt_str(input_data, xtoken)
                else:
                    ret_val = ''
            else:
                ret_val = ''

            # Return value
            return ret_val

        except Exception as e:
            ret_val = ''
            # Return the valid json Error Response
            return ret_val

    def getDecryptProcess(self, dGroup, input_data, dTemplate):
        try:
            xtoken = self.xtoken

            # Capturing the individual element
            dGroup = dGroup
            input_data = input_data
            dTemplate = dTemplate

            # This will check the mandatory json elements
            if ((dGroup != '') & (dTemplate != '')):

                # Based on the Group & Element it will fetch the salt
                # Based on the specific salt it will decrypt the data
                if ((dGroup == 'GrDet') & (dTemplate == 'subGrAcct_Nbr')):
                    xtoken = str(csf.config['ACCT_NBR_SALT'])

                    strV1 = "xtoken: " + str(xtoken)
                    logging.info(strV1)
                    strV2 = "Flask Input Data: " + str(input_data)
                    logging.info(strV2)

                    #x = cen.clsEnDecAuth()
                    ret_val = getVal.decrypt_str(input_data, xtoken)
                elif ((dGroup == 'GrDet') & (dTemplate == 'subGrName')):
                    xtoken = str(csf.config['NAME_SALT'])

                    strV1 = "xtoken: " + str(xtoken)
                    logging.info(strV1)
                    strV2 = "Flask Input Data: " + str(input_data)
                    logging.info(strV2)

                    #x = cen.clsEnDecAuth()
                    ret_val = getVal.decrypt_str(input_data, xtoken)
                elif ((dGroup == 'GrDet') & (dTemplate == 'subGrPhone')):
                    xtoken = str(csf.config['PHONE_SALT'])

                    strV1 = "xtoken: " + str(xtoken)
                    logging.info(strV1)
                    strV2 = "Flask Input Data: " + str(input_data)
                    logging.info(strV2)

                    #x = cen.clsEnDecAuth()
                    ret_val = getVal.decrypt_str(input_data, xtoken)
                elif ((dGroup == 'GrDet') & (dTemplate == 'subGrEmail')):
                    xtoken = str(csf.config['EMAIL_SALT'])

                    strV1 = "xtoken: " + str(xtoken)
                    logging.info(strV1)
                    strV2 = "Flask Input Data: " + str(input_data)
                    logging.info(strV2)

                    #x = cen.clsEnDecAuth()
                    ret_val = getVal.decrypt_str(input_data, xtoken)
                else:
                    ret_val = ''
            else:
                ret_val = ''

            # Return value
            return ret_val

        except Exception as e:
            ret_val = ''
            # Return the valid Error Response
            return ret_val

4. __init__.py (This autogenerated script contains the primary calling methods of encryption & decryption based on the element header & values after enhanced as per the functionality.)

###########################################
#### Written By: SATYAKI DE            ####
#### Written On: 08-Jun-2019           ####
#### Package Flask package needs to    ####
#### install in order to run this      ####
#### script.                           ####
####                                   ####
#### Objective: Main Calling scripts.  ####
#### This is an autogenrate scripts.   ####
#### However, to meet the functionality####
#### we've enhanced as per our logic.  ####
###########################################
__all__ = ['clsFlask']

import logging
import azure.functions as func
import json

from getVal.clsFlask import clsFlask

getVal = clsFlask()

def main(req: func.HttpRequest) -> func.HttpResponse:
    logging.info('Python Encryption function processed a request.')

    str_val = 'Input Payload:: ' + str(req.get_json())
    str_1 = str(req.get_json())

    logging.info(str_val)

    ret_val = {}
    DataIn = ''
    dGroup = ''
    dTemplate = ''
    flg = ''

    if (str_1 != ''):
        try:
            req_body = req.get_json()
            dGroup = req_body.get('dataGroup')

            try:
                DataIn = req_body.get('data')
                strV15 = 'If Part:: ' + str(DataIn)

                logging.info(strV15)

                if ((DataIn == '') | (DataIn == None)):
                    raise ValueError

                flg = 'Y'
            except ValueError:
                DataIn = req_body.get('edata')
                strV15 = 'Else Part:: ' + str(DataIn)
                logging.info(strV15)
                flg = 'N'
            except:
                DataIn = req_body.get('edata')
                strV15 = 'Else Part:: ' + str(DataIn)
                logging.info(strV15)
                flg = 'N'

            dTemplate = req_body.get('dataTemplate')

        except ValueError:
            pass

    strV5 = "Encrypt Decrypt Flag:: " + flg
    logging.info(strV5)

    if (flg == 'Y'):

        if ((DataIn != '') & ((dGroup != '') & (dTemplate != ''))):

            logging.info("Encryption Started!")
            ret_val = getVal.getEncryptProcess(dGroup, DataIn, dTemplate)
            strVal2 = 'Return Payload:: ' + str(ret_val)
            logging.info(strVal2)

            xval = json.dumps(ret_val)

            return func.HttpResponse(xval)
        else:
            return func.HttpResponse(
                 "Please pass a data in the request body",
                 status_code=400
            )
    else:

        if ((DataIn != '') & ((dGroup != '') & (dTemplate != ''))):

            logging.info("Decryption Started!")
            ret_val2 = getVal.getDecryptProcess(dGroup, DataIn, dTemplate)
            strVal3 = 'Return Payload:: ' + str(ret_val)
            logging.info(strVal3)

            xval1 = json.dumps(ret_val2)

            return func.HttpResponse(xval1)
        else:
            return func.HttpResponse(
                "Please pass a data in the request body",
                status_code=400
            )

In this script, based on the value of an flg variable, we’re calling our encryption or decryption methods. And, the value of the flg variable is set based on the following logic –

try:
    DataIn = req_body.get('data')
    strV15 = 'If Part:: ' + str(DataIn)

    logging.info(strV15)

    if ((DataIn == '') | (DataIn == None)):
        raise ValueError

    flg = 'Y'
except ValueError:
    DataIn = req_body.get('edata')
    strV15 = 'Else Part:: ' + str(DataIn)
    logging.info(strV15)
    flg = 'N'
except:
    DataIn = req_body.get('edata')
    strV15 = 'Else Part:: ' + str(DataIn)
    logging.info(strV15)
    flg = 'N'

So, if the application gets the “data” element then – it will consider the data needs to be encrypted; otherwise, it will go for decryption. And, based on that – it is setting the value.

Now, we’re ready to locally run our application –

func host start

And, the output will look like this –

StartingAzureFunction-Python
StartingAzureFunction-Python 2

Let’s test it from postman –

Encrypt:

Postman-Encrypt

Decrypt:

Postman-Decrypt

Great. Now, we’re ready to publish this application to Azure cloud.

As in our earlier steps, we’ve already built our storage account for the metadata. Please scroll to top to view that again. Now, using that information, we’ll make the function app with a more meaningful name –

az functionapp create –resource-group rndWestUSGrp –os-type Linux \
–consumption-plan-location westus –runtime python \
–name getEncryptDecrypt –storage-account cryptpy2019

CreatingFunctionPython

Let’s publish the function –

sudo func azure functionapp publish “getEncryptDecrypt” –build-native-deps

On many occassion, without the use of “–build-native-deps” might leads to failure. Hence, I’ve added that to avoid such scenarios.

Publishing-Function

Now, we need to test our first published complex Azure function with Python through postman –

Encrypt:

PubishedFuncPostmanEncrypt

Decrypt:

PubishedFuncPostmanDecrypt

Wonderful! So, it is working.

You can see the function under the Azure portal –

Deployed-Function

Let’s see some other important features of this function –

Monitor: You can monitor two ways. One is by clicking the monitor options you will get the individual requests level details & also get to see the log information over here –

Function-Monitor-Details-1

Clicking Application Insights will give you another level of detailed logs, which can be very useful for debugging. We’ll touch this at the end of this post with a very brief discussion.

Function-Monitor-Details-3.JPG

As you can see, clicking individual lines will show the details further.

Let’s quickly check the application insights –

Application-Insights-1

Application Insights will give you a SQL like an interface where you can get the log details of all your requests.

Application-Insights-2

You can expand the individual details for further information.

Application-Insights-3

You can change the parameter name & other details & click the run button to get all the log details for your debugging purpose.

So, finally, we’ve achieved our goal. This is relatively long posts. But, I’m sure this will help you to create your first python-based function on the Azure platform.

Hope, you will like this approach. Let me know your comment on the same.

I’ll bring some more exciting topic in the coming days from the Python verse.

Till then, Happy Avenging! 😀

Note: All the data posted here are representational data & available over the internet.

String Manipulation Advanced Using Teradata 14.0 Regular Expression

Today, I’ll show couple of very useful functions or logic implemented in Teradata using It’s Regular Expression.

There is two very popular demand comes from most of the Developer across different databases regarding the following two cases –

1. How to Split Comma Separated Values in each rows 

2. How to bind separate values in 1 row (Just opposite of Step 1)

2nd Options are very demanding as Cross platform database professional specially Oracle Developers looking for these kind of implementation as Oracle has directly built-in functions to do the same. Those functions are Listagg, wm_concat, group_concat.

Let’s check the solution –

Case 1,

Let’s create the table & prepare some data –


1
2
3
4
5
6
7
CREATE MULTISET TABLE ETL_DATA.PARSE_STR
  (
     SEQ_NO       INTEGER,
     SRC_STR     VARCHAR(70)
  );
 
CREATE TABLE completed. 0 rows processed. Elapsed Time =  00:00:01.864


Let’s insert some data –


1
2
3
INSERT INTO ETL_DATA.PARSE_STR VALUES(1,'RAM,TRIDIB,ANUPAM,BIRESWAR,SUJAY')
;INSERT INTO ETL_DATA.PARSE_STR VALUES(2,'TUNKAI,SAYAN,BABU,PAPU')
;INSERT INTO ETL_DATA.PARSE_STR VALUES(3,'IK,ATBIS,SAPMUNDA');


Let’s check the value –


1
2
3
4
5
SEQ_NO          SRC_STR
------  ----------------------------------
    1   RAM,TRIDIB,ANUPAM,BIRESWAR,SUJAY
    2   TUNKAI,SAYAN,BABU,PAPU
    3   IK,ATBIS,SAPMUNDA


Fine, Now our objective will be split these comma separated values in each lines.


1
2
3
4
5
6
SELECT b.SEQ_NO,
       regexp_substr(b.SRC_STR,'[^,]+',1,day_of_calendar) AS SRC_STR
FROM sys_calendar.calendar ,
     PARSE_STR b
WHERE day_of_calendar BETWEEN 1 AND  (LENGTH(b.SRC_STR) - LENGTH(regexp_replace(b.SRC_STR,'[^A-Z]+','',1,0,'i'))+1 )
ORDER BY 1,2;


And, let’s check the output –


 1
 2
 3
 4
 5
 6
 7
 8
 9
10
11
12
13
14
SEQ_NO  SRC_STR
-----   ----------------------
1       ANUPAM
1       BIRESWAR
1       RAM
1       SUJAY
1       TRIDIB
2       BABU
2       PAPU
2       SAYAN
2       TUNKAI
3       ATBIS
3       IK
3       SAPMUNDA


Gr8! I guess, result is coming as per my expectation. 🙂


Case 2(Subsitute Of Listagg, wm_concat, group_concat in Oracle),

This we’ve to do it in Two small Steps for better understanding & performance.

First, let us create another table –


1
2
3
4
5
6
7
CREATE MULTISET TABLE ETL_DATA.WM_CONCAT_TAB
   (
      SEQ_NO   INTEGER,
      SRC_STR VARCHAR(20)
   );
    
CREATE TABLE completed. 0 rows processed. Elapsed Time =  00:00:01.230


Good. Now we’ll populate some data into this table. We’ll populate data from Step 1 as this will provide the exact data that we’re expecting as input test data for Case 2.

Let’s insert those data –


1
2
3
4
5
6
INSERT INTO ETL_DATA.WM_CONCAT_TAB
SELECT b.SEQ_NO,
       regexp_substr(b.SRC_STR,'[^,]+',1,day_of_calendar) AS SRC_STR
FROM sys_calendar.calendar ,
     PARSE_STR b
WHERE day_of_calendar BETWEEN 1 AND  (LENGTH(b.SRC_STR) - LENGTH(regexp_replace(b.SRC_STR,'[^A-Z]+','',1,0,'i'))+1 );


Let’s check the data –

 1
 2
 3
 4
 5
 6
 7
 8
 9
10
11
12
13
14
SEQ_NO  SRC_STR
------  --------------------
1       ANUPAM
1       BIRESWAR
1       RAM
1       SUJAY
1       TRIDIB
2       BABU
2       PAPU
2       SAYAN
2       TUNKAI
3       ATBIS
3       IK
3       SAPMUNDA


As you know in TD we’ve significant restcriction regarding Hirarchical Queries & Recursive Queries. So, In this step we’ll build one relationship like employee & manager in popular employee table. So, if we have that kind of relation then we can easily establish & fit that in TD model.

Let’s create this intermediate table. In this case we’ll go for mapping between current rows with next rows. This is also very useful process. In Oracle, they have LEAD or LAG functions to achieve the same. But, here we’ve to work a little bit more to achive the same.

 1
 2
 3
 4
 5
 6
 7
 8
 9
10
11
12
13
14
15
16
17
18
19
20
CREATE MULTISET VOLATILE TABLE VT_SRC_ARRNG
AS
     (
            SELECT SEQ_NO,
                   SRC_STR,
                   MAX(SRC_STR) OVER(
                                        PARTITION BY SEQ_NO
                                        ORDER BY SEQ_NO, SRC_STR
                                        ROWS BETWEEN 1 FOLLOWING AND 1 FOLLOWING 
                                    ) AS PREV_SRC_STR,
                   COUNT(*)  OVER(
                                    PARTITION BY SEQ_NO
                                 ) AS MAX_RECUR_CNT
            FROM WM_CONCAT_TAB
      )
WITH DATA
ON COMMIT
PRESERVE ROWS;
 
CREATE TABLE completed. 0 rows processed. Elapsed Time =  00:00:01.102


Let’s look the output –

 1
 2
 3
 4
 5
 6
 7
 8
 9
10
11
12
13
14
15
16
17
18
19
20
21
SELECT *
FROM VT_SRC_ARRNG
ORDER BY 1,2;


SEQ_NO  SRC_STR  PREV_SRC_STR    MAX_RECUR_CNT
-----   -------  --------------- ---------------------
1       ANUPAM      BIRESWAR     5
1       BIRESWAR    RAM          5
1       RAM         SUJAY        5
1       SUJAY       TRIDIB       5
1       TRIDIB      ?            5
2       BABU        PAPU         4
2       PAPU        SAYAN        4
2       SAYAN       TUNKAI       4
2       TUNKAI      ?            4
3       ATBIS       IK           3
3       IK          SAPMUNDA     3
3       SAPMUNDA    ?            3


Fine. From the above VT we can see every Source String has one Previous Source String. Also, we’ve noted down that in each window of SEQ_NO how many levels are there by MAX_RECUR_CNT. We’ll use this column later.

Let’s move to the 2nd & final part –

Let’s aggregate the values based on SEQ_NO & club them with comma –

 1
 2
 3
 4
 5
 6
 7
 8
 9
10
11
12
13
14
15
16
17
18
19
20
21
22
23
24
25
26
27
28
29
30
31
32
33
34
35
36
37
38
39
40
41
42
43
WITH RECURSIVE WM_CONCAT(SEQ_NO, SRC_STR, PREV_SRC_STR, MAX_RECUR_CNT, LVL,  COMMA_SEP_STR)
AS
     (
        SELECT SEQ_NO,
               SRC_STR,
               PREV_SRC_STR,
               MAX_RECUR_CNT,
               1 AS LVL,
               CAST( '' AS VARCHAR(100)) AS COMMA_SEP_STR
       FROM VT_SRC_ARRNG
       WHERE  PREV_SRC_STR IS NULL
       UNION ALL
       SELECT  b.SEQ_NO,
               b.SRC_STR,
               b.PREV_SRC_STR,
               b.MAX_RECUR_CNT,
               c.LVL+1 AS LVL,
               c.COMMA_SEP_STR||b.SRC_STR||',' AS COMMA_SEP_STR
       FROM VT_SRC_ARRNG b,
               WM_CONCAT c
       WHERE c.SRC_STR =  b.PREV_SRC_STR
     )
SELECT k.SEQ_NO,
       k.AGGR_STR
FROM (               
    SELECT SEQ_NO,
           SRC_STR,
           LVL,
           MAX_RECUR_CNT,
           MIN(CASE
                 WHEN LVL = 1 THEN
                    SRC_STR
               ELSE
                  'ZZZZZ'
               END   ) OVER(
                                 PARTITION BY SEQ_NO
                                 ORDER BY LVL ASC
                           ) ROOT_SRC_STR,
           COMMA_SEP_STR||ROOT_SRC_STR AS AGGR_STR
    FROM WM_CONCAT
    )  k
WHERE k.LVL = k.MAX_RECUR_CNT
ORDER BY 1,2;


Let’s check the output –

1
2
3
4
5
SEQ_NO  AGGR_STR
------- ---------------------------
1       SUJAY,RAM,BIRESWAR,ANUPAM,TRIDIB
2       SAYAN,PAPU,BABU,TUNKAI
3       IK,ATBIS,SAPMUNDA


I guess, We’ve done it. 😀

So, You can achieve the same without writing any UDF.