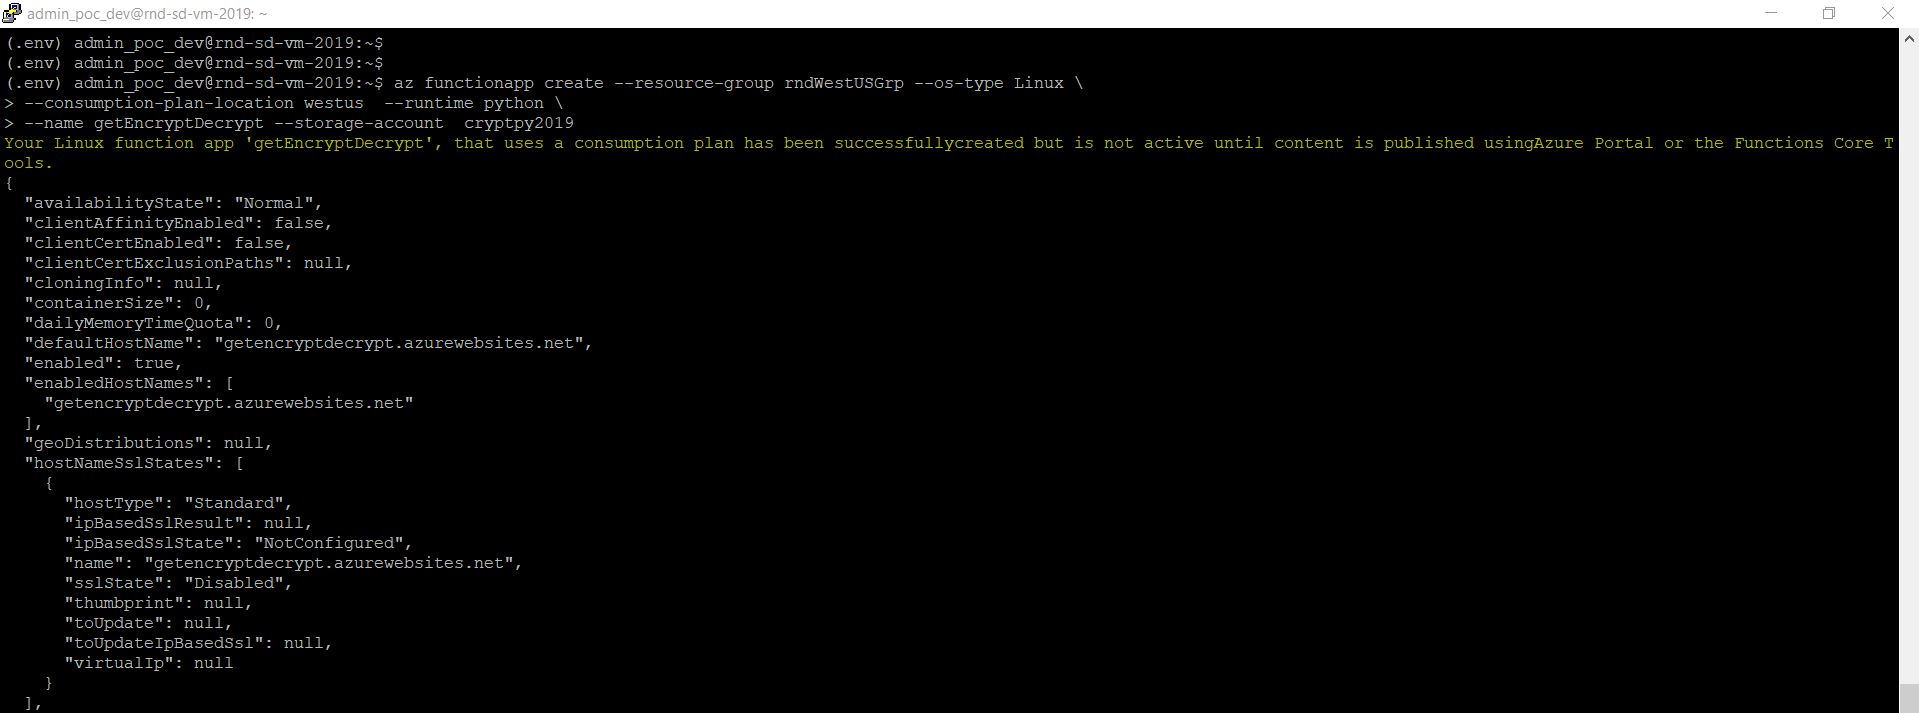
Predicting Flipkart business growth factor using Linear-Regression Machine Learning Model

Hi Guys,

Today, We’ll be exploring the potential business growth factor using the “Linear-Regression Machine Learning” model. We’ve prepared a set of dummy data & based on that, we’ll predict.

Let’s explore a few sample data –

1. Sample Data

So, based on these data, we would like to predict YearlyAmountSpent dependent on any one of the following features, i.e. [ Time On App / Time On Website / Flipkart Membership Duration (In Year) ].

You need to install the following packages –

pip install pandas

pip install matplotlib

pip install sklearn

We’ll be discussing only the main calling script & class script. However, we’ll be posting the parameters without discussing it. And, we won’t discuss clsL.py as we’ve already discussed that in our previous post.

1. clsConfig.py (This script contains all the parameter details.)

################################################
#### Written By: SATYAKI DE                 ####
#### Written On: 15-May-2020                ####
####                                        ####
#### Objective: This script is a config     ####
#### file, contains all the keys for        ####
#### Machine-Learning. Application will     ####
#### process these information & perform    ####
#### various analysis on Linear-Regression. ####
################################################

import os
import platform as pl

class clsConfig(object):
    Curr_Path = os.path.dirname(os.path.realpath(__file__))

    os_det = pl.system()
    if os_det == "Windows":
        sep = '\\'
    else:
        sep = '/'

    config = {
        'APP_ID': 1,
        'ARCH_DIR': Curr_Path + sep + 'arch' + sep,
        'PROFILE_PATH': Curr_Path + sep + 'profile' + sep,
        'LOG_PATH': Curr_Path + sep + 'log' + sep,
        'REPORT_PATH': Curr_Path + sep + 'report',
        'FILE_NAME': Curr_Path + sep + 'Data' + sep + 'FlipkartCustomers.csv',
        'SRC_PATH': Curr_Path + sep + 'Data' + sep,
        'APP_DESC_1': 'IBM Watson Language Understand!',
        'DEBUG_IND': 'N',
        'INIT_PATH': Curr_Path
    }

2. clsLinearRegression.py (This is the main script, which will invoke the Machine-Learning API & return 0 if successful.)

##############################################
#### Written By: SATYAKI DE               ####
#### Written On: 15-May-2020              ####
#### Modified On 15-May-2020              ####
####                                      ####
#### Objective: Main scripts for Linear   ####
#### Regression.                          ####
##############################################

import pandas as p
import numpy as np
import regex as re

import matplotlib.pyplot as plt
from clsConfig import clsConfig as cf

# %matplotlib inline -- for Jupyter Notebook
class clsLinearRegression:
    def __init__(self):
        self.fileName =  cf.config['FILE_NAME']

    def predictResult(self):
        try:

            inputFileName = self.fileName

            # Reading from Input File
            df = p.read_csv(inputFileName)

            print()
            print('Projecting sample rows: ')
            print(df.head())

            print()
            x_row = df.shape[0]
            x_col = df.shape[1]

            print('Total Number of Rows: ', x_row)
            print('Total Number of columns: ', x_col)

            # Adding Features
            x = df[['TimeOnApp', 'TimeOnWebsite', 'FlipkartMembershipInYear']]

            # Target Variable - Trying to predict
            y = df['YearlyAmountSpent']

            # Now Train-Test Split of your source data
            from sklearn.model_selection import train_test_split

            # test_size => % of allocated data for your test cases
            # random_state => A specific set of random split on your data
            X_train, X_test, Y_train, Y_test = train_test_split(x, y, test_size=0.4, random_state=101)

            # Importing Model
            from sklearn.linear_model import LinearRegression

            # Creating an Instance
            lm = LinearRegression()

            # Train or Fit my model on Training Data
            lm.fit(X_train, Y_train)

            # Creating a prediction value
            flipKartSalePrediction = lm.predict(X_test)

            # Creating a scatter plot based on Actual Value & Predicted Value
            plt.scatter(Y_test, flipKartSalePrediction)

            # Adding meaningful Label
            plt.xlabel('Actual Values')
            plt.ylabel('Predicted Values')

            # Checking Individual Metrics
            from sklearn import metrics

            print()
            mea_val = metrics.mean_absolute_error(Y_test, flipKartSalePrediction)
            print('Mean Absolute Error (MEA): ', mea_val)

            mse_val = metrics.mean_squared_error(Y_test, flipKartSalePrediction)
            print('Mean Square Error (MSE): ', mse_val)

            rmse_val = np.sqrt(metrics.mean_squared_error(Y_test, flipKartSalePrediction))
            print('Square root Mean Square Error (RMSE): ', rmse_val)

            print()

            # Check Variance Score - R^2 Value
            print('Variance Score:')
            var_score = str(round(metrics.explained_variance_score(Y_test, flipKartSalePrediction) * 100, 2)).strip()
            print('Our Model is', var_score, '% accurate. ')
            print()

            # Finding Coeficent on X_train.columns
            print()
            print('Finding Coeficent: ')

            cedf = p.DataFrame(lm.coef_, x.columns, columns=['Coefficient'])
            print('Printing the All the Factors: ')
            print(cedf)

            print()

            # Getting the Max Value from it
            cedf['MaxFactorForBusiness'] = cedf['Coefficient'].max()

            # Filtering the max Value to identify the biggest Business factor
            dfMax = cedf[(cedf['MaxFactorForBusiness'] == cedf['Coefficient'])]

            # Dropping the derived column
            dfMax.drop(columns=['MaxFactorForBusiness'], inplace=True)
            dfMax = dfMax.reset_index()

            print(dfMax)

            # Extracting Actual Business Factor from Pandas dataframe
            str_factor_temp = str(dfMax.iloc[0]['index'])
            str_factor = re.sub("([a-z])([A-Z])", "\g<1> \g<2>", str_factor_temp)
            str_value = str(round(float(dfMax.iloc[0]['Coefficient']),2))

            print()
            print('*' * 80)
            print('Major Busienss Activity - (', str_factor, ') - ', str_value, '%')
            print('*' * 80)
            print()

            # This is require when you are trying to print from conventional
            # front & not using Jupyter notebook.
            plt.show()

            return 0

        except Exception  as e:
            x = str(e)
            print('Error : ', x)

            return 1

Key lines from the above snippet –

# Adding Features
x = df[['TimeOnApp', 'TimeOnWebsite', 'FlipkartMembershipInYear']]

Our application creating a subset of the main datagram, which contains all the features.

# Target Variable - Trying to predict
y = df['YearlyAmountSpent']

Now, the application is setting the target variable into ‘Y.’

# Now Train-Test Split of your source data
from sklearn.model_selection import train_test_split

# test_size => % of allocated data for your test cases
# random_state => A specific set of random split on your data
X_train, X_test, Y_train, Y_test = train_test_split(x, y, test_size=0.4, random_state=101)

As per “Supervised Learning,” our application is splitting the dataset into two subsets. One is to train the model & another segment is to test your final model. However, you can divide the data into three sets that include the performance statistics for a large dataset. In our case, we don’t need that as this data is significantly less.

# Train or Fit my model on Training Data
lm.fit(X_train, Y_train)

Our application is now training/fit the data into the model.

# Creating a scatter plot based on Actual Value & Predicted Value
plt.scatter(Y_test, flipKartSalePrediction)

Our application projected the outcome based on the predicted data in a scatterplot graph.

Also, the following concepts captured by using our program. For more details, I’ve provided the external link for your reference –

  1. Mean Absolute Error (MEA)
  2. Mean Square Error (MSE)
  3. Square Root Mean Square Error (RMSE)

And, the implementation has shown as –

mea_val = metrics.mean_absolute_error(Y_test, flipKartSalePrediction)
print('Mean Absolute Error (MEA): ', mea_val)

mse_val = metrics.mean_squared_error(Y_test, flipKartSalePrediction)
print('Mean Square Error (MSE): ', mse_val)

rmse_val = np.sqrt(metrics.mean_squared_error(Y_test, flipKartSalePrediction))
print('Square Root Mean Square Error (RMSE): ', rmse_val)

At this moment, we would like to check the credibility of our model by using the variance score are as follows –

var_score = str(round(metrics.explained_variance_score(Y_test, flipKartSalePrediction) * 100, 2)).strip()
print('Our Model is', var_score, '% accurate. ')

Finally, extracting the coefficient to find out, which particular feature will lead Flikkart for better sale & growth by taking the maximum of coefficient value month the all features are as shown below –

cedf = p.DataFrame(lm.coef_, x.columns, columns=['Coefficient'])

# Getting the Max Value from it
cedf['MaxFactorForBusiness'] = cedf['Coefficient'].max()

# Filtering the max Value to identify the biggest Business factor
dfMax = cedf[(cedf['MaxFactorForBusiness'] == cedf['Coefficient'])]

# Dropping the derived column
dfMax.drop(columns=['MaxFactorForBusiness'], inplace=True)
dfMax = dfMax.reset_index()

Note that we’ve used a regular expression to split the camel-case column name from our feature & represent that with a much more meaningful name without changing the column name.

# Extracting Actual Business Factor from Pandas dataframe
str_factor_temp = str(dfMax.iloc[0]['index'])
str_factor = re.sub("([a-z])([A-Z])", "\g<1> \g<2>", str_factor_temp)
str_value = str(round(float(dfMax.iloc[0]['Coefficient']),2))

print('Major Busienss Activity - (', str_factor, ') - ', str_value, '%')

3. callLinear.py (This is the first calling script.)

##############################################
#### Written By: SATYAKI DE               ####
#### Written On: 15-May-2020              ####
#### Modified On 15-May-2020              ####
####                                      ####
#### Objective: Main calling scripts.     ####
##############################################

from clsConfig import clsConfig as cf
import clsL as cl
import logging
import datetime
import clsLinearRegression as cw

# Disbling Warning
def warn(*args, **kwargs):
    pass

import warnings
warnings.warn = warn

# Lookup functions from
# Azure cloud SQL DB

var = datetime.datetime.now().strftime("%Y-%m-%d_%H-%M-%S")

def main():
    try:
        ret_1 = 0
        general_log_path = str(cf.config['LOG_PATH'])

        # Enabling Logging Info
        logging.basicConfig(filename=general_log_path + 'MachineLearning_LinearRegression.log', level=logging.INFO)

        # Initiating Log Class
        l = cl.clsL()

        # Moving previous day log files to archive directory
        log_dir = cf.config['LOG_PATH']
        curr_ver =datetime.datetime.now().strftime("%Y-%m-%d")

        tmpR0 = "*" * 157

        logging.info(tmpR0)
        tmpR9 = 'Start Time: ' + str(var)
        logging.info(tmpR9)
        logging.info(tmpR0)

        print("Log Directory::", log_dir)
        tmpR1 = 'Log Directory::' + log_dir
        logging.info(tmpR1)

        print('Machine Learning - Linear Regression Prediction : ')
        print('-' * 200)

        # Create the instance of the Linear-Regression Class
        x2 = cw.clsLinearRegression()

        ret = x2.predictResult()

        if ret == 0:
            print('Successful Linear-Regression Prediction Generated!')
        else:
            print('Failed to generate Linear-Regression Prediction!')

        print("-" * 200)
        print()

        print('Finding Analysis points..')
        print("*" * 200)
        logging.info('Finding Analysis points..')
        logging.info(tmpR0)


        tmpR10 = 'End Time: ' + str(var)
        logging.info(tmpR10)
        logging.info(tmpR0)

    except ValueError as e:
        print(str(e))
        logging.info(str(e))

    except Exception as e:
        print("Top level Error: args:{0}, message{1}".format(e.args, e.message))

if __name__ == "__main__":
    main()

Key snippet from the above script –

# Create the instance of the Linear-Regression
x2 = cw.clsLinearRegression()

ret = x2.predictResult()

In the above snippet, our application initially creating an instance of the main class & finally invokes the “predictResult” method.

Let’s run our application –

Step 1:

First, the application will fetch the following sample rows from our source file – if it is successful.

2. Run_1

Step 2:

Then, It will create the following scatterplot by executing the following snippet –

# Creating a scatter plot based on Actual Value & Predicted Value
plt.scatter(Y_test, flipKartSalePrediction)
3. Run_2

Note that our model is pretty accurate & it has a balanced success rate compared to our predicted numbers.

Step 3:

Finally, it is successfully able to project the critical feature are shown below –

4. Run_3

From the above picture, you can see that our model is pretty accurate (89% approx).

Also, highlighted red square identifying the key-features & their confidence score & finally, the projecting the winner feature marked in green.

So, as per that, we’ve come to one conclusion that Flipkart’s business growth depends on the tenure of their subscriber, i.e., old members are prone to buy more than newer members.

Let’s look into our directory structure –

5. Win_Dir

So, we’ve done it.

I’ll be posting another new post in the coming days. Till then, Happy Avenging! 😀

Note: All the data posted here are representational data & available over the internet & for educational purpose only.

Analyzing Language using IBM Watson using Python

Hi Guys,

Today, I’ll be discussing the following topic – “How to analyze text using IBM Watson implementing through Python.”

IBM has significantly improved in the field of Visual Image Analysis or Text language analysis using its IBM Watson cloud platform. In this particular topic, we’ll be exploring the natural languages only.

To access IBM API, we need to first create an IBM Cloud account from this site.

Let us quickly go through the steps to create the IBM Language Understanding service. Click the Catalog on top of your browser menu as shown in the below picture –

6. Creating an Instance for Watson

After that, click the AI option on your left-hand side of the panel marked in RED.

Click the Watson-Studio & later choose the plan. In our case, We’ll select the “Lite” option as IBM provided this platform for all the developers to explore their cloud for free.

7. Choosing AI
8. Choosing Plan

Clicking the create option will lead to a blank page of Watson Studio as shown below –

9. Choosing Watson Studio

And, now, we need to click the Get Started button to launch it. This will lead to Create Project page, which can be done using the following steps –

10. Create Project Initial Screen

Now, clicking the create a project will lead you to the next screen –

11. Create Project - Continue

You can choose either an empty project, or you can create it from a sample file. In this case, we’ll be selecting the first option & this will lead us to the below page –

12. Creating a Project

And, then you will click the “Create” option, which will lead you to the next screen –

13. Adding to project

Now, you need to click “Add to Project.” This will give you a variety of services that you want to explore/use from the list. If you want to create your own natural language classifier, which you can do that as follows –

14. Adding Natural Language Components from IBM Cloud

Once, you click it – you need to select the associate service –

15. Adding Associte Service - Sound

Here, you need to click the hyperlink, which prompts to the next screen –

16. Choosing Associate Service - Sound

You need to check the price for both the Visual & Natural Language Classifier. They are pretty expensive. The visual classifier has the Lite plan. However, it has limitations of output.

Clicking the “Create” will prompt to the next screen –

18. Selecting Region - Sound

After successful creation, you will be redirected to the following page –

19. Landing Page - Sound

Now, We’ll be adding our “Natural Language Understand” for our test –

29. Choosing Natural Language Understanding

This will prompt the next screen –

7. Choosing AI - Natural Language Understanding

Once, it is successful. You will see the service registered as shown below –

3. Watson Services - Sound

If you click the service marked in RED, it will lead you to another page, where you will get the API Key & Url. You need both of this information in Python application to access this API as shown below –

4. Watson API Details - Sound

Now, we’re ready with the necessary cloud set-up. After this, we need to install the Python package for IBM Cloud as shown below –

1. Installing_Packages

We’ve noticed that, recently, IBM has launched one upgraded package. Hence, we installed that one as well. I would recommend you to install this second package directly instead of the first one shown above –

2. Installing Latest IBM_Watson Package

Now, we’re done with our set-up.

Let’s see the directory structure –

31. Directory Structure

We’ll be discussing only the main calling script & class script. However, we’ll be posting the parameters without discussing it. And, we won’t discuss clsL.py as we’ve already discussed that in our previous post.

1. clsConfig.py (This script contains all the parameter details.)

##############################################
#### Written By: SATYAKI DE               ####
#### Written On: 04-Apr-2020              ####
####                                      ####
#### Objective: This script is a config   ####
#### file, contains all the keys for      ####
#### IBM Cloud API.   Application will    ####
#### process these information & perform  ####
#### various analysis on IBM Watson cloud.####
##############################################

import os
import platform as pl

class clsConfig(object):
    Curr_Path = os.path.dirname(os.path.realpath(__file__))

    os_det = pl.system()
    if os_det == "Windows":
        sep = '\\'
    else:
        sep = '/'

    config = {
        'APP_ID': 1,
        'SERVICE_URL': "https://api.eu-gb.natural-language-understanding.watson.cloud.ibm.com/instances/xxxxxxxxxxxxxxXXXXXXXXXXxxxxxxxxxxxxxxxx",
        'API_KEY': "Xxxxxxxxxxxxxkdkdfifd984djddkkdkdkdsSSdkdkdd",
        'API_TYPE': "application/json",
        'CACHE': "no-cache",
        'CON': "keep-alive",
        'ARCH_DIR': Curr_Path + sep + 'arch' + sep,
        'PROFILE_PATH': Curr_Path + sep + 'profile' + sep,
        'LOG_PATH': Curr_Path + sep + 'log' + sep,
        'REPORT_PATH': Curr_Path + sep + 'report',
        'SRC_PATH': Curr_Path + sep + 'Src_File' + sep,
        'APP_DESC_1': 'IBM Watson Language Understand!',
        'DEBUG_IND': 'N',
        'INIT_PATH': Curr_Path
    }

Note that you will be placing your API_KEY & URL here, as shown in the configuration file.

2. clsIBMWatson.py (This is the main script, which will invoke the IBM Watson API based on the input from the user & return 0 if successful.)

##############################################
#### Written By: SATYAKI DE               ####
#### Written On: 04-Apr-2020              ####
#### Modified On 04-Apr-2020              ####
####                                      ####
#### Objective: Main scripts to invoke    ####
#### IBM Watson Language Understand API.  ####
##############################################

import logging
from clsConfig import clsConfig as cf
import clsL as cl
import json
from ibm_watson import NaturalLanguageUnderstandingV1
from ibm_cloud_sdk_core.authenticators import IAMAuthenticator
from ibm_watson.natural_language_understanding_v1 import Features, EntitiesOptions, KeywordsOptions, SentimentOptions, CategoriesOptions, ConceptsOptions
from ibm_watson import ApiException

class clsIBMWatson:
    def __init__(self):
        self.api_key =  cf.config['API_KEY']
        self.service_url = cf.config['SERVICE_URL']

    def calculateExpressionFromUrl(self, inputUrl, inputVersion):
        try:
            api_key = self.api_key
            service_url = self.service_url
            print('-' * 60)
            print('Beginning of the IBM Watson for Input Url.')
            print('-' * 60)

            authenticator = IAMAuthenticator(api_key)

            # Authentication via service credentials provided in our config files
            service = NaturalLanguageUnderstandingV1(version=inputVersion, authenticator=authenticator)
            service.set_service_url(service_url)

            response = service.analyze(
                url=inputUrl,
                features=Features(entities=EntitiesOptions(),
                                  sentiment=SentimentOptions(),
                                  concepts=ConceptsOptions())).get_result()

            print(json.dumps(response, indent=2))

            return 0

        except ApiException as ex:
            print('-' * 60)
            print("Method failed for Url with status code " + str(ex.code) + ": " + ex.message)
            print('-' * 60)

            return 1

    def calculateExpressionFromText(self, inputText, inputVersion):
        try:
            api_key = self.api_key
            service_url = self.service_url
            print('-' * 60)
            print('Beginning of the IBM Watson for Input Url.')
            print('-' * 60)

            authenticator = IAMAuthenticator(api_key)

            # Authentication via service credentials provided in our config files
            service = NaturalLanguageUnderstandingV1(version=inputVersion, authenticator=authenticator)
            service.set_service_url(service_url)

            response = service.analyze(
                text=inputText,
                features=Features(entities=EntitiesOptions(),
                                  sentiment=SentimentOptions(),
                                  concepts=ConceptsOptions())).get_result()

            print(json.dumps(response, indent=2))

            return 0

        except ApiException as ex:
            print('-' * 60)
            print("Method failed for Url with status code " + str(ex.code) + ": " + ex.message)
            print('-' * 60)

            return 1

Some of the key lines from the above snippet –

authenticator = IAMAuthenticator(api_key)

# Authentication via service credentials provided in our config files
service = NaturalLanguageUnderstandingV1(version=inputVersion, authenticator=authenticator)
service.set_service_url(service_url)

By providing the API Key & Url, the application is initiating the service for Watson.

response = service.analyze(
    url=inputUrl,
    features=Features(entities=EntitiesOptions(),
                      sentiment=SentimentOptions(),
                      concepts=ConceptsOptions())).get_result()

Based on your type of input, it will bring the features of entities, sentiment & concepts here. Apart from that, you can additionally check the following features as well – Keywords & Categories.

3. callIBMWatsonAPI.py (This is the first calling script. Based on user choice, it will receive input either as Url or as the plain text & then analyze it.)

##############################################
#### Written By: SATYAKI DE               ####
#### Written On: 04-Apr-2020              ####
#### Modified On 04-Apr-2020              ####
####                                      ####
#### Objective: Main calling scripts.     ####
##############################################

from clsConfig import clsConfig as cf
import clsL as cl
import logging
import datetime
import clsIBMWatson as cw

# Disbling Warning
def warn(*args, **kwargs):
    pass

import warnings
warnings.warn = warn

# Lookup functions from
# Azure cloud SQL DB

var = datetime.datetime.now().strftime("%Y-%m-%d_%H-%M-%S")

def main():
    try:
        ret_1 = 0
        general_log_path = str(cf.config['LOG_PATH'])

        # Enabling Logging Info
        logging.basicConfig(filename=general_log_path + 'IBMWatson_NaturalLanguageAnalysis.log', level=logging.INFO)

        # Initiating Log Class
        l = cl.clsL()

        # Moving previous day log files to archive directory
        log_dir = cf.config['LOG_PATH']
        curr_ver =datetime.datetime.now().strftime("%Y-%m-%d")

        tmpR0 = "*" * 157

        logging.info(tmpR0)
        tmpR9 = 'Start Time: ' + str(var)
        logging.info(tmpR9)
        logging.info(tmpR0)

        print("Log Directory::", log_dir)
        tmpR1 = 'Log Directory::' + log_dir
        logging.info(tmpR1)

        print('Welcome to IBM Wantson Language Understanding Calling Program: ')
        print('-' * 60)
        print('Please Press 1 for Understand the language from Url.')
        print('Please Press 2 for Understand the language from your input-text.')
        input_choice = int(input('Please provide your choice:'))

        # Create the instance of the IBM Watson Class
        x2 = cw.clsIBMWatson()

        # Let's pass this to our map section
        if input_choice == 1:
            textUrl = str(input('Please provide the complete input url:'))
            ret_1 = x2.calculateExpressionFromUrl(textUrl, curr_ver)
        elif input_choice == 2:
            inputText = str(input('Please provide the input text:'))
            ret_1 = x2.calculateExpressionFromText(inputText, curr_ver)
        else:
            print('Invalid options!')

        if ret_1 == 0:
            print('Successful IBM Watson Language Understanding Generated!')
        else:
            print('Failed to generate IBM Watson Language Understanding!')

        print("-" * 60)
        print()

        print('Finding Analysis points..')
        print("*" * 157)
        logging.info('Finding Analysis points..')
        logging.info(tmpR0)


        tmpR10 = 'End Time: ' + str(var)
        logging.info(tmpR10)
        logging.info(tmpR0)

    except ValueError as e:
        print(str(e))
        print("Invalid option!")
        logging.info("Invalid option!")

    except Exception as e:
        print("Top level Error: args:{0}, message{1}".format(e.args, e.message))

if __name__ == "__main__":
    main()

This script is pretty straight forward as it is first creating an instance of the main class & then based on the user input, it is calling the respective functions here.

As of now, IBM Watson can work on a list of languages, which are available here.

If you want to start from scratch, please refer to the following link.

Please find the screenshot of our application run –

Case 1 (With Url): 

21. Win_Run_1_Url
23. Win_Run_3_Url

Case 2 (With Plain text):

25. Win_Run_1_InputText
26. Win_Run_2_InputText
27. Win_Run_3_InputText

Now, Don’t forget to delete all the services from your IBM Cloud.

32. Delete Service

As you can see, from the service, you need to delete all the services one-by-one as shown in the figure.

So, we’ve done it.

To explore my photography, you can visit the following link.

I’ll be posting another new post in the coming days. Till then, Happy Avenging! 😀

Note: All the data posted here are representational data & available over the internet & for educational purpose only.

Building Python-based best-route apps for Indian Railways

Hi Guys!

Today, I’ll present a way to get the best route from Indian Railways train between two specific sources & destination using third-party API.

This approach is particularly beneficial if you want to integrate this logic in Azure Function or Lambda Function or any serverless functions.

Before we dig into the details. Let us explore what kind of cloud-based architecture we can implement this.

Architecture

Fig: 1 (Cloud Architecture)

In this case, I’ve considered Azure as the implementation platform.

Let’s discuss how the events will take place. At first, a user searches for the best routes between two fixed stations. The user has to provide the source & destination stations. The request will go through the Azure Firewall after validating the initial authentication. As part of the API service, it will check for similar queries & if it is there, then it will fetch it from the cache & send it back to the user through their mobile application. However, for the first time, it will retrieve the information from the DB & keep a copy in the cache. This part also managed through a load balancer for high-level availability. However, periodically system will push the data from the cache to the DB with the updated information.

Let’s see the program directory structure –

ProgramDir

Let’s discuss our code –

1. clsConfig.py (This script contains all the parameters for the main Indian Railway API & try to get the response between two railway stations. Hence, the name comes into the picture.)

 1
 2
 3
 4
 5
 6
 7
 8
 9
10
11
12
13
14
15
16
17
18
19
20
21
22
23
24
25
26
27
28
29
30
31
32
33
34
35
36
37
38
##############################################
#### Written By: SATYAKI DE               ####
#### Written On: 12-Oct-2019              ####
####                                      ####
#### Objective: This script is a config   ####
#### file, contains all the keys for      ####
#### azure cosmos db. Application will    ####
#### process these information & perform  ####
#### various CRUD operation on Cosmos DB. ####
##############################################

import os
import platform as pl

class clsConfig(object):
    Curr_Path = os.path.dirname(os.path.realpath(__file__))

    os_det = pl.system()
    if os_det == "Windows":
        sep = '\\'
    else:
        sep = '/'

    config = {
        'APP_ID': 1,
        'URL': "https://trains.p.rapidapi.com/",
        'RAPID_API_HOST': "trains.p.rapidapi.com",
        'RAPID_API_KEY': "hrfjjdfjfjfjfjxxxxxjffjjfjfjfjfjfjfjf",
        'RAPID_API_TYPE': "application/json",
        'ARCH_DIR': Curr_Path + sep + 'arch' + sep,
        'PROFILE_PATH': Curr_Path + sep + 'profile' + sep,
        'LOG_PATH': Curr_Path + sep + 'log' + sep,
        'REPORT_PATH': Curr_Path + sep + 'report',
        'APP_DESC_1': 'Indian Railway Train Schedule Search',
        'DEBUG_IND': 'N',
        'INIT_PATH': Curr_Path,
        'COL_LIST': ['name','train_num','train_from','train_to','classes','departTime','arriveTime','Mon','Tue','Wed','Thu','Fri','Sat','Sun']
    }

As of now, I’ve replaced the API Key with the dummy value.

2. clsIndianRailway.py (This script will invoke the main Indian Railway API & try to get the response between two railway stations. Hence, the name comes into the picture.)

 1
 2
 3
 4
 5
 6
 7
 8
 9
10
11
12
13
14
15
16
17
18
19
20
21
22
23
24
25
26
27
28
29
30
31
32
33
34
35
36
37
38
39
40
41
42
43
44
45
46
47
48
49
50
51
52
53
54
55
56
57
58
59
60
##############################################
#### Written By: SATYAKI DE               ####
#### Written On: 20-Dec-2019              ####
#### Modified On 20-Dec-2019              ####
####                                      ####
#### Objective: Main scripts to invoke    ####
#### Indian Railway API.                  ####
##############################################

import requests
import logging
import json
from clsConfig import clsConfig as cf

class clsIndianRailway:
    def __init__(self):
        self.url = cf.config['URL']
        self.rapidapi_host = cf.config['RAPID_API_HOST']
        self.rapidapi_key = cf.config['RAPID_API_KEY']
        self.type = cf.config['RAPID_API_TYPE']

    def searchQry(self, rawQry):
        try:
            url = self.url
            rapidapi_host = self.rapidapi_host
            rapidapi_key = self.rapidapi_key
            type = self.type

            Ipayload = "{\"search\":\"" + rawQry + "\"}"

            jpayload = json.dumps(Ipayload)
            payload = json.loads(jpayload)

            print('Input JSON: ', str(payload))

            headers = {
                'x-rapidapi-host': rapidapi_host,
                'x-rapidapi-key': rapidapi_key,
                'content-type': type,
                'accept': type
                }

            response = requests.request("POST", url, data=payload, headers=headers)

            ResJson  = response.text

            jdata = json.dumps(ResJson)
            ResJson = json.loads(jdata)

            return ResJson

        except Exception as e:
            ResJson = ''
            x = str(e)
            print(x)

            logging.info(x)
            ResJson = {'errorDetails': x}

            return ResJson

Let’s explain the critical snippet from the code.

url = self.url
rapidapi_host = self.rapidapi_host
rapidapi_key = self.rapidapi_key
type = self.type

Ipayload = "{\"search\":\"" + rawQry + "\"}"

jpayload = json.dumps(Ipayload)
payload = json.loads(jpayload)

The first four lines are to receive the parameter values. Our application needs to frame the search query, which is done in the IPayload variable. After that, our app will convert it into a json object type.

headers = {
    'x-rapidapi-host': rapidapi_host,
    'x-rapidapi-key': rapidapi_key,
    'content-type': type,
    'accept': type
    }

response = requests.request("POST", url, data=payload, headers=headers)

Now, the application will prepare the headers & send the request & received the response. Finally, that response will be sent by this script to the main callee application after extracting part of the response & converting that back to JSON are as follows –

response = requests.request("POST", url, data=payload, headers=headers)

ResJson  = response.text

jdata = json.dumps(ResJson)
ResJson = json.loads(jdata)

return ResJson

3. callIndianRailwayAPI.py (This is the main script which invokes the main Indian Railway API & tries to get the response between two railway stations. Hence, the name comes into the picture.)

  1
  2
  3
  4
  5
  6
  7
  8
  9
 10
 11
 12
 13
 14
 15
 16
 17
 18
 19
 20
 21
 22
 23
 24
 25
 26
 27
 28
 29
 30
 31
 32
 33
 34
 35
 36
 37
 38
 39
 40
 41
 42
 43
 44
 45
 46
 47
 48
 49
 50
 51
 52
 53
 54
 55
 56
 57
 58
 59
 60
 61
 62
 63
 64
 65
 66
 67
 68
 69
 70
 71
 72
 73
 74
 75
 76
 77
 78
 79
 80
 81
 82
 83
 84
 85
 86
 87
 88
 89
 90
 91
 92
 93
 94
 95
 96
 97
 98
 99
100
101
102
103
104
105
106
107
108
109
110
111
112
113
114
115
116
117
118
119
120
121
122
123
124
125
126
127
128
129
130
131
132
133
134
135
136
137
138
139
140
141
142
143
144
145
146
147
148
149
150
151
152
153
154
155
156
157
158
159
160
161
162
163
164
165
166
167
168
169
170
171
172
173
174
175
176
177
178
179
180
181
182
183
184
185
186
187
188
189
190
191
192
193
194
195
196
197
198
199
200
201
202
203
204
205
206
207
208
209
210
211
212
213
214
215
216
217
218
##############################################
#### Written By: SATYAKI DE               ####
#### Written On: 20-Dec-2019              ####
#### Modified On 20-Dec-2019              ####
####                                      ####
#### Objective: Main calling scripts.     ####
##############################################

from clsConfig import clsConfig as cf
import pandas as p
import clsL as cl
import logging
import datetime
import json
import clsIndianRailway as ct
import re
import numpy as np

# Disbling Warning
def warn(*args, **kwargs):
    pass

import warnings
warnings.warn = warn

# Lookup functions from
# Azure cloud SQL DB

var = datetime.datetime.now().strftime("%Y-%m-%d_%H-%M-%S")

def getArriveTimeOnly(row):
    try:
        # Using regular expression to fetch time part only

        lkp_arriveTime = str(row['arriveTime'])

        str_arr_time, remain = lkp_arriveTime.split('+')

        return str_arr_time

    except Exception as e:
        x = str(e)
        str_arr_time = ''

        return str_arr_time

def getArriveDateDiff(row):
    try:
        # Using regular expression to fetch time part only

        lkp_arriveTime = str(row['arriveTime'])

        first_half, str_date_diff_init = lkp_arriveTime.split('+')

        # Replacing the text part from it & only capturing the integer part
        str_date_diff = int(re.sub(r"[a-z]","",str_date_diff_init, flags=re.I))

        return str_date_diff

    except Exception as e:
        x = str(e)
        str_date_diff = 0

        return str_date_diff

def getArriveTimeDiff(row):
    try:
        # Using regular expression to fetch time part only

        lkp_arriveTimeM = str(row['arriveTimeM'])

        str_time_diff_init = int(re.sub(r'[^\w\s]', '', lkp_arriveTimeM))

        # Replacing the text part from it & only capturing the integer part
        str_time_diff = (2400 - str_time_diff_init)

        return str_time_diff

    except Exception as e:
        x = str(e)
        str_time_diff = 0

        return str_time_diff

def main():
    try:
        dfSrc = p.DataFrame()
        df_ret = p.DataFrame()
        ret_2 = ''
        debug_ind = 'Y'
        col_list = cf.config['COL_LIST']

        general_log_path = str(cf.config['LOG_PATH'])

        # Enabling Logging Info
        logging.basicConfig(filename=general_log_path + 'consolidatedIR.log', level=logging.INFO)

        # Initiating Log Class
        l = cl.clsL()

        # Moving previous day log files to archive directory
        arch_dir = cf.config['ARCH_DIR']
        log_dir = cf.config['LOG_PATH']

        tmpR0 = "*" * 157

        logging.info(tmpR0)
        tmpR9 = 'Start Time: ' + str(var)
        logging.info(tmpR9)
        logging.info(tmpR0)

        print("Archive Directory:: ", arch_dir)
        print("Log Directory::", log_dir)
        tmpR1 = 'Log Directory::' + log_dir
        logging.info(tmpR1)

        # Query using parameters
        rawQry = str(input('Please enter the name of the train service that you want to find out (Either by Name or by Number): '))

        x1 = ct.clsIndianRailway()
        ret_2 = x1.searchQry(rawQry)

        # Capturing the JSON Payload
        res = json.loads(ret_2)

        # Converting dictionary to Pandas Dataframe
        # df_ret = p.read_json(ret_2, orient='records')

        df_ret = p.io.json.json_normalize(res)
        df_ret.columns = df_ret.columns.map(lambda x: x.split(".")[-1])

        # Resetting the column orders as per JSON
        # df_ret = df_ret[list(res[0].keys())]
        column_order = col_list
        df_mod_ret = df_ret.reindex(column_order, axis=1)

        # Sorting the source data for better viewing
        df_mod_resp = df_mod_ret.sort_values(by=['train_from','train_to','train_num'])

        l.logr('1.IndianRailway_' + var + '.csv', debug_ind, df_mod_resp, 'log')

        # Fetching Data for Delhi To Howrah
        df_del_how = df_mod_resp[(df_mod_resp['train_from'] == 'NDLS') & (df_mod_resp['train_to'] == 'HWH')]

        l.logr('2.IndianRailway_Delhi2Howrah_' + var + '.csv', debug_ind, df_del_how, 'log')

        # Splitting Arrive time into two separate fields for better calculation
        df_del_how['arriveTimeM'] = df_del_how.apply(lambda row: getArriveTimeOnly(row), axis=1)
        df_del_how['arriveTimeDayDiff'] = df_del_how.apply(lambda row: getArriveDateDiff(row), axis=1)
        df_del_how['arriveTimeDiff'] = df_del_how.apply(lambda row: getArriveTimeDiff(row), axis=1)

        l.logr('3.IndianRailway_Del2How_Mod_' + var + '.csv', debug_ind, df_del_how, 'log')

        # To fetch the best route which saves time
        lstTimeDayDiff = df_del_how['arriveTimeDayDiff'].values.tolist()
        min_lstTimeDayDiff = int(min(lstTimeDayDiff))

        df_min_timedaydiff = df_del_how[(df_del_how['arriveTimeDayDiff'] == min_lstTimeDayDiff)]

        l.logr('4.IndianRailway_Del2How_TimeCalc_' + var + '.csv', debug_ind, df_min_timedaydiff, 'log')

        # Now application will check the maximum arrivetimediff, this will bring the record
        # which arrives early at Howrah station
        lstTimeDiff = df_min_timedaydiff['arriveTimeDiff'].values.tolist()
        max_lstTimeDiff = int(max(lstTimeDiff))

        df_best_route = df_min_timedaydiff[(df_min_timedaydiff['arriveTimeDiff'] == max_lstTimeDiff)]

        # Dropping unwanted columns
        df_best_route.drop(columns=['arriveTimeM'], inplace=True)
        df_best_route.drop(columns=['arriveTimeDayDiff'], inplace=True)
        df_best_route.drop(columns=['arriveTimeDiff'], inplace=True)

        l.logr('5.IndianRailway_Del2How_BestRoute_' + var + '.csv', debug_ind, df_best_route, 'log')

        print("-" * 60)

        print('Realtime Indian Railway Data:: ')
        logging.info('Realtime Indian Railway Data:: ')
        print(df_mod_resp)
        print()
        print('Best Route from Delhi -> Howrah:: ')
        print(df_best_route)
        print()

        # Checking execution status
        ret_val_2 = df_best_route.shape[0]

        if ret_val_2 == 0:
            print("Indian Railway hasn't returned any rows. Please check your queries!")
            logging.info("Indian Railway hasn't returned any rows. Please check your queries!")
            print("*" * 157)
            logging.info(tmpR0)
        else:
            print("Successfuly row feteched!")
            logging.info("Successfuly row feteched!")
            print("*" * 157)
            logging.info(tmpR0)

        print('Finding Story points..')
        print("*" * 157)
        logging.info('Finding Story points..')
        logging.info(tmpR0)


        tmpR10 = 'End Time: ' + str(var)
        logging.info(tmpR10)
        logging.info(tmpR0)

    except ValueError:
        print("No relevant data to proceed!")
        logging.info("No relevant data to proceed!")

    except Exception as e:
        print("Top level Error: args:{0}, message{1}".format(e.args, e.message))

if __name__ == "__main__":
    main()

Key snippet to explore –

# Query using parameters
rawQry = str(input('Please enter the name of the train service that you want to find out (Either by Name or by Number): '))

In this case, we make it interactive mode. However, in the actual scenario, you would receive these values from your mobile application.

x1 = ct.clsIndianRailway()
ret_2 = x1.searchQry(rawQry)

# Capturing the JSON Payload
res = json.loads(ret_2)

The above four lines initially invoke the API & receive the JSON response.

# Converting dictionary to Pandas Dataframe
df_ret = p.io.json.json_normalize(res)
df_ret.columns = df_ret.columns.map(lambda x: x.split(".")[-1])

# Resetting the column orders as per JSON
column_order = col_list
df_mod_ret = df_ret.reindex(column_order, axis=1)

# Sorting the source data for better viewing
df_mod_resp = df_mod_ret.sort_values(by=['train_from','train_to','train_num'])

In these last five lines, our application will convert the JSON & serialize it into pandas dataframe, which is sorted after that.

The result will look like this –

SerializeJson2PandasDF

This is exceptionally critical, as this will allow you to achieve your target. Without flattening the data, you won’t get to your goal.

# Fetching Data for Delhi To Howrah
df_del_how = df_mod_resp[(df_mod_resp['train_from'] == 'NDLS') & (df_mod_resp['train_to'] == 'HWH')]

As the line suggested, our application will pick-up only those records between New Delhi & Howrah. Thus, we’ve used our filter to eliminate additional records. And, the data will look like this –

SilteredRecords

Now, we need to identify the minimum time taken by anyone of the two records. For that, we’ll be doing some calculations to fetch the minimum time taken by the application.

# Splitting Arrive time into two separate fields for better calculation
df_del_how['arriveTimeM'] = df_del_how.apply(lambda row: getArriveTimeOnly(row), axis=1)
df_del_how['arriveTimeDayDiff'] = df_del_how.apply(lambda row: getArriveDateDiff(row), axis=1)
df_del_how['arriveTimeDiff'] = df_del_how.apply(lambda row: getArriveTimeDiff(row), axis=1)

To do that, we’ll be generating a couple of derived columns (shown above), which we’ll be using the fetch the shortest duration. And, the data should look like this –

CalculatedFields

These are the two fields, which we’re using for our calculation. First, we’re splitting arriveTime into two separate columns i.e. arriveTimeM & arriveTimeDayDiff. However, arriveTimeDiff is a calculated field.

So, our logic to find the best routes –

  • arriveTimeDayDiff = Take the minimum of the records. If you have multiple candidates, then we’ll pick all of them. In this case, we’ll get two records.
  • ArrivalDiff = (24:00 – <Train’s Arrival Time>), then take the maximum of the value

Note that, in this case, we haven’t considered the departure time. You can add that logic to improvise & correct your prediction.

The above steps can be seen in the following snippet –

# To fetch the best route which saves time
lstTimeDayDiff = df_del_how['arriveTimeDayDiff'].values.tolist()
min_lstTimeDayDiff = int(min(lstTimeDayDiff))

df_min_timedaydiff = df_del_how[(df_del_how['arriveTimeDayDiff'] == min_lstTimeDayDiff)]

l.logr('4.IndianRailway_Del2How_TimeCalc_' + var + '.csv', debug_ind, df_min_timedaydiff, 'log')

# Now application will check the maximum arrivetimediff, this will bring the record
# which arrives early at Howrah station
lstTimeDiff = df_min_timedaydiff['arriveTimeDiff'].values.tolist()
max_lstTimeDiff = int(max(lstTimeDiff))

df_best_route = df_min_timedaydiff[(df_min_timedaydiff['arriveTimeDiff'] == max_lstTimeDiff)]

Let’s see how it runs –

Output

As you can see that NDLS (New Delhi), we’ve three records marked in the GREEN square box. However, as destination HWH (Howrah), we’ve only two records marked in the RED square box. However, as part of our calculation, we’ll pick the record marked with the BLUE square box.

Let’s see how the log directory generates all the files –

Log_Dir

Let’s see the final output in our csv file –

BestRoute

So, finally, we’ve achieved it. 😀

Let me know – how do you like this post. Please share your suggestion & comments.

I’ll be back with another installment from the Python verse.

Till then – Happy Avenging!

Note: All the data posted here are representational data & available over the internet & for educational purpose only.

Prepare analytics based on streaming data from Twitter using Python

Hi Guys!

Today, we will be projecting an analytics storyline based on streaming data from twitter’s developer account.

I want to make sure that this solely for educational purposes & no data analysis has provided to any agency or third-party apps. So, when you are planning to use this API, make sure that you strictly follow these rules.

In order to create a streaming channel from Twitter, you need to create one developer account.

As I’m a huge soccer fan, I would like to refer to one soccer place on Twitter for this. In this case, we’ll be checking BA Analytics for this.

6. Origin_Site

Please find the steps to create one developer account –

Step -1: 

You have to go to the following link. Over there you need to submit the request in order to create the account. You need to provide proper justification as to why you need that account. I’m not going into those forms. They are self-explanatory.

Once, your developer account activated, you need to click the following link as shown below –

1. TwitterSetup

Once you clicked that, the program will lead to you the following page –

2. TwitterSetup - Continue

If you don’t have any app, the first page will look something like the above page.

Step 2:

3. TwiterSetup - Continue

Now, you need to fill-up the following details. For security reasons, I’ll be hiding sensitive data here.

Step 3:

4. TwitterSetUp - Continue

After creating that, you need to go to the next tab i.e. key’s & tokens. The initial screen will only have Consumer API keys.

Step 4:

To generate the Access token, you need to click the create button from the above screenshot & then the new page will look like this –

5. TwitterSetUp - Continue

Our program will be using all these pieces of information.

So, now we’re ready for our Python program.

In order to access Twitter API through python, you need to install the following package –

pip install python-twitter

Let’s see the directory structure –

7. Directory

Let’s check only the relevant scripts here. We’re not going to discuss the clsL.py as we’ve already discussed. Please refer to the old post.

1. clsConfig.py (This script contains all the parameters of the server.)

##############################################
#### Written By: SATYAKI DE               ####
#### Written On: 12-Oct-2019              ####
####                                      ####
#### Objective: This script is a config   ####
#### file, contains all the keys for      ####
#### azure cosmos db. Application will    ####
#### process these information & perform  ####
#### various CRUD operation on Cosmos DB. ####
##############################################

import os
import platform as pl

class clsConfig(object):
    Curr_Path = os.path.dirname(os.path.realpath(__file__))

    os_det = pl.system()
    if os_det == "Windows":
        sep = '\\'
    else:
        sep = '/'

    config = {
        'APP_ID': 1,
        'EMAIL_SRC_JSON_FILE': Curr_Path + sep + 'src_file' + sep + 'srcEmail.json',
        'TWITTER_SRC_JSON_FILE': Curr_Path + sep + 'src_file' + sep + 'srcTwitter.json',
        'HR_SRC_JSON_FILE': Curr_Path + sep + 'src_file' + sep + 'srcHR.json',
        'ACCESS_TOKEN': '99999999-XXXXXXXXXXXXXXXXXXXXXXXXXXXXXXXXXXXXXXXX',
        'ACCESS_SECRET': 'YYYYYYYYYYYYYYYYYYYYYYYYYYYYYYYYYYYYYYYYYYYYYY',
        'CONSUMER_KEY': "aaaaaaaaaaaaaaaaaaaaaaa",
        'CONSUMER_SECRET': 'HHHHHHHHHHHHHHHHHHHHHHHHHHHHHHHHHHHHHHHHHHHH',
        'ARCH_DIR': Curr_Path + sep + 'arch' + sep,
        'PROFILE_PATH': Curr_Path + sep + 'profile' + sep,
        'LOG_PATH': Curr_Path + sep + 'log' + sep,
        'REPORT_PATH': Curr_Path + sep + 'report',
        'APP_DESC_1': 'Feedback Communication',
        'DEBUG_IND': 'N',
        'INIT_PATH': Curr_Path
    }

For security reasons, I’ve removed the original keys with dummy keys. You have to fill-up your own keys.

2. clsTwitter.py (This script will fetch data from Twitter API & process the same & send it to the calling method.)

###############################################
#### Written By: SATYAKI DE                ####
#### Written On: 12-Oct-2019               ####
#### Modified On 12-Oct-2019               ####
####                                       ####
#### Objective: Main class fetching sample ####
#### data from Twitter API.                ####
###############################################

import twitter
from clsConfig import clsConfig as cf
import json
import re
import string
import logging

class clsTwitter:
    def __init__(self):
        self.access_token = cf.config['ACCESS_TOKEN']
        self.access_secret = cf.config['ACCESS_SECRET']
        self.consumer_key = cf.config['CONSUMER_KEY']
        self.consumer_secret = cf.config['CONSUMER_SECRET']

    def find_element(self, srcJson, key):
        """Pull all values of specified key from nested JSON."""
        arr = []

        def fetch(srcJson, arr, key):
            """Recursively search for values of key in JSON tree."""
            if isinstance(srcJson, dict):
                for k, v in srcJson.items():
                    if isinstance(v, (dict, list)):
                        fetch(v, arr, key)
                    elif k == key:
                        arr.append(v)
            elif isinstance(srcJson, list):
                for item in srcJson:
                    fetch(item, arr, key)
            return arr

        finJson = fetch(srcJson, arr, key)
        return finJson

    def searchQry(self, rawQry):
        try:
            fin_dict = {}
            finJson = ''
            res = ''
            cnt = 0

            # Parameters to invoke Twitter API
            ACCESS_TOKEN = self.access_token
            ACCESS_SECRET = self.access_secret
            CONSUMER_KEY = self.consumer_key
            CONSUMER_SECRET = self.consumer_secret

            tmpR20 = 'Raw Query: ' + str(rawQry)
            logging.info(tmpR20)

            finJson = '['

            if rawQry == '':
                print('No data to proceed!')
                logging.info('No data to proceed!')
            else:
                t = twitter.Api(
                                  consumer_key = CONSUMER_KEY,
                                  consumer_secret = CONSUMER_SECRET,
                                  access_token_key = ACCESS_TOKEN,
                                  access_token_secret = ACCESS_SECRET
                               )

                response = t.GetSearch(raw_query=rawQry)
                print('Total Records fetched:', str(len(response)))

                for i in response:

                    # Converting them to json
                    data = str(i)
                    res_json = json.loads(data)

                    # Calling individual key
                    id = res_json['id']
                    tmpR19 = 'Id: ' + str(id)
                    logging.info(tmpR19)

                    try:
                        f_count = res_json['quoted_status']['user']['followers_count']
                    except:
                        f_count = 0
                    tmpR21 = 'Followers Count: ' + str(f_count)
                    logging.info(tmpR21)

                    try:
                        r_count = res_json['quoted_status']['retweet_count']
                    except:
                        r_count = 0
                    tmpR22 = 'Retweet Count: ' + str(r_count)
                    logging.info(tmpR22)

                    text = self.find_element(res_json, 'text')

                    for j in text:
                        strF = re.sub(f'[^{re.escape(string.printable)}]', '', str(j))
                        pat = re.compile(r'[\t\n]')
                        strG = pat.sub("", strF)
                        res = "".join(strG)

                    # Forming return dictionary
                    #fin_dict.update({id:'id', f_count: 'followerCount', r_count: 'reTweetCount', res: 'msgPost'})
                    if cnt == 0:
                        finJson = finJson + '{"id":' + str(id) + ',"followerCount":' + str(f_count) + ',"reTweetCount":' + str(r_count) + ', "msgPost":"' + str(res) + '"}'
                    else:
                        finJson = finJson + ', {"id":' + str(id) + ',"followerCount":' + str(f_count) + ',"reTweetCount":' + str(r_count) + ', "msgPost":"' + str(res) + '"}'

                    cnt += 1

            finJson = finJson + ']'

            jdata = json.dumps(finJson)
            ResJson = json.loads(jdata)

            return ResJson

        except Exception as e:
            ResJson = ''
            x = str(e)
            print(x)

            logging.info(x)
            ResJson = {'errorDetails' : x}

            return ResJson

The key lines from this snippet are as follows –

def find_element(self, srcJson, key):
    """Pull all values of specified key from nested JSON."""
    arr = []

    def fetch(srcJson, arr, key):
        """Recursively search for values of key in JSON tree."""
        if isinstance(srcJson, dict):
            for k, v in srcJson.items():
                if isinstance(v, (dict, list)):
                    fetch(v, arr, key)
                elif k == key:
                    arr.append(v)
        elif isinstance(srcJson, list):
            for item in srcJson:
                fetch(item, arr, key)
        return arr

    finJson = fetch(srcJson, arr, key)
    return finJson

This function will check against a specific key & based on that it will search from the supplied JSON & returns the value. This would be particularly very useful when you don’t have any fixed position of your elements.

t = twitter.Api(
                  consumer_key = CONSUMER_KEY,
                  consumer_secret = CONSUMER_SECRET,
                  access_token_key = ACCESS_TOKEN,
                  access_token_secret = ACCESS_SECRET
               )

response = t.GetSearch(raw_query=rawQry)

In this case, Python application will receive the JSON response using the new Twitter API.

id = res_json['id']
try:
    f_count = res_json['quoted_status']['user']['followers_count']
except:
    f_count = 0
try:
    r_count = res_json['quoted_status']['retweet_count']
except:
    r_count = 0

Fetching specific fixed position elements from the response API.

text = self.find_element(res_json, 'text')

Fetching the dynamic position based element using our customized function.

for j in text:
    strF = re.sub(f'[^{re.escape(string.printable)}]', '', str(j))
    pat = re.compile(r'[\t\n]')
    strG = pat.sub("", strF)
    res = "".join(strG)

Removing non-printable characters & white spaces from the extracted text field in order to get clean data.

if cnt == 0:
    finJson = finJson + '{"id":' + str(id) + ',"followerCount":' + str(f_count) + ',"reTweetCount":' + str(r_count) + ', "msgPost":"' + str(res) + '"}'
else:
    finJson = finJson + ', {"id":' + str(id) + ',"followerCount":' + str(f_count) + ',"reTweetCount":' + str(r_count) + ', "msgPost":"' + str(res) + '"}'

Finally, generating a JSON string dynamically.

jdata = json.dumps(finJson)
ResJson = json.loads(jdata)

And, returning the JSON to our calling program.

3. callTwitterAPI.py (This is the main script that will invoke the Twitter API & then project the analytic report based on the available Twitter data.)

##############################################
#### Written By: SATYAKI DE               ####
#### Written On: 12-Oct-2019              ####
#### Modified On 12-Oct-2019              ####
####                                      ####
#### Objective: Main calling scripts.     ####
##############################################

from clsConfig import clsConfig as cf
import pandas as p
import clsL as cl
import logging
import datetime
import json
import clsTwitter as ct

# Disbling Warning
def warn(*args, **kwargs):
    pass

import warnings
warnings.warn = warn

def getMaximumFollower(df):
    try:
        d1 = df['followerCount'].max()
        d1_max_str = int(d1)

        return d1_max_str
    except Exception as e:
        x = str(e)
        print(x)
        dt_part1 = 0

        return dt_part1

def getMaximumRetweet(df):
    try:
        d1 = df['reTweetCount'].max()
        d1_max_str = int(d1)

        return d1_max_str
    except Exception as e:
        x = str(e)
        print(x)
        dt_part1 = ''

        return dt_part1

# Lookup functions from
# Azure cloud SQL DB

var = datetime.datetime.now().strftime("%Y-%m-%d_%H-%M-%S")

def main():
    try:
        dfSrc = p.DataFrame()
        df_ret = p.DataFrame()
        ret_2 = ''
        debug_ind = 'Y'

        general_log_path = str(cf.config['LOG_PATH'])

        # Enabling Logging Info
        logging.basicConfig(filename=general_log_path + 'consolidatedTwitter.log', level=logging.INFO)

        # Initiating Log Class
        l = cl.clsL()

        # Moving previous day log files to archive directory
        arch_dir = cf.config['ARCH_DIR']
        log_dir = cf.config['LOG_PATH']

        tmpR0 = "*" * 157

        logging.info(tmpR0)
        tmpR9 = 'Start Time: ' + str(var)
        logging.info(tmpR9)
        logging.info(tmpR0)

        print("Archive Directory:: ", arch_dir)
        print("Log Directory::", log_dir)
        tmpR1 = 'Log Directory::' + log_dir
        logging.info(tmpR1)

        # Query using parameters
        rawQry = 'q=from%3ABlades_analytic&src=typd'

        x1 = ct.clsTwitter()
        ret_2 = x1.searchQry(rawQry)

        # Capturing the JSON Payload
        res = json.loads(ret_2)

        # Converting dictionary to Pandas Dataframe
        df_ret = p.read_json(ret_2, orient='records')

        # Resetting the column orders as per JSON
        df_ret = df_ret[list(res[0].keys())]

        l.logr('1.Twitter_' + var + '.csv', debug_ind, df_ret, 'log')

        print('Realtime Twitter Data:: ')
        logging.info('Realtime Twitter Data:: ')
        print(df_ret)
        print()

        # Checking execution status
        ret_val_2 = df_ret.shape[0]

        if ret_val_2 == 0:
            print("Twitter hasn't returned any rows. Please check your queries!")
            logging.info("Twitter hasn't returned any rows. Please check your queries!")
            print("*" * 157)
            logging.info(tmpR0)
        else:
            print("Successfuly row feteched!")
            logging.info("Successfuly row feteched!")
            print("*" * 157)
            logging.info(tmpR0)

        print('Finding Story points..')
        print("*" * 157)
        logging.info('Finding Story points..')
        logging.info(tmpR0)

        # Performing Basic Aggregate
        # 1. Find the user who has maximum Followers
        df_ret['MaxFollower'] = getMaximumFollower(df_ret)

        # 2. Find the user who has maximum Re-Tweets
        df_ret['MaxTweet'] = getMaximumRetweet(df_ret)

        # Getting Status
        df_MaxFollower = df_ret[(df_ret['followerCount'] == df_ret['MaxFollower'])]

        # Dropping Columns
        df_MaxFollower.drop(['reTweetCount'], axis=1, inplace=True)
        df_MaxFollower.drop(['MaxTweet'], axis=1, inplace=True)

        l.logr('2.Twitter_Maximum_Follower_' + var + '.csv', debug_ind, df_MaxFollower, 'log')

        print('Maximum Follower:: ')
        print(df_MaxFollower)
        print("*" * 157)
        logging.info(tmpR0)

        df_MaxTwitter = df_ret[(df_ret['reTweetCount'] == df_ret['MaxTweet'])]
        print()

        # Dropping Columns
        df_MaxTwitter.drop(['followerCount'], axis=1, inplace=True)
        df_MaxTwitter.drop(['MaxFollower'], axis=1, inplace=True)

        l.logr('3.Twitter_Maximum_Retweet_' + var + '.csv', debug_ind, df_MaxTwitter, 'log')

        print('Maximum Re-Twitt:: ')
        print(df_MaxTwitter)
        print("*" * 157)
        logging.info(tmpR0)

        tmpR10 = 'End Time: ' + str(var)
        logging.info(tmpR10)
        logging.info(tmpR0)

    except ValueError:
        print("No relevant data to proceed!")
        logging.info("No relevant data to proceed!")

    except Exception as e:
        print("Top level Error: args:{0}, message{1}".format(e.args, e.message))

if __name__ == "__main__":
    main()

And, here are the key lines –

x1 = ct.clsTwitter()
ret_2 = x1.searchQry(rawQry)

Our application is instantiating the newly developed class.

# Capturing the JSON Payload
res = json.loads(ret_2)

# Converting dictionary to Pandas Dataframe
df_ret = p.read_json(ret_2, orient='records')

# Resetting the column orders as per JSON
df_ret = df_ret[list(res[0].keys())]

Converting the JSON to pandas dataframe for our analytic data point.

def getMaximumFollower(df):
    try:
        d1 = df['followerCount'].max()
        d1_max_str = int(d1)

        return d1_max_str
    except Exception as e:
        x = str(e)
        print(x)
        dt_part1 = 0

        return dt_part1

def getMaximumRetweet(df):
    try:
        d1 = df['reTweetCount'].max()
        d1_max_str = int(d1)

        return d1_max_str
    except Exception as e:
        x = str(e)
        print(x)
        dt_part1 = ''

        return dt_part1

These two functions declared above in the calling script are generating the maximum data point from the Re-Tweet & Followers from our returned dataset.

# Getting Status
df_MaxFollower = df_ret[(df_ret['followerCount'] == df_ret['MaxFollower'])]

And, this is the way, our application will fetch the maximum twitter dataset –

df_MaxTwitter = df_ret[(df_ret['reTweetCount'] == df_ret['MaxTweet'])]

And, you can customize your output by dropping unwanted columns in the specific dataset.

And, here is the output on Windows, which looks like –

8. WindowsRun

And, here is the windows log directory –

WindowsRunLog

So, we’ve achieved our target data point.

So, we’ll come out with another exciting post in the coming days!

N.B.: This is demonstrated for RnD/study purposes. All the data posted here are representational data & available over the internet.

Explaining New Python Library – Regular Expression in JSON

Hi Guys!

As discussed, here is the continuation of the previous post. We’ll explain the regular expression from the library that I’ve created recently.

First, let me share the calling script for regular expression –

##############################################
#### Written By: SATYAKI DE               ####
#### Written On: 08-Sep-2019              ####
####                                      ####
#### Objective: Main calling scripts.     ####
##############################################

from dnpr.clsDnpr import clsDnpr
import datetime as dt
import json

# Disbling Warning
def warn(*args, **kwargs):
    pass

import warnings
warnings.warn = warn

# Lookup functions from
# Azure cloud SQL DB

def main():
    try:
        # Initializing the class
        t = clsDnpr()
        
        srcJson = [
                    {"FirstName": "Satyaki", "LastName": "De", "Sal": 1000},
                    {"FirstName": "Satyaki", "LastName": "De", "Sal": 1000},
                    {"FirstName": "Archi", "LastName": "Bose", "Sal": 500},
                    {"FirstName": "Archi", "LastName": "Bose", "Sal": 7000},
                    {"FirstName": "Deb", "LastName": "Sen", "Sal": 9500}
                  ]

        print("4. Checking regular expression functionality!")
        print()

        var13 = dt.datetime.now().strftime("%Y-%m-%d %H-%M-%S")
        print("Start Time: ", str(var13))

        print('::Function Regex_Like:: ')
        print()

        tarColumn = 'FirstName'
        print('Target Column for Rexex_Like: ', tarColumn)
        inpPattern = r"\bSa"
        print('Input Pattern: ', str(inpPattern))

        # Invoking the distinct function
        tarJson = t.regex_like(srcJson, tarColumn, inpPattern)

        print('End of Function Regex_Like!')
        print()

        print("*" * 157)
        print("Output Data: ")
        tarJsonFormat = json.dumps(tarJson, indent=1)
        print(str(tarJsonFormat))
        print("*" * 157)

        if not tarJson:
            print()
            print("No relevant output data!")
            print("*" * 157)
        else:
            print()
            print("Relevant output data comes!")
            print("*" * 157)

        var14 = dt.datetime.now().strftime("%Y-%m-%d %H-%M-%S")
        print("End Time: ", str(var14))

        var15 = dt.datetime.now().strftime("%Y-%m-%d %H-%M-%S")
        print("Start Time: ", str(var15))

        print('::Function Regex_Replace:: ')
        print()

        tarColumn = 'FirstName'
        print('Target Column for Rexex_Replace: ', tarColumn)
        inpPattern = r"\bSa"
        print('Input Pattern: ', str(inpPattern))
        replaceString = 'Ka'
        print('Replacing Character: ', replaceString)

        # Invoking the distinct function
        tarJson = t.regex_replace(srcJson, tarColumn, inpPattern, replaceString)

        print('End of Function Rexex_Replace!')
        print()

        print("*" * 157)
        print("Output Data: ")
        tarJsonFormat = json.dumps(tarJson, indent=1)
        print(str(tarJsonFormat))
        print("*" * 157)

        if not tarJson:
            print()
            print("No relevant output data!")
            print("*" * 157)
        else:
            print()
            print("Relevant output data comes!")
            print("*" * 157)

        var16 = dt.datetime.now().strftime("%Y-%m-%d %H-%M-%S")
        print("End Time: ", str(var16))

        var17 = dt.datetime.now().strftime("%Y-%m-%d %H-%M-%S")
        print("Start Time: ", str(var17))

        print('::Function Regex_Substr:: ')
        print()

        tarColumn = 'FirstName'
        print('Target Column for Regex_Substr: ', tarColumn)
        inpPattern = r"\bSa"
        print('Input Pattern: ', str(inpPattern))

        # Invoking the distinct function
        tarJson = t.regex_substr(srcJson, tarColumn, inpPattern)

        print('End of Function Regex_Substr!')
        print()

        print("*" * 157)
        print("Output Data: ")
        tarJsonFormat = json.dumps(tarJson, indent=1)
        print(str(tarJsonFormat))
        print("*" * 157)

        if not tarJson:
            print()
            print("No relevant output data!")
            print("*" * 157)
        else:
            print()
            print("Relevant output data comes!")
            print("*" * 157)

        var18 = dt.datetime.now().strftime("%Y-%m-%d %H-%M-%S")
        print("End Time: ", str(var18))

        print("=" * 157)
        print("End of regular expression function!")
        print("=" * 157)


    except ValueError:
        print("No relevant data to proceed!")

    except Exception as e:
        print("Top level Error: args:{0}, message{1}".format(e.args, e.message))

if __name__ == "__main__":
    main()

As per the library, we’ll discuss the following functionalities –

  1. regex_like
  2. regex_replace
  3. regex_substr

Now, let us check how to call these functions.

1. regex_like:

Following is the base skeleton in order to invoke this function –

regex_like(Input Json, Target Column, Pattern To Match) return Output Json

Here are the key lines in the script –

srcJson = [
            {"FirstName": "Satyaki", "LastName": "De", "Sal": 1000},
            {"FirstName": "Satyaki", "LastName": "De", "Sal": 1000},
            {"FirstName": "Archi", "LastName": "Bose", "Sal": 500},
            {"FirstName": "Archi", "LastName": "Bose", "Sal": 7000},
            {"FirstName": "Deb", "LastName": "Sen", "Sal": 9500}
          ]

# Invoking the distinct function
tarJson = t.regex_like(srcJson, tarColumn, inpPattern)

2. regex_replace:

Following is the base skeleton in order to invoke this function –

regex_replace(Input Json, Target Column, Pattern to Replace) return Output Json

Here are the key lines in the script –

tarColumn = 'FirstName'
print('Target Column for Rexex_Replace: ', tarColumn)
inpPattern = r"\bSa"
print('Input Pattern: ', str(inpPattern))
replaceString = 'Ka'
print('Replacing Character: ', replaceString)

# Invoking the distinct function
tarJson = t.regex_replace(srcJson, tarColumn, inpPattern, replaceString)

As you can see, here ‘Sa’ with ‘Ka’ provided it matches the specific pattern in the JSON.

3. regex_replace:

Following is the base skeleton in order to invoke this function –

regex_substr(Input Json, Target Column, Pattern to substring) return Output Json

Here are the key lines –

tarColumn = 'FirstName'
print('Target Column for Regex_Substr: ', tarColumn)
inpPattern = r"\bSa"
print('Input Pattern: ', str(inpPattern))

# Invoking the distinct function
tarJson = t.regex_substr(srcJson, tarColumn, inpPattern)

In this case, we’ve subtracted a part of the JSON string & return the final result as JSON.

Let us first see the sample input JSON –

SourceJSON_Regex

Let us check how it looks when we run the calling script –

  • regex_like:
Regex_Like

This function will retrieve the elements, which will start with ‘Sa‘. As a result, we’ll see the following two elements in the Payload.

  • regex_replace:
Regex_Replace

In this case, we’re replacing any string which starts with ‘Sa‘ & replaced with the ‘Ka‘.

  • regex_substr:
Regex_Substr

As you can see that the first element FirstName changed the name from “Satyaki” to “tyaki“.

So, finally, we’ve achieved our target.

I’ll post the next exciting concept very soon.

Till then! Happy Avenging! 😀

N.B.: This is demonstrated for RnD/study purposes. All the data posted here are representational data & available over the internet.

Building an Azure Function using Python (Crossover between Reality Stone & Time Stone in Python Verse)

Hi Guys!

Today, we’ll be discussing a preview features from Microsoft Azure. Building an Azure function using Python on it’s Linux/Ubuntu VM. Since this is a preview feature, we cannot implement this to production till now. However, my example definitely has more detailed steps & complete code guide compared to whatever available over the internet.

In this post, I will take one of my old posts & enhance it as per this post. Hence, I’ll post those modified scripts. However, I won’t discuss the logic in details as most of these scripts have cosmetic changes to cater to this requirement.

In this post, we’ll only show Ubuntu run & there won’t be Windows or MAC comparison.

Initial Environment Preparation:

  1. Set-up new virtual machine on Azure.
  2. Set-up Azure function environments on that server.

Set-up new virtual machine on Azure:

I’m not going into the details of how to create Ubuntu VM on Microsoft Azure. You can refer the steps in more information here.

After successful creation, the VM will look like this –

Azure VM - Ubuntu

Detailed information you can get after clicking this hyperlink over the name of the VM.

Azure-VM Basic Details

You have to open port 7071 for application testing from the local using postman.

You can get it from the network option under VM as follows –

Network-Configuration

Make sure that you are restricting these ports to specific network & not open to ALL traffic.

So, your VM is ready now.

To update Azure CLI, you need to use the following commands –

sudo apt-get update && sudo apt-get install –only-upgrade -y azure-cli

Set-up Azure function environments on that server:

To set-up the environment, you don’t have to go for Python installation as by default Ubuntu in Microsoft Azure comes up with desired Python version, i.e., Python3.6. However, to run the python application, you need to install the following app –

  1. Microsoft SDK. You will get the details from this link.
  2. Installing node-js. You will get the details from this link.
  3. You need to install a docker. However, as per Microsoft official version, this is not required. But, you can create a Docker container to distribute the python function in Azure application. I would say you can install this just in case if you want to continue with this approach. You will get the details over here. If you want to know details about the Docker. And, how you want to integrate python application. You can refer to this link.
  4. Your desired python packages. In this case, we’ll be modifying this post – “Encryption/Decryption, JSON, API, Flask Framework in Python (Crossover between Reality Stone & Time Stone in Python Verse).” We’ll be modifying a couple of lines only to cater to this functionality & deploying the same as an Azure function.
  5. Creating an Azure function template on Ubuntu. The essential detail you’ll get it from here. However, over there, it was not shown in detailed steps of python packages & how you can add all the dependencies to publish it in details. It was an excellent post to start-up your knowledge.

Let’s see these components status & very brief details –

Microsoft SDK:

To check the dot net version. You need to type the following commands in Ubuntu –

dotnet –info

And, the output will look like this –

DotNet-Version

Node-Js:

Following is the way to verify your node-js version & details –

node -v

npm -v

And, the output looks like this –

Node-Js

Docker:

Following is the way to test your docker version –

docker -v

And, the output will look like this –

Docker-Version

Python Packages:

Following are the python packages that we need to run & publish that in Azure cloud as an Azure function –

pip freeze | grep -v “pkg-resources” > requirements.txt

And, the output is –

Requirements

You must be wondered that why have I used this grep commands here. I’ve witnessed that on many occassion in Microsoft Azure’s Linux VM it produces one broken package called resource=0.0.0, which will terminate the deployment process. Hence, this is very crucial to eliminate those broken packages.

Now, we’re ready for our python scripts. But, before that, let’s see the directory structure over here –

Win_Vs_Ubuntu-Cloud

Creating an Azure Function Template on Ubuntu: 

Before we post our python scripts, we’ll create these following components, which is essential for our Python-based Azure function –

  • Creating a group:

              Creating a group either through Azure CLI or using a docker, you can proceed. The commands for Azure CLI is as follows –

az group create –name “rndWestUSGrp” –location westus

It is advisable to use double quotes for parameters value. Otherwise, you might land-up getting the following error – “Error: “resourceGroupName” should satisfy the constraint – “Pattern”: /^[-w._]+$/“.

I’m sure. You don’t want to face that again. And, here is the output –

CreateDeploymentGroup

Note that, here I haven’t used the double-quotes. But, to avoid any unforeseen issues – you should use double-quotes. You can refer the docker command from the above link, which I’ve shared earlier.

Now, you need to create one storage account where the metadata information of your function will be stored. You will create that as follows –

az storage account create –name cryptpy2019 –location westus –resource-group rndWestUSGrp –sku Standard_LRS

And, the output will look like this –

AccountCreate_1

Great. Now, we’ll create a virtual environment for Python3.6.

python3.6 -m venv .env
source .env/bin/activate

Python-VM

Now, we’ll create a local function project.

func init encPro

And, the output you will get is as follows –

Local-Function

Inside this directory, you’ll see the following files –

Local-Function-Details

You need to edit the host.json with these default lines –

{
 “version”: “2.0”,
 “extensionBundle”: {
                                       “id”: “Microsoft.Azure.Functions.ExtensionBundle”,
                                       “version”: “[1.*, 2.0.0)”
                                     }
}

And, the final content of these two files (excluding the requirements.txt) will look like this –

Configuration

Finally, we’ll create the template function by this following command –

func new

This will follow with steps finish it. You need to choose Python as your programing language. You need to choose an HTTP trigger template. Once you created that successfully, you’ll see the following files –

func_New

Note that, our initial function name is -> getVal.

By default, Azure will generate some default code inside the __init__.py. The details of those two files can be found here.

Since we’re ready with our environment setup. We can now discuss our Python scripts –

1. clsConfigServer.py (This script contains all the parameters of the server.)

###########################################
#### Written By: SATYAKI DE        ########
#### Written On: 10-Feb-2019       ########
####                               ########
#### Objective: Parameter File     ########
###########################################

import os
import platform as pl

# Checking with O/S system
os_det = pl.system()

class clsConfigServer(object):
    Curr_Path = os.path.dirname(os.path.realpath(__file__))

    if os_det == "Windows":
        config = {
            'FILE': 'acct_addr_20180112.csv',
            'SRC_FILE_PATH': Curr_Path + '\\' + 'src_file\\',
            'PROFILE_FILE_PATH': Curr_Path + '\\' + 'profile\\',
            'HOST_IP_ADDR': '0.0.0.0',
            'DEF_SALT': 'iooquzKtqLwUwXG3rModqj_fIl409vemWg9PekcKh2o=',
            'ACCT_NBR_SALT': 'iooquzKtqLwUwXG3rModqj_fIlpp1vemWg9PekcKh2o=',
            'NAME_SALT': 'iooquzKtqLwUwXG3rModqj_fIlpp1026Wg9PekcKh2o=',
            'PHONE_SALT': 'iooquzKtqLwUwXG3rMM0F5_fIlpp1026Wg9PekcKh2o=',
            'EMAIL_SALT': 'iooquzKtqLwU0653rMM0F5_fIlpp1026Wg9PekcKh2o='
        }
    else:
        config = {
            'FILE': 'acct_addr_20180112.csv',
            'SRC_FILE_PATH': Curr_Path + '/' + 'src_file/',
            'PROFILE_FILE_PATH': Curr_Path + '/' + 'profile/',
            'HOST_IP_ADDR': '0.0.0.0',
            'DEF_SALT': 'iooquzKtqLwUwXG3rModqj_fIl409vemWg9PekcKh2o=',
            'ACCT_NBR_SALT': 'iooquzKtqLwUwXG3rModqj_fIlpp1vemWg9PekcKh2o=',
            'NAME_SALT': 'iooquzKtqLwUwXG3rModqj_fIlpp1026Wg9PekcKh2o=',
            'PHONE_SALT': 'iooquzKtqLwUwXG3rMM0F5_fIlpp1026Wg9PekcKh2o=',
            'EMAIL_SALT': 'iooquzKtqLwU0653rMM0F5_fIlpp1026Wg9PekcKh2o='
        }

2. clsEnDec.py (This script is a lighter version of encryption & decryption of our previously discussed scenario. Hence, we won’t discuss in details. You can refer my earlier post to understand the logic of this script.)

###########################################
#### Written By: SATYAKI DE        ########
#### Written On: 25-Jan-2019       ########
#### Package Cryptography needs to ########
#### install in order to run this  ########
#### script.                       ########
####                               ########
#### Objective: This script will   ########
#### encrypt/decrypt based on the  ########
#### hidden supplied salt value.   ########
###########################################

from cryptography.fernet import Fernet
import logging

from getVal.clsConfigServer import clsConfigServer as csf

class clsEnDec(object):

    def __init__(self):
        # Calculating Key
        self.token = str(csf.config['DEF_SALT'])

    def encrypt_str(self, data, token):
        try:
            # Capturing the Salt Information
            t1 = self.token
            t2 = token

            if t2 == '':
                salt = t1
            else:
                salt = t2

            logging.info("Encrypting the value!")

            # Checking Individual Types inside the Dataframe
            cipher = Fernet(salt)
            encr_val = str(cipher.encrypt(bytes(data,'utf8'))).replace("b'","").replace("'","")

            strV1 = "Encrypted value:: " + str(encr_val)
            logging.info(strV1)

            return encr_val

        except Exception as e:
            x = str(e)
            print(x)
            encr_val = ''

            return encr_val

    def decrypt_str(self, data, token):
        try:
            # Capturing the Salt Information
            t1 = self.token
            t2 = token

            if t2 == '':
                salt = t1
            else:
                salt = t2

            logging.info("Decrypting the value!")

            # Checking Individual Types inside the Dataframe
            cipher = Fernet(salt)
            decr_val = str(cipher.decrypt(bytes(data,'utf8'))).replace("b'","").replace("'","")

            strV2 = "Decrypted value:: " + str(decr_val)
            logging.info(strV2)

            return decr_val

        except Exception as e:
            x = str(e)
            print(x)
            decr_val = ''

            return decr_val

3. clsFlask.py (This is the main server script that will the encrypt/decrypt class from our previous scenario. This script will capture the requested JSON from the client, who posted from the clients like another python script or third-party tools like Postman.)

###########################################
#### Written By: SATYAKI DE            ####
#### Written On: 25-Jan-2019           ####
#### Package Flask package needs to    ####
#### install in order to run this      ####
#### script.                           ####
####                                   ####
#### Objective: This script will       ####
#### encrypt/decrypt based on the      ####
#### supplied salt value. Also,        ####
#### this will capture the individual  ####
#### element & stored them into JSON   ####
#### variables using flask framework.  ####
###########################################

from getVal.clsConfigServer import clsConfigServer as csf
from getVal.clsEnDec import clsEnDecAuth

getVal = clsEnDec()

import logging

class clsFlask(object):
    def __init__(self):
        self.xtoken = str(csf.config['DEF_SALT'])

    def getEncryptProcess(self, dGroup, input_data, dTemplate):
        try:
            # It is sending default salt value
            xtoken = self.xtoken

            # Capturing the individual element
            dGroup = dGroup
            input_data = input_data
            dTemplate = dTemplate

            # This will check the mandatory json elements
            if ((dGroup != '') & (dTemplate != '')):

                # Based on the Group & Element it will fetch the salt
                # Based on the specific salt it will encrypt the data
                if ((dGroup == 'GrDet') & (dTemplate == 'subGrAcct_Nbr')):
                    xtoken = str(csf.config['ACCT_NBR_SALT'])

                    strV1 = "xtoken: " + str(xtoken)
                    logging.info(strV1)
                    strV2 = "Flask Input Data: " + str(input_data)
                    logging.info(strV2)

                    #x = cen.clsEnDecAuth()
                    ret_val = getVal.encrypt_str(input_data, xtoken)
                elif ((dGroup == 'GrDet') & (dTemplate == 'subGrName')):
                    xtoken = str(csf.config['NAME_SALT'])

                    strV1 = "xtoken: " + str(xtoken)
                    logging.info(strV1)
                    strV2 = "Flask Input Data: " + str(input_data)
                    logging.info(strV2)

                    #x = cen.clsEnDecAuth()
                    ret_val = getVal.encrypt_str(input_data, xtoken)
                elif ((dGroup == 'GrDet') & (dTemplate == 'subGrPhone')):
                    xtoken = str(csf.config['PHONE_SALT'])

                    strV1 = "xtoken: " + str(xtoken)
                    logging.info(strV1)
                    strV2 = "Flask Input Data: " + str(input_data)
                    logging.info(strV2)

                    #x = cen.clsEnDecAuth()
                    ret_val = getVal.encrypt_str(input_data, xtoken)
                elif ((dGroup == 'GrDet') & (dTemplate == 'subGrEmail')):
                    xtoken = str(csf.config['EMAIL_SALT'])

                    strV1 = "xtoken: " + str(xtoken)
                    logging.info(strV1)
                    strV2 = "Flask Input Data: " + str(input_data)
                    logging.info(strV2)

                    #x = cen.clsEnDecAuth()
                    ret_val = getVal.encrypt_str(input_data, xtoken)
                else:
                    ret_val = ''
            else:
                ret_val = ''

            # Return value
            return ret_val

        except Exception as e:
            ret_val = ''
            # Return the valid json Error Response
            return ret_val

    def getDecryptProcess(self, dGroup, input_data, dTemplate):
        try:
            xtoken = self.xtoken

            # Capturing the individual element
            dGroup = dGroup
            input_data = input_data
            dTemplate = dTemplate

            # This will check the mandatory json elements
            if ((dGroup != '') & (dTemplate != '')):

                # Based on the Group & Element it will fetch the salt
                # Based on the specific salt it will decrypt the data
                if ((dGroup == 'GrDet') & (dTemplate == 'subGrAcct_Nbr')):
                    xtoken = str(csf.config['ACCT_NBR_SALT'])

                    strV1 = "xtoken: " + str(xtoken)
                    logging.info(strV1)
                    strV2 = "Flask Input Data: " + str(input_data)
                    logging.info(strV2)

                    #x = cen.clsEnDecAuth()
                    ret_val = getVal.decrypt_str(input_data, xtoken)
                elif ((dGroup == 'GrDet') & (dTemplate == 'subGrName')):
                    xtoken = str(csf.config['NAME_SALT'])

                    strV1 = "xtoken: " + str(xtoken)
                    logging.info(strV1)
                    strV2 = "Flask Input Data: " + str(input_data)
                    logging.info(strV2)

                    #x = cen.clsEnDecAuth()
                    ret_val = getVal.decrypt_str(input_data, xtoken)
                elif ((dGroup == 'GrDet') & (dTemplate == 'subGrPhone')):
                    xtoken = str(csf.config['PHONE_SALT'])

                    strV1 = "xtoken: " + str(xtoken)
                    logging.info(strV1)
                    strV2 = "Flask Input Data: " + str(input_data)
                    logging.info(strV2)

                    #x = cen.clsEnDecAuth()
                    ret_val = getVal.decrypt_str(input_data, xtoken)
                elif ((dGroup == 'GrDet') & (dTemplate == 'subGrEmail')):
                    xtoken = str(csf.config['EMAIL_SALT'])

                    strV1 = "xtoken: " + str(xtoken)
                    logging.info(strV1)
                    strV2 = "Flask Input Data: " + str(input_data)
                    logging.info(strV2)

                    #x = cen.clsEnDecAuth()
                    ret_val = getVal.decrypt_str(input_data, xtoken)
                else:
                    ret_val = ''
            else:
                ret_val = ''

            # Return value
            return ret_val

        except Exception as e:
            ret_val = ''
            # Return the valid Error Response
            return ret_val

4. __init__.py (This autogenerated script contains the primary calling methods of encryption & decryption based on the element header & values after enhanced as per the functionality.)

###########################################
#### Written By: SATYAKI DE            ####
#### Written On: 08-Jun-2019           ####
#### Package Flask package needs to    ####
#### install in order to run this      ####
#### script.                           ####
####                                   ####
#### Objective: Main Calling scripts.  ####
#### This is an autogenrate scripts.   ####
#### However, to meet the functionality####
#### we've enhanced as per our logic.  ####
###########################################
__all__ = ['clsFlask']

import logging
import azure.functions as func
import json

from getVal.clsFlask import clsFlask

getVal = clsFlask()

def main(req: func.HttpRequest) -> func.HttpResponse:
    logging.info('Python Encryption function processed a request.')

    str_val = 'Input Payload:: ' + str(req.get_json())
    str_1 = str(req.get_json())

    logging.info(str_val)

    ret_val = {}
    DataIn = ''
    dGroup = ''
    dTemplate = ''
    flg = ''

    if (str_1 != ''):
        try:
            req_body = req.get_json()
            dGroup = req_body.get('dataGroup')

            try:
                DataIn = req_body.get('data')
                strV15 = 'If Part:: ' + str(DataIn)

                logging.info(strV15)

                if ((DataIn == '') | (DataIn == None)):
                    raise ValueError

                flg = 'Y'
            except ValueError:
                DataIn = req_body.get('edata')
                strV15 = 'Else Part:: ' + str(DataIn)
                logging.info(strV15)
                flg = 'N'
            except:
                DataIn = req_body.get('edata')
                strV15 = 'Else Part:: ' + str(DataIn)
                logging.info(strV15)
                flg = 'N'

            dTemplate = req_body.get('dataTemplate')

        except ValueError:
            pass

    strV5 = "Encrypt Decrypt Flag:: " + flg
    logging.info(strV5)

    if (flg == 'Y'):

        if ((DataIn != '') & ((dGroup != '') & (dTemplate != ''))):

            logging.info("Encryption Started!")
            ret_val = getVal.getEncryptProcess(dGroup, DataIn, dTemplate)
            strVal2 = 'Return Payload:: ' + str(ret_val)
            logging.info(strVal2)

            xval = json.dumps(ret_val)

            return func.HttpResponse(xval)
        else:
            return func.HttpResponse(
                 "Please pass a data in the request body",
                 status_code=400
            )
    else:

        if ((DataIn != '') & ((dGroup != '') & (dTemplate != ''))):

            logging.info("Decryption Started!")
            ret_val2 = getVal.getDecryptProcess(dGroup, DataIn, dTemplate)
            strVal3 = 'Return Payload:: ' + str(ret_val)
            logging.info(strVal3)

            xval1 = json.dumps(ret_val2)

            return func.HttpResponse(xval1)
        else:
            return func.HttpResponse(
                "Please pass a data in the request body",
                status_code=400
            )

In this script, based on the value of an flg variable, we’re calling our encryption or decryption methods. And, the value of the flg variable is set based on the following logic –

try:
    DataIn = req_body.get('data')
    strV15 = 'If Part:: ' + str(DataIn)

    logging.info(strV15)

    if ((DataIn == '') | (DataIn == None)):
        raise ValueError

    flg = 'Y'
except ValueError:
    DataIn = req_body.get('edata')
    strV15 = 'Else Part:: ' + str(DataIn)
    logging.info(strV15)
    flg = 'N'
except:
    DataIn = req_body.get('edata')
    strV15 = 'Else Part:: ' + str(DataIn)
    logging.info(strV15)
    flg = 'N'

So, if the application gets the “data” element then – it will consider the data needs to be encrypted; otherwise, it will go for decryption. And, based on that – it is setting the value.

Now, we’re ready to locally run our application –

func host start

And, the output will look like this –

StartingAzureFunction-Python
StartingAzureFunction-Python 2

Let’s test it from postman –

Encrypt:

Postman-Encrypt

Decrypt:

Postman-Decrypt

Great. Now, we’re ready to publish this application to Azure cloud.

As in our earlier steps, we’ve already built our storage account for the metadata. Please scroll to top to view that again. Now, using that information, we’ll make the function app with a more meaningful name –

az functionapp create –resource-group rndWestUSGrp –os-type Linux \
–consumption-plan-location westus –runtime python \
–name getEncryptDecrypt –storage-account cryptpy2019

CreatingFunctionPython

Let’s publish the function –

sudo func azure functionapp publish “getEncryptDecrypt” –build-native-deps

On many occassion, without the use of “–build-native-deps” might leads to failure. Hence, I’ve added that to avoid such scenarios.

Publishing-Function

Now, we need to test our first published complex Azure function with Python through postman –

Encrypt:

PubishedFuncPostmanEncrypt

Decrypt:

PubishedFuncPostmanDecrypt

Wonderful! So, it is working.

You can see the function under the Azure portal –

Deployed-Function

Let’s see some other important features of this function –

Monitor: You can monitor two ways. One is by clicking the monitor options you will get the individual requests level details & also get to see the log information over here –

Function-Monitor-Details-1

Clicking Application Insights will give you another level of detailed logs, which can be very useful for debugging. We’ll touch this at the end of this post with a very brief discussion.

Function-Monitor-Details-3.JPG

As you can see, clicking individual lines will show the details further.

Let’s quickly check the application insights –

Application-Insights-1

Application Insights will give you a SQL like an interface where you can get the log details of all your requests.

Application-Insights-2

You can expand the individual details for further information.

Application-Insights-3

You can change the parameter name & other details & click the run button to get all the log details for your debugging purpose.

So, finally, we’ve achieved our goal. This is relatively long posts. But, I’m sure this will help you to create your first python-based function on the Azure platform.

Hope, you will like this approach. Let me know your comment on the same.

I’ll bring some more exciting topic in the coming days from the Python verse.

Till then, Happy Avenging! 😀

Note: All the data posted here are representational data & available over the internet.

Combining the NoSQL(Cosmos DB) & traditional Azure RDBMS in Azure (Time stone solo from Python verse)

Hi Guys!

Today, our main objective is to extend our last post & blending two different kinds of data using Python.

Please refer the earlier post if you didn’t go through it – “Building Azure cosmos application.“.

What is the Objective?

In this post, our objective is to combine traditional RDBMS from the cloud with Azure’s NO SQL, which is, in this case, is Cosmos DB. And, try to forecast some kind of blended information, which can be aggregated further.

Examining Source Data.

No SQL Data from Cosmos:

Let’s check one more time the No SQL data created in our last post.

CosmosData

Total, we’ve created 6 records in our last post.

As you can see in red marked areas. From item, one can check the total number of records created. You can also filter out specific record using the Edit Filter blue color button highlighted with blue box & you need to provide the “WHERE CLAUSE” inside it.

Azure SQL DB:

Let’s create some data in Azure SQL DB.

But, before that, you need to create SQL DB in the Azure cloud. Here is the official Microsoft link to create DB in Azure. You can refer to it here.

I won’t discuss the detailed steps of creating DB here.

From Azure portal, it looks like –

Azure SQL DB Main Screen

Let’s see how the data looks like in Azure DB. For our case, we’ll be using the hrMaster DB.

Let’s create the table & some sample data aligned as per our cosmos data.

Azure SQL DB

We will join both the data based on subscriberId & then extract our required columns in our final output.

CombinedData

Good. Now, we’re ready for python scripts.

Python Scripts:

In this installment, we’ll be reusing the following python scripts, which is already discussed in my earlier post –

  • clsL.py
  • clsColMgmt.py
  • clsCosmosDBDet.py

So, I’m not going to discuss these scripts.

Before we discuss our scripts, let’s look out the directory structures –

Win_Vs_MAC

Here is the detailed directory structure between the Windows & MAC O/S.

1. clsConfig.py (This script will create the split csv files or final merge file after the corresponding process. However, this can be used as usual verbose debug logging as well. Hence, the name comes into the picture.)

##############################################
#### Written By: SATYAKI DE               ####
#### Written On: 25-May-2019              ####
#### Updated On: 02-Jun-2019              ####
####                                      ####
#### Objective: This script is a config   ####
#### file, contains all the keys for      ####
#### azure cosmos db. Application will    ####
#### process these information & perform  ####
#### various CRUD operation on Cosmos DB. ####
##############################################

import os
import platform as pl

class clsConfig(object):
    Curr_Path = os.path.dirname(os.path.realpath(__file__))
    db_name = 'rnd-de01-usw2-vfa-cdb'
    db_link = 'dbs/' + db_name
    CONTAINER1 = "RealtimeEmail"
    CONTAINER2 = "RealtimeTwitterFeedback"
    CONTAINER3 = "RealtimeHR"

    os_det = pl.system()
    if os_det == "Windows":
        sep = '\\'
    else:
        sep = '/'

    config = {
        'SERVER': 'xxxx-xxx.database.windows.net',
        'DATABASE_1': 'SalesForceMaster',
        'DATABASE_2': 'hrMaster',
        'DATABASE_3': 'statMaster',
        'USERNAME': 'admin_poc_dev',
        'PASSWORD': 'xxxxx',
        'DRIVER': '{ODBC Driver 17 for SQL Server}',
        'ENV': 'pocdev-saty',
        'ENCRYPT_FLAG': "yes",
        'TRUST_FLAG': "no",
        'TIMEOUT_LIMIT': "30",
        'PROCSTAT': "'Y'",
        'APP_ID': 1,
        'EMAIL_SRC_JSON_FILE': Curr_Path + sep + 'src_file' + sep + 'srcEmail.json',
        'TWITTER_SRC_JSON_FILE': Curr_Path + sep + 'src_file' + sep + 'srcTwitter.json',
        'HR_SRC_JSON_FILE': Curr_Path + sep + 'src_file' + sep + 'srcHR.json',
        'COSMOSDB_ENDPOINT': 'https://rnd-de01-usw2-vfa-cdb.documents.azure.com:443/',
        'CONFIG_TABLE': 'ETL_CONFIG_TAB',
        'COSMOS_PRIMARYKEY': "XXXXXXXXXXXXXXXXXXXXXXXXXXXXXXXXXXXXXXXXXXXXXXXXXXXXXXXXXXXXIsI00AxKXXXXXgg==",
        'ARCH_DIR': Curr_Path + sep + 'arch' + sep,
        'COSMOSDB': db_name,
        'COSMOS_CONTAINER1': CONTAINER1,
        'COSMOS_CONTAINER2': CONTAINER2,
        'COSMOS_CONTAINER3': CONTAINER3,
        'CONFIG_ORIG': 'Config_orig.csv',
        'ENCRYPT_CSV': 'Encrypt_Config.csv',
        'DECRYPT_CSV': 'Decrypt_Config.csv',
        'PROFILE_PATH': Curr_Path + sep + 'profile' + sep,
        'LOG_PATH': Curr_Path + sep + 'log' + sep,
        'REPORT_PATH': Curr_Path + sep + 'report',
        'APP_DESC_1': 'Feedback Communication',
        'DEBUG_IND': 'N',
        'INIT_PATH': Curr_Path,
        'SQL_QRY_1': "SELECT c.subscriberId, c.sender, c.orderNo, c.orderDate, c.items.orderQty  FROM RealtimeEmail c",
        'SQL_QRY_2': "SELECT c.twitterId, c.Twit, c.DateCreated, c.Country FROM RealtimeTwitterFeedback c WHERE c.twitterId=@CrVal",
        'DB_QRY': "SELECT * FROM c",
        'AZURE_SQL_1': "SELECT DISTINCT subscriberId, state, country, annualIncome, customerType FROM dbo.onboardCustomer",
        'COLLECTION_QRY': "SELECT * FROM r",
        'database_link': db_link,
        'collection_link_1': db_link + '/colls/' + CONTAINER1,
        'collection_link_2': db_link + '/colls/' + CONTAINER2,
        'collection_link_3': db_link + '/colls/' + CONTAINER3,
        'options': {
            'offerThroughput': 1000,
            'enableCrossPartitionQuery': True,
            'maxItemCount': 2
        }
    }

Here, we’ve added a couple of more entries compared to the last time, which points the detailed configuration for Azure SQL DB.

‘SERVER’: ‘xxxx-xxx.database.windows.net’,
‘DATABASE_1’: ‘SalesForceMaster’,
‘DATABASE_2’: ‘hrMaster’,
‘DATABASE_3’: ‘statMaster’,
‘USERNAME’: ‘admin_poc_dev’,
‘PASSWORD’: ‘xxxxx’,
‘DRIVER’: ‘{ODBC Driver 17 for SQL Server}’,
‘ENV’: ‘pocdev-saty’,
‘ENCRYPT_FLAG’: “yes”,
‘TRUST_FLAG’: “no”,
‘TIMEOUT_LIMIT’: “30”,
‘PROCSTAT’: “‘Y'”, 

Here, you need to supply your DB credentials accordingly.

2. clsDBLookup.py (This script will look into the Azure SQL DB & fetch data from the traditional RDBMS of Azure environment.)

#####################################################
#### Written By: SATYAKI DE                      ####
#### Written On: 25-May-2019                     ####
####                                             ####
#### Objective: This script will check &         ####
#### test the connection with the Azure          ####
#### SQL DB & it will fetch all the records      ####
#### name resied under the same DB of a table.   ####
#####################################################

import pyodbc as py
import pandas as p
from clsConfig import clsConfig as cdc

class clsDBLookup(object):
    def __init__(self, lkpTableName = ''):
        self.server = cdc.config['SERVER']
        self.database = cdc.config['DATABASE_1']
        self.database1 = cdc.config['DATABASE_2']
        self.database2 = cdc.config['DATABASE_3']
        self.username = cdc.config['USERNAME']
        self.password = cdc.config['PASSWORD']
        self.driver = cdc.config['DRIVER']
        self.env = cdc.config['ENV']
        self.encrypt_flg = cdc.config['ENCRYPT_FLAG']
        self.trust_flg = cdc.config['TRUST_FLAG']
        self.timeout_limit = cdc.config['TIMEOUT_LIMIT']
        self.lkpTableName = cdc.config['CONFIG_TABLE']
        self.ProcStat = cdc.config['PROCSTAT']
        self.AppId = cdc.config['APP_ID']

    def LookUpData(self):
        try:
            # Assigning all the required values
            server = self.server
            database = self.database1
            username = self.username
            password = self.password
            driver = self.driver
            env = self.env
            encrypt_flg = self.encrypt_flg
            trust_flg = self.trust_flg
            timout_limit = self.timeout_limit
            lkpTableName = self.lkpTableName
            ProcStat = self.ProcStat
            AppId = self.AppId

            # Creating secure connection
            str_conn = 'Driver=' + driver + ';Server=tcp:' + server + ',1433;' \
                       'Database=' + database + ';Uid=' + username + '@' + env + ';' \
                       'Pwd=' + password + ';Encrypt=' + encrypt_flg + ';' \
                       'TrustServerCertificate=' + trust_flg + ';Connection Timeout=' + timout_limit + ';'

            db_con_azure = py.connect(str_conn)

            query = " SELECT [ruleId] as ruleId, [ruleName] as ruleName, [ruleSQL] as ruleSQL, " \
                    " [ruleFlag] as ruleFlag, [appId] as appId, [DBType] as DBType, " \
                    " [DBName] as DBName FROM [dbo][" + lkpTableName + "] WHERE ruleFLag = " + ProcStat + " " \
                    " and appId = " + AppId + " ORDER BY ruleId "

            df = p.read_sql(query, db_con_azure)

            # Closing the connection
            db_con_azure.close()

            return df
        except Exception as e:
            x = str(e)
            print(x)
            df = p.DataFrame()

            return df

    def azure_sqldb_read(self, sql):
        try:
            # Assigning all the required values
            server = self.server
            database = self.database1
            username = self.username
            password = self.password
            driver = self.driver
            env = self.env
            encrypt_flg = self.encrypt_flg
            trust_flg = self.trust_flg
            timout_limit = self.timeout_limit
            lkpTableName = self.lkpTableName
            ProcStat = self.ProcStat
            AppId = self.AppId

            # Creating secure connection
            str_conn = 'Driver=' + driver + ';Server=tcp:' + server + ',1433;' \
                       'Database=' + database + ';Uid=' + username + '@' + env + ';' \
                       'Pwd=' + password + ';Encrypt=' + encrypt_flg + ';' \
                       'TrustServerCertificate=' + trust_flg + ';Connection Timeout=' + timout_limit + ';'

            # print("Connection Details:: ", str_conn)
            db_con_azure = py.connect(str_conn)

            query = sql

            df = p.read_sql(query, db_con_azure)

            # Closing the connection
            db_con_azure.close()

            return df
        except Exception as e:
            x = str(e)
            print(x)
            df = p.DataFrame()

            return df

Major lines to discuss –

azure_sqldb_read(self, sql):

Getting the source SQL supplied from the configuration script.

db_con_azure = py.connect(str_conn)

query = sql

df = p.read_sql(query, db_con_azure)

After creating a successful connection, our application will read the SQL & fetch the data & store that into a pandas dataframe and return the output to the primary calling function.

3. callCosmosAPI.py (This is the main script, which will call all the methods to blend the data. Hence, the name comes into the picture.)

##############################################
#### Written By: SATYAKI DE               ####
#### Written On: 25-May-2019              ####
#### Modified On 02-Jun-2019              ####
####                                      ####
#### Objective: Main calling scripts.     ####
##############################################

import clsColMgmt as cm
import clsCosmosDBDet as cmdb
from clsConfig import clsConfig as cf
import pandas as p
import clsLog as cl
import logging
import datetime
import json
import clsDBLookup as dbcon

# Disbling Warning
def warn(*args, **kwargs):
    pass

import warnings
warnings.warn = warn

def getDate(row):
    try:
        d1 = row['orderDate']
        d1_str = str(d1)
        d1_dt_part, sec = d1_str.split('.')
        dt_part1 = d1_dt_part.replace('T', ' ')

        return dt_part1
    except Exception as e:
        x = str(e)
        print(x)
        dt_part1 = ''

        return dt_part1

# Lookup functions from
# Azure cloud SQL DB

var = datetime.datetime.now().strftime("%Y-%m-%d_%H-%M-%S")

def main():
    try:
        df_ret = p.DataFrame()
        df_ret_2 = p.DataFrame()
        df_ret_2_Mod = p.DataFrame()

        debug_ind = 'Y'

        # Initiating Log Class
        l = cl.clsLog()

        general_log_path = str(cf.config['LOG_PATH'])

        # Enabling Logging Info
        logging.basicConfig(filename=general_log_path + 'consolidated.log', level=logging.INFO)

        # Moving previous day log files to archive directory
        arch_dir = cf.config['ARCH_DIR']
        log_dir = cf.config['LOG_PATH']

        print("Archive Directory:: ", arch_dir)
        print("Log Directory::", log_dir)

        print("*" * 157)
        print("Testing COSMOS DB Connection!")
        print("*" * 157)

        # Checking Cosmos DB Azure
        y = cmdb.clsCosmosDBDet()
        ret_val = y.test_db_con()

        if ret_val == 0:
            print()
            print("Cosmos DB Connection Successful!")
            print("*" * 157)
        else:
            print()
            print("Cosmos DB Connection Failure!")
            print("*" * 157)
            raise Exception

        print("*" * 157)

        # Accessing from Azure SQL DB
        x1 = dbcon.clsDBLookup()
        act_df = x1.azure_sqldb_read(cf.config['AZURE_SQL_1'])

        print("Azure SQL DB::")
        print(act_df)
        print()

        print("-" * 157)

        # Calling the function 1
        print("RealtimeEmail::")

        # Fetching First collection data to dataframe
        print("Fethcing Comos Collection Data!")

        sql_qry_1 = cf.config['SQL_QRY_1']
        msg = "Documents generatd based on unique key"
        collection_flg = 1

        x = cm.clsColMgmt()
        df_ret = x.fetch_data(sql_qry_1, msg, collection_flg)

        l.logr('1.EmailFeedback_' + var + '.csv', debug_ind, df_ret, 'log')
        print('RealtimeEmail Data::')
        print(df_ret)
        print()

        # Checking execution status
        ret_val = int(df_ret.shape[0])

        if ret_val == 0:
            print("Cosmos DB Hans't returned any rows. Please check your queries!")
            print("*" * 157)
        else:
            print("Successfully fetched!")
            print("*" * 157)

        # Calling the 2nd Collection
        print("RealtimeTwitterFeedback::")

        # Fetching First collection data to dataframe
        print("Fethcing Cosmos Collection Data!")

        # Query using parameters
        sql_qry_2 = cf.config['SQL_QRY_2']
        msg_2 = "Documents generated based on RealtimeTwitterFeedback feed!"
        collection_flg = 2

        val = 'crazyGo'
        param_det = [{"name": "@CrVal", "value": val}]
        add_param = 2

        x1 = cm.clsColMgmt()
        df_ret_2 = x1.fetch_data(sql_qry_2, msg_2, collection_flg, add_param, param_det)

        l.logr('2.TwitterFeedback_' + var + '.csv', debug_ind, df_ret, 'log')
        print('Realtime Twitter Data:: ')
        print(df_ret_2)
        print()

        # Checking execution status
        ret_val_2 = int(df_ret_2.shape[0])

        if ret_val_2 == 0:
            print("Cosmos DB hasn't returned any rows. Please check your queries!")
            print("*" * 157)
        else:
            print("Successfuly row feteched!")
            print("*" * 157)

        # Merging NoSQL Data (Cosmos DB) with Relational DB (Azure SQL DB)
        df_Fin_temp = p.merge(df_ret, act_df, on='subscriberId', how='inner')

        df_fin = df_Fin_temp[['orderDate', 'orderNo', 'sender', 'state', 'country', 'customerType']]

        print("Initial Combined Data (From Cosmos & Azure SQL DB) :: ")
        print(df_fin)

        l.logr('3.InitCombine_' + var + '.csv', debug_ind, df_fin, 'log')

        # Transforming the orderDate as per standard format
        df_fin['orderDateM'] = df_fin.apply(lambda row: getDate(row), axis=1)

        # Dropping the old column & renaming the new column to old column
        df_fin.drop(columns=['orderDate'], inplace=True)
        df_fin.rename(columns={'orderDateM': 'orderDate'}, inplace=True)

        print("*" * 157)
        print()
        print("Final Combined & Transformed result:: ")
        print(df_fin)

        l.logr('4.Final_Combine_' + var + '.csv', debug_ind, df_fin, 'log')
        print("*" * 157)

    except ValueError:
        print("No relevant data to proceed!")

    except Exception as e:
        print("Top level Error: args:{0}, message{1}".format(e.args, e.message))

if __name__ == "__main__":
    main()

The key lines from this script –

def getDate(row):
    try:
        d1 = row['orderDate']
        d1_str = str(d1)
        d1_dt_part, sec = d1_str.split('.')
        dt_part1 = d1_dt_part.replace('T', ' ')

        return dt_part1
    except Exception as e:
        x = str(e)
        print(x)
        dt_part1 = ''

        return dt_part1

This function converts NoSQL date data type more familiar format.

NoSQL Date:
NoSQL_Date
Transformed Date:
Transformed Date
# Accessing from Azure SQL DB
x1 = dbcon.clsDBLookup()
act_df = x1.azure_sqldb_read(cf.config['AZURE_SQL_1'])

print("Azure SQL DB::")
print(act_df)
print()

Above lines are calling the Azure SQL DB method to retrieve the RDBMS data into our dataframe.

# Merging NoSQL Data (Cosmos DB) with Relational DB (Azure SQL DB)
df_Fin_temp = p.merge(df_ret, act_df, on='subscriberId', how='inner')

df_fin = df_Fin_temp[['orderDate', 'orderNo', 'sender', 'state', 'country', 'customerType']]

In these above lines, we’re joining the data retrieved from two different kinds of the database to prepare our initial combined dataframe. Also, we’ve picked only the desired column, which will be useful for us.

# Transforming the orderDate as per standard format
df_fin['orderDateM'] = df_fin.apply(lambda row: getDate(row), axis=1)

# Dropping the old column & renaming the new column to old column
df_fin.drop(columns=['orderDate'], inplace=True)
df_fin.rename(columns={'orderDateM': 'orderDate'}, inplace=True)

In the above lines, we’re transforming our date field, as shown above in one of our previous images by calling the getDate method.

Let’s see the directory structure of our program –

Win_Vs_MAC

Let’s see how it looks when it runs –

Windows:

Win_Run_1
Win_Run_2

MAC:

MAC_Run_1
MAC_Run_2

So, finally, we’ve successfully blended the data & make more meaningful data projection.

Following python packages are required to run this application –

pip install azure

pip install azure-cosmos

pip install pandas

pip install requests

pip install pyodbc

This application tested on Python3.7.1 & Python3.7.2 as well. As per Microsoft, their official supported version is Python3.5.

I hope you’ll like this effort.

Wait for the next installment. Till then, Happy Avenging. 😀

[Note: All the sample data are available/prepared in the public domain for research & study.]

Improvement of Pandas data processing performance using Multi-threading with the Queue (Another crossover of Space Stone, Reality Stone & Power Stone)

Today, we’ll discuss how to improve your panda’s data processing power using Multi-threading. Note that, we are not going to use any third party python package. Also, we’ll be using a couple of python scripts, which we’ve already discussed in our previous posts. Hence, this time, I won’t post them here.

Please refer the following scripts –

a. callClient.py
b. callRunServer.py
c. clsConfigServer.py
d. clsEnDec.py
e. clsFlask.py
f. clsL.py
g. clsParam.py
h. clsSerial.py
i. clsWeb.py

Please find the above scripts described here with details.

So, today, we’ll be looking into how the multi-threading really helps the application to gain some performance over others.

Let’s go through our existing old sample files –

Sample Data

And, we’ve four columns that are applicable for encryption. This file contains 10K records. That means the application will make 40K calls to the server for a different kind of encryption for each column.

Now, if you are going with the serial approach, which I’ve already discussed here, will take significant time for data processing. However, if we could club a few rows as one block & in this way we can create multiple blocks out of our data csv like this –

Data_Blocks

As you can see that blocks are marked with a different color. So, now if you send each block of data in parallel & send the data for encryption. Ideally, you will be able to process data much faster than the usual serial process. And, this what we would be looking for with the help of python’s multi-threading & queue. Without the queue, this program won’t be possible as the queue maintains the data & process integrity.

One more thing we would like to explain here. Whenever this application is sending the block of data. It will be posting that packed into a (key, value) dictionary randomly. Key will be the thread name. The reason, we’re not expecting data after process might arrive in some random order wrapped with the dictionary as well. Once the application received all the dictionary with dataframe with encrypted/decrypted data, the data will be rearranged based on the key & then joined back with the rest of the data.

Let’s see one sample way of sending & receiving random thread –

Data Packing

The left-hand side, the application is splitting the recordset into small chunks of a group. Once, those group created, using python multi-threading the application is now pushing them into the queue for the producer to produce the encrypted/decrypted value. Similar way, after processing the application will push the final product into the queue for consuming the final output.

This is the pictorial representation of dictionary ordering based on the key-value & then the application will extract the entire data to form the target csv file.

Final_Data_Sort

Let’s explore the script –

1. clsParallel.py (This script will consume the split csv files & send the data blocks in the form of the dictionary using multi-threading to the API for encryption in parallel. Hence, the name comes into the picture.)

  1
  2
  3
  4
  5
  6
  7
  8
  9
 10
 11
 12
 13
 14
 15
 16
 17
 18
 19
 20
 21
 22
 23
 24
 25
 26
 27
 28
 29
 30
 31
 32
 33
 34
 35
 36
 37
 38
 39
 40
 41
 42
 43
 44
 45
 46
 47
 48
 49
 50
 51
 52
 53
 54
 55
 56
 57
 58
 59
 60
 61
 62
 63
 64
 65
 66
 67
 68
 69
 70
 71
 72
 73
 74
 75
 76
 77
 78
 79
 80
 81
 82
 83
 84
 85
 86
 87
 88
 89
 90
 91
 92
 93
 94
 95
 96
 97
 98
 99
100
101
102
103
104
105
106
107
108
109
110
111
112
113
114
115
116
117
118
119
120
121
122
123
124
125
126
127
128
129
130
131
132
133
134
135
136
137
138
139
140
141
142
143
144
145
146
147
148
149
150
151
152
153
154
155
156
157
158
159
160
161
162
163
164
165
166
167
168
169
170
171
172
173
174
175
176
177
178
179
180
181
182
183
184
185
186
187
188
189
190
191
192
193
194
195
196
197
198
199
200
201
202
203
204
205
206
207
208
209
210
211
212
213
214
215
216
217
218
219
220
221
222
223
224
225
226
227
228
229
230
231
232
233
234
235
236
237
238
239
240
241
242
243
244
245
246
247
248
249
250
251
252
253
254
255
256
257
258
259
260
261
262
263
264
265
266
267
268
269
270
271
272
273
274
275
276
277
278
279
280
281
282
283
284
285
286
287
288
289
290
291
292
293
294
295
296
297
298
299
300
301
302
303
304
305
306
307
308
309
310
311
312
313
314
315
316
317
318
319
320
321
322
323
324
325
326
327
328
329
330
331
332
333
334
335
336
337
338
339
340
341
342
343
344
345
346
347
348
349
350
351
352
353
354
355
356
357
358
359
360
361
362
363
364
365
366
367
368
369
370
371
372
373
374
375
376
377
378
379
380
381
382
383
384
385
386
387
388
389
390
391
392
393
394
395
396
397
398
399
400
401
402
403
404
405
406
407
408
409
410
411
412
413
414
415
416
417
418
419
420
421
422
423
424
425
426
427
428
429
430
431
432
433
434
435
436
437
438
439
440
441
442
443
444
445
446
447
448
449
450
451
452
453
454
455
456
457
458
459
460
461
462
463
464
465
466
467
468
469
470
471
472
473
474
475
476
477
478
479
480
481
482
483
484
485
486
487
488
489
490
491
492
493
494
495
496
497
498
499
500
501
502
503
504
505
506
507
508
509
510
511
512
513
514
515
516
517
518
519
import pandas as p
import clsWeb as cw
import datetime
from clsParam import clsParam as cf
import threading
from queue import Queue
import gc
import signal
import time
import os

# Declaring Global Variable
q = Queue()
m = Queue()
tLock = threading.Lock()
threads = []

fin_dict = {}
fin_dict_1 = {}
stopping = threading.Event()

# Disbling Warnings
def warn(*args, **kwargs):
    pass
import warnings
warnings.warn = warn

class clsParallel(object):
    def __init__(self):
        self.path = cf.config['PATH']
        self.EncryptMode = str(cf.config['ENCRYPT_MODE'])
        self.DecryptMode = str(cf.config['DECRYPT_MODE'])
        self.num_worker_threads = int(cf.config['NUM_OF_THREAD'])
        

    # Lookup Methods for Encryption
    def encrypt_acctNbr(self, row):
        # Declaring Local Variable
        en_AcctNbr = ''
        json_source_str = ''

        # Capturing essential values
        EncryptMode = self.EncryptMode
        lkp_acctNbr = row['Acct_Nbr']
        str_acct_nbr = str(lkp_acctNbr)
        fil_acct_nbr = str_acct_nbr.strip()

        # Forming JSON String for this field
        json_source_str = '{"dataGroup":"GrDet","data":"' + fil_acct_nbr + '","dataTemplate":"subGrAcct_Nbr"}'

        # Identifying Length of the field
        len_acct_nbr = len(fil_acct_nbr)

        # This will trigger the service if it has valid data
        if len_acct_nbr > 0:
            x = cw.clsWeb(json_source_str)
            en_AcctNbr = x.getResponse(EncryptMode)
        else:
            en_AcctNbr = ''

        return en_AcctNbr

    def encrypt_Name(self, row):
        # Declaring Local Variable
        en_AcctName = ''

        # Capturing essential values
        EncryptMode = self.EncryptMode
        lkp_acctName = row['Name']
        str_acct_name = str(lkp_acctName)
        fil_acct_name = str_acct_name.strip()

        # Forming JSON String for this field
        json_source_str = '{"dataGroup":"GrDet","data":"' + fil_acct_name + '","dataTemplate":"subGrName"}'

        # Identifying Length of the field
        len_acct_nbr = len(fil_acct_name)

        # This will trigger the service if it has valid data
        if len_acct_nbr > 0:
            x = cw.clsWeb(json_source_str)
            en_AcctName = x.getResponse(EncryptMode)
        else:
            en_AcctName = ''

        return en_AcctName

    def encrypt_Phone(self, row):
        # Declaring Local Variable
        en_Phone = ''

        # Capturing essential values
        EncryptMode = self.EncryptMode
        lkp_phone = row['Phone']
        str_phone = str(lkp_phone)
        fil_phone = str_phone.strip()

        # Forming JSON String for this field
        json_source_str = '{"dataGroup":"GrDet","data":"' + fil_phone + '","dataTemplate":"subGrPhone"}'

        # Identifying Length of the field
        len_acct_nbr = len(fil_phone)

        # This will trigger the service if it has valid data
        if len_acct_nbr > 0:
            x = cw.clsWeb(json_source_str)
            en_Phone = x.getResponse(EncryptMode)
        else:
            en_Phone = ''

        return en_Phone

    def encrypt_Email(self, row):
        # Declaring Local Variable
        en_Email = ''

        # Capturing essential values
        EncryptMode = self.EncryptMode
        lkp_email = row['Email']
        str_email = str(lkp_email)
        fil_email = str_email.strip()

        # Forming JSON String for this field
        json_source_str = '{"dataGroup":"GrDet","data":"' + fil_email + '","dataTemplate":"subGrEmail"}'

        # Identifying Length of the field
        len_acct_nbr = len(fil_email)

        # This will trigger the service if it has valid data
        if len_acct_nbr > 0:
            x = cw.clsWeb(json_source_str)
            en_Email = x.getResponse(EncryptMode)
        else:
            en_Email = ''

        return en_Email

    # Lookup Methods for Decryption
    def decrypt_acctNbr(self, row):
        # Declaring Local Variable
        de_AcctNbr = ''
        json_source_str = ''

        # Capturing essential values
        EncryptMode = self.DecryptMode
        lkp_acctNbr = row['Acct_Nbr']
        str_acct_nbr = str(lkp_acctNbr)
        fil_acct_nbr = str_acct_nbr.strip()

        # Forming JSON String for this field
        json_source_str = '{"dataGroup":"GrDet","data":"' + fil_acct_nbr + '","dataTemplate":"subGrAcct_Nbr"}'

        # Identifying Length of the field
        len_acct_nbr = len(fil_acct_nbr)

        # This will trigger the service if it has valid data
        if len_acct_nbr > 0:
            x = cw.clsWeb(json_source_str)
            de_AcctNbr = x.getResponse(EncryptMode)
        else:
            de_AcctNbr = ''

        return de_AcctNbr

    def decrypt_Name(self, row):
        # Declaring Local Variable
        de_AcctName = ''

        # Capturing essential values
        EncryptMode = self.DecryptMode
        lkp_acctName = row['Name']
        str_acct_name = str(lkp_acctName)
        fil_acct_name = str_acct_name.strip()

        # Forming JSON String for this field
        json_source_str = '{"dataGroup":"GrDet","data":"' + fil_acct_name + '","dataTemplate":"subGrName"}'

        # Identifying Length of the field
        len_acct_nbr = len(fil_acct_name)

        # This will trigger the service if it has valid data
        if len_acct_nbr > 0:
            x = cw.clsWeb(json_source_str)
            de_AcctName = x.getResponse(EncryptMode)
        else:
            de_AcctName = ''

        return de_AcctName

    def decrypt_Phone(self, row):
        # Declaring Local Variable
        de_Phone = ''

        # Capturing essential values
        EncryptMode = self.DecryptMode
        lkp_phone = row['Phone']
        str_phone = str(lkp_phone)
        fil_phone = str_phone.strip()

        # Forming JSON String for this field
        json_source_str = '{"dataGroup":"GrDet","data":"' + fil_phone + '","dataTemplate":"subGrPhone"}'

        # Identifying Length of the field
        len_acct_nbr = len(fil_phone)

        # This will trigger the service if it has valid data
        if len_acct_nbr > 0:
            x = cw.clsWeb(json_source_str)
            de_Phone = x.getResponse(EncryptMode)
        else:
            de_Phone = ''

        return de_Phone

    def decrypt_Email(self, row):
        # Declaring Local Variable
        de_Email = ''

        # Capturing essential values
        EncryptMode = self.DecryptMode
        lkp_email = row['Email']
        str_email = str(lkp_email)
        fil_email = str_email.strip()

        # Forming JSON String for this field
        json_source_str = '{"dataGroup":"GrDet","data":"' + fil_email + '","dataTemplate":"subGrEmail"}'

        # Identifying Length of the field
        len_acct_nbr = len(fil_email)

        # This will trigger the service if it has valid data
        if len_acct_nbr > 0:
            x = cw.clsWeb(json_source_str)
            de_Email = x.getResponse(EncryptMode)
        else:
            de_Email = ''

        return de_Email

    def getEncrypt(self, df_dict):
        try:
            df_input = p.DataFrame()
            df_fin = p.DataFrame()

            # Assigning Target File Basic Name
            for k, v in df_dict.items():
                Thread_Name = k
                df_input = v

            # Checking total count of rows
            count_row = int(df_input.shape[0])
            # print('Part number of records to process:: ', count_row)

            if count_row > 0:

                # Deriving rows
                df_input['Encrypt_Acct_Nbr'] = df_input.apply(lambda row: self.encrypt_acctNbr(row), axis=1)
                df_input['Encrypt_Name'] = df_input.apply(lambda row: self.encrypt_Name(row), axis=1)
                df_input['Encrypt_Phone'] = df_input.apply(lambda row: self.encrypt_Phone(row), axis=1)
                df_input['Encrypt_Email'] = df_input.apply(lambda row: self.encrypt_Email(row), axis=1)

                # Dropping original columns
                df_input.drop(['Acct_Nbr', 'Name', 'Phone', 'Email'], axis=1, inplace=True)

                # Renaming new columns with the old column names
                df_input.rename(columns={'Encrypt_Acct_Nbr':'Acct_Nbr'}, inplace=True)
                df_input.rename(columns={'Encrypt_Name': 'Name'}, inplace=True)
                df_input.rename(columns={'Encrypt_Phone': 'Phone'}, inplace=True)
                df_input.rename(columns={'Encrypt_Email': 'Email'}, inplace=True)

                # New Column List Orders
                column_order = ['Acct_Nbr', 'Name', 'Acct_Addr_1', 'Acct_Addr_2', 'Phone', 'Email', 'Serial_No']
                df_fin = df_input.reindex(column_order, axis=1)

                fin_dict[Thread_Name] = df_fin

            return 0
        except Exception as e:
            df_error = p.DataFrame({'Acct_Nbr':str(e), 'Name':'', 'Acct_Addr_1':'', 'Acct_Addr_2':'', 'Phone':'', 'Email':'', 'Serial_No':''})
            fin_dict[Thread_Name] = df_error

            return 1

    def getEncryptWQ(self):
        item_dict = {}
        item = ''

        while True:
            try:
                #item_dict = q.get()
                item_dict = q.get_nowait()

                for k, v in item_dict.items():
                    # Assigning Target File Basic Name
                    item = str(k)

                if ((item == 'TEND') | (item == '')):
                    break

                if ((item != 'TEND') | (item != '')):
                    self.getEncrypt(item_dict)

                q.task_done()
            except Exception:
                break

    def getEncryptParallel(self, df_payload):
        start_pos = 0
        end_pos = 0
        l_dict = {}
        c_dict = {}
        min_val_list = {}
        cnt = 0
        num_worker_threads = self.num_worker_threads
        split_df = p.DataFrame()
        df_ret = p.DataFrame()

        # Assigning Target File Basic Name
        df_input = df_payload

        # Checking total count of rows
        count_row = df_input.shape[0]
        print('Total number of records to process:: ', count_row)

        interval = int(count_row / num_worker_threads) + 1
        actual_worker_task = int(count_row / interval) + 1

        for i in range(actual_worker_task):
            t = threading.Thread(target=self.getEncryptWQ)
            t.start()
            threads.append(t)
            name = str(t.getName())

            if ((start_pos + interval) < count_row):
                end_pos = start_pos + interval
            else:
                end_pos = start_pos + (count_row - start_pos)

            split_df = df_input.iloc[start_pos:end_pos]
            l_dict[name] = split_df

            if ((start_pos > count_row) | (start_pos == count_row)):
                break
            else:
                start_pos = start_pos + interval

            q.put(l_dict)
            cnt += 1

        # block until all tasks are done
        q.join()

        # stop workers
        for i in range(actual_worker_task):
            c_dict['TEND'] = p.DataFrame()
            q.put(c_dict)

        for t in threads:
            t.join()

        for k, v in fin_dict.items():
            min_val_list[int(k.replace('Thread-',''))] = v

        min_val = min(min_val_list, key=int)

        for k, v in sorted(fin_dict.items(), key=lambda k:int(k[0].replace('Thread-',''))):
            if int(k.replace('Thread-','')) == min_val:
                df_ret = fin_dict[k]
            else:
                d_frames = [df_ret, fin_dict[k]]
                df_ret = p.concat(d_frames)

        # Releasing Memory
        del[[split_df]]
        gc.collect()

        return df_ret

    def getDecrypt(self, df_encrypted_dict):
        try:
            df_input = p.DataFrame()
            df_fin = p.DataFrame()

            # Assigning Target File Basic Name
            for k, v in df_encrypted_dict.items():
                Thread_Name = k
                df_input = v

            # Checking total count of rows
            count_row = int(df_input.shape[0])

            if count_row > 0:

                # Deriving rows
                df_input['Decrypt_Acct_Nbr'] = df_input.apply(lambda row: self.decrypt_acctNbr(row), axis=1)
                df_input['Decrypt_Name'] = df_input.apply(lambda row: self.decrypt_Name(row), axis=1)
                df_input['Decrypt_Phone'] = df_input.apply(lambda row: self.decrypt_Phone(row), axis=1)
                df_input['Decrypt_Email'] = df_input.apply(lambda row: self.decrypt_Email(row), axis=1)

                # Dropping original columns
                df_input.drop(['Acct_Nbr', 'Name', 'Phone', 'Email'], axis=1, inplace=True)

                # Renaming new columns with the old column names
                df_input.rename(columns={'Decrypt_Acct_Nbr':'Acct_Nbr'}, inplace=True)
                df_input.rename(columns={'Decrypt_Name': 'Name'}, inplace=True)
                df_input.rename(columns={'Decrypt_Phone': 'Phone'}, inplace=True)
                df_input.rename(columns={'Decrypt_Email': 'Email'}, inplace=True)

                # New Column List Orders
                column_order = ['Acct_Nbr', 'Name', 'Acct_Addr_1', 'Acct_Addr_2', 'Phone', 'Email']
                df_fin = df_input.reindex(column_order, axis=1)

                fin_dict_1[Thread_Name] = df_fin

            return 0

        except Exception as e:
            df_error = p.DataFrame({'Acct_Nbr': str(e), 'Name': '', 'Acct_Addr_1': '', 'Acct_Addr_2': '', 'Phone': '', 'Email': ''})
            fin_dict_1[Thread_Name] = df_error

            return 1

    def getDecryptWQ(self):
        item_dict = {}
        item = ''

        while True:
            try:
                #item_dict = q.get()
                item_dict = m.get_nowait()

                for k, v in item_dict.items():
                    # Assigning Target File Basic Name
                    item = str(k)

                if ((item == 'TEND') | (item == '')):
                    return True
                    #break

                if ((item != 'TEND') | (item != '')):
                    self.getDecrypt(item_dict)

                m.task_done()
            except Exception:
                break


    def getDecryptParallel(self, df_payload):
        start_pos = 0
        end_pos = 0
        l_dict_1 = {}
        c_dict_1 = {}
        cnt = 0
        num_worker_threads = self.num_worker_threads
        split_df = p.DataFrame()
        df_ret_1 = p.DataFrame()

        min_val_list = {}

        # Assigning Target File Basic Name
        df_input_1 = df_payload

        # Checking total count of rows
        count_row = df_input_1.shape[0]
        print('Total number of records to process:: ', count_row)

        interval = int(count_row / num_worker_threads) + 1
        actual_worker_task = int(count_row / interval) + 1

        for i in range(actual_worker_task):
            t_1 = threading.Thread(target=self.getDecryptWQ)
            t_1.start()
            threads.append(t_1)
            name = str(t_1.getName())

            if ((start_pos + interval) < count_row):
                end_pos = start_pos + interval
            else:
                end_pos = start_pos + (count_row - start_pos)

            split_df = df_input_1.iloc[start_pos:end_pos]
            l_dict_1[name] = split_df

            if ((start_pos > count_row) | (start_pos == count_row)):
                break
            else:
                start_pos = start_pos + interval

            m.put(l_dict_1)
            cnt += 1

        # block until all tasks are done
        m.join()

        # stop workers
        for i in range(actual_worker_task):
            c_dict_1['TEND'] = p.DataFrame()
            m.put(c_dict_1)

        for t_1 in threads:
            t_1.join()

        for k, v in fin_dict_1.items():
            min_val_list[int(k.replace('Thread-',''))] = v

        min_val = min(min_val_list, key=int)

        for k, v in sorted(fin_dict_1.items(), key=lambda k:int(k[0].replace('Thread-',''))):
            if int(k.replace('Thread-','')) == min_val:
                df_ret_1 = fin_dict_1[k]
            else:
                d_frames = [df_ret_1, fin_dict_1[k]]
                df_ret_1 = p.concat(d_frames)

        # Releasing Memory
        del[[split_df]]
        gc.collect()

        return df_ret_1

Let’s explain the key snippet from the code. For your information, we’re not going to describe all the encryption methods such as –

# Encryption Method
encrypt_acctNbr

encrypt_Name
encrypt_Phone
encrypt_Email

# Decryption Method
decrypt_acctNbr
decrypt_Name
decrypt_Phone
decrypt_Email

As we’ve already described the logic of these methods in our previous post.

# Checking total count of rows
count_row = df_input.shape[0]
print('Total number of records to process:: ', count_row)

interval = int(count_row / num_worker_threads) + 1
actual_worker_task = int(count_row / interval) + 1

Fetching the total number of rows from the dataframe. Based on the row count, the application will derive the actual number of threads that will be used for parallelism.

for i in range(actual_worker_task):
    t = threading.Thread(target=self.getEncryptWQ)
    t.start()
    threads.append(t)
    name = str(t.getName())

    if ((start_pos + interval) < count_row):
        end_pos = start_pos + interval
    else:
        end_pos = start_pos + (count_row - start_pos)

    split_df = df_input.iloc[start_pos:end_pos]
    l_dict[name] = split_df

    if ((start_pos > count_row) | (start_pos == count_row)):
        break
    else:
        start_pos = start_pos + interval

    q.put(l_dict)
    cnt += 1

Here, the application is splitting the data into multiple groups of smaller data packs & then combining them into (key, value) dictionary & finally placed them into the individual queue.

# block until all tasks are done
q.join()

This will join the queue process. This will ensure that queues are free after consuming the data.

# stop workers
for i in range(actual_worker_task):
    c_dict['TEND'] = p.DataFrame()
    q.put(c_dict)

for t in threads:
    t.join()

The above lines are essential. As this will help the process to identify that no more data are left to send at the queue. And, the main thread will wait until all the threads are done.

for k, v in fin_dict.items():
    min_val_list[int(k.replace('Thread-',''))] = v

min_val = min(min_val_list, key=int)

Once, all the jobs are done. The application will find the minimum thread value & based on that we can sequence all the data chunks as explained in our previous image & finally clubbed them together to form the complete csv.

for k, v in sorted(fin_dict.items(), key=lambda k:int(k[0].replace('Thread-',''))):
    if int(k.replace('Thread-','')) == min_val:
        df_ret = fin_dict[k]
    else:
        d_frames = [df_ret, fin_dict[k]]
        df_ret = p.concat(d_frames)

As already explained, using the starting point of our data dictionary element, the application is clubbing the data back to the main csv.

Next method, which we’ll be explaining is –

getEncryptWQ

Please find the key lines –

while True:
    try:
        #item_dict = q.get()
        item_dict = q.get_nowait()

        for k, v in item_dict.items():
            # Assigning Target File Basic Name
            item = str(k)

        if ((item == 'TEND') | (item == '')):
            break

        if ((item != 'TEND') | (item != '')):
            self.getEncrypt(item_dict)

        q.task_done()
    except Exception:
        break

This method will consume the data & processing it for encryption or decryption. This will continue to do the work until or unless it receives the key value as TEND or the queue is empty.

Let’s compare the statistics between Windows & MAC.

Let’s see the file structure first –

Windows (16 GB – Core 2) Vs Mac (10 GB – Core 2):

Win_Vs_MAC

Windows (16 GB – Core 2):

Performance_Stats_Windows

Mac (10 GB – Core 2):

Performance_Stats_MAC

Find the complete directory from both the machine.
Windows (16 GB – Core 2):

Win_Files

Mac (10 GB – Core 2):

MAC_Files

Here is the final output –

Sample_OUTPut

So, we’ve achieved our target goal.

Let me know – how do you like this post. Please share your suggestion & comments.

I’ll be back with another installment from the Python verse.

Till then – Happy Avenging!

Pandas, Numpy, Encryption/Decryption, Hidden Files In Python (Crossover between Space Stone, Reality Stone & Mind Stone of Python-Verse)

So, here we come up with another crossover of Space Stone, Reality Stone & Mind Stone of Python-Verse. It is indeed exciting & I cannot wait to explore that part further. Today, in this post, we’ll see how one application can integrate all these key ingredients in Python to serve the purpose. Our key focus will be involving popular packages like Pandas, Numpy & Popular Encryption-Decryption techniques, which include some hidden files as well.

So, our objective here is to proceed with the encryption & decryption technique. But, there is a catch. We need to store some salt or tokenized value inside a hidden file. Our application will extract the salt value from it & then based on that it will perform Encrypt/Decrypt on the data.

Why do we need this approach?

The answer is simple. On many occasions, we don’t want to store our right credentials in configuration files. Also, we don’t want to keep our keys to open to other developers. There are many ways you can achieve this kind of security.  Today, I’ll be showing a different approach to make the same.

Let’s explore.

As usual, I’ll provide the solution, which is tested in Windows & MAC & provide the script. Also, I’ll explain the critical lines of those scripts to understand it from a layman point of view. And, I won’t explain any script, which I’ve already explained in my earlier post. So, you have to refer my old post for that.

To encrypt & decrypt, we need the following files, which contains credentials in a csv. Please find the sample data –

Config_orig.csv

Orig_File

Please see the file, which will be hidden by the application process.

Token_Salt_File

As you can see, this column contains the salt, which will be used in our Encryption/Decryption.

1. clsL.py (This script will create the csv files or any intermediate debug csv file after the corresponding process. Hence, the name comes into the picture.)

 1
 2
 3
 4
 5
 6
 7
 8
 9
10
11
12
13
14
15
16
17
18
19
20
21
22
23
24
25
26
27
28
29
30
31
32
33
34
35
36
37
38
39
40
41
42
###########################################
#### Written By: SATYAKI DE        ########
#### Written On: 25-Jan-2019       ########
####                               ########
#### Objective: Log File           ########
###########################################
import pandas as p
import platform as pl
from clsParam import clsParam as cf

class clsL(object):
    def __init__(self):
        self.path = cf.config['PATH']

    def logr(self, Filename, Ind, df, subdir=None):
        try:
            x = p.DataFrame()
            x = df
            sd = subdir

            os_det = pl.system()

            if sd == None:
                if os_det == "Windows":
                    fullFileName = self.path + '\\' + Filename
                else:
                    fullFileName = self.path + '/' + Filename
            else:
                if os_det == "Windows":
                    fullFileName = self.path + '\\' + sd + "\\" + Filename
                else:
                    fullFileName = self.path + '/' + sd + "/" + Filename

            if Ind == 'Y':
                x.to_csv(fullFileName, index=False)

            return 0

        except Exception as e:
            y = str(e)
            print(y)
            return 3

2. clsParam.py (This is the script that will be used as a parameter file & will be used in other python scripts.)

 1
 2
 3
 4
 5
 6
 7
 8
 9
10
11
12
13
14
15
16
17
18
19
###########################################
#### Written By: SATYAKI DE        ########
#### Written On: 25-Jan-2019       ########
#### Objective: Parameter File     ########
###########################################

import os
import platform as pl

class clsParam(object):

    config = {
        'FILENAME' : 'test.amca',
        'OSX_MOD_FILE_NM': '.test.amca',
        'CURR_PATH': os.path.dirname(os.path.realpath(__file__)),
        'NORMAL_FLAG': 32,
        'HIDDEN_FLAG': 34,
        'OS_DET': pl.system()
    }


3. clsWinHide.py (This script contains the core logic of hiding/unhiding a file under Windows OS. Hence, the name comes into the picture.)

 1
 2
 3
 4
 5
 6
 7
 8
 9
10
11
12
13
14
15
16
17
18
19
20
21
22
23
24
25
26
27
28
29
30
31
32
33
34
35
36
37
38
39
40
41
42
43
44
45
46
47
48
49
###########################################
#### Written By: SATYAKI DE          ######
#### Written On: 25-Jan-2019         ######
####                                 ######
#### This script will hide or Unhide ######
#### Files in Windows.               ######
###########################################

import win32file
import win32con
from clsParam import clsParam as cp

class clsWinHide(object):
    def __init__(self):
        self.path = cp.config['CURR_PATH']
        self.FileName = cp.config['FILENAME']
        self.normal_file_flag = cp.config['NORMAL_FLAG']

    def doit(self):
        try:
            path = self.path
            FileName = self.FileName

            FileNameWithPath = path + '\\' + FileName
            flags = win32file.GetFileAttributesW(FileNameWithPath)
            win32file.SetFileAttributes(FileNameWithPath,win32con.FILE_ATTRIBUTE_HIDDEN | flags)

            return 0
        except Exception as e:
            x = str(e)
            print(x)

            return 1

    def undoit(self):
        try:
            path = self.path
            FileName = self.FileName
            normal_file_flag = self.normal_file_flag

            FileNameWithPath = path + '\\' + FileName
            win32file.SetFileAttributes(FileNameWithPath,win32con.FILE_ATTRIBUTE_NORMAL | int(normal_file_flag))

            return 0
        except Exception as e:
            x = str(e)
            print(x)

            return 1

Key lines that we would like to explore are as follows –

def doit()

flags = win32file.GetFileAttributesW(FileNameWithPath)
win32file.SetFileAttributes(FileNameWithPath,win32con.FILE_ATTRIBUTE_HIDDEN | flags)

The above two lines under doit() functions are changing the file attributes in Windows OS to the hidden mode by assigning the FILE_ATTRIBUTE_HIDDEN property.

def undoit()

normal_file_flag = self.normal_file_flag

FileNameWithPath = path + '\\' + FileName
win32file.SetFileAttributes(FileNameWithPath,win32con.FILE_ATTRIBUTE_NORMAL | int(normal_file_flag))

As the script suggested, the application is setting the file attribute of a hidden file to FILE_ATTRIBUTE_NORMAL & set the correct flag from parameters, which leads to the file appears as a normal windows file.

4. clsOSXHide.py (This script contains the core logic of hiding/unhiding a file under OSX, i.e., MAC OS. Hence, the name comes into the picture.)

 1
 2
 3
 4
 5
 6
 7
 8
 9
10
11
12
13
14
15
16
17
18
19
20
21
22
23
24
25
26
27
28
29
30
31
32
33
34
35
36
37
38
39
40
41
42
43
44
45
46
47
48
49
###########################################
#### Written By: SATYAKI DE           #####
#### Written On: 25-Jan-2019          #####
####                                  #####
#### Objective: This script will hide #####
#### or Unhide the file in OSX.       #####
###########################################

import os
from clsParam import clsParam as cp

class clsOSXHide(object):
    def __init__(self):
        self.path = cp.config['CURR_PATH']
        self.FileName = cp.config['FILENAME']
        self.OSX_Mod_FileName = cp.config['OSX_MOD_FILE_NM']
        self.normal_file_flag = cp.config['NORMAL_FLAG']

    def doit(self):
        try:
            path = self.path
            FileName = self.FileName

            FileNameWithPath = path + '/' + FileName
            os.rename(FileNameWithPath, os.path.join(os.path.dirname(FileNameWithPath),'.'
                                                     + os.path.basename(FileNameWithPath)))

            return 0
        except Exception as e:
            x = str(e)
            print(x)

            return 1

    def undoit(self):
        try:
            path = self.path
            FileName = self.FileName
            OSX_Mod_FileName = self.OSX_Mod_FileName

            FileNameWithPath = path + '/' + FileName
            os.rename(OSX_Mod_FileName, FileNameWithPath)

            return 0
        except Exception as e:
            x = str(e)
            print(x)

            return 1

The key lines that we’ll be exploring here are as follows –

def doit()

FileNameWithPath = path + '/' + FileName
os.rename(FileNameWithPath, os.path.join(os.path.dirname(FileNameWithPath),'.'
                                         + os.path.basename(FileNameWithPath)))

In MAC or Linux, any file starts with ‘.’ will be considered as a hidden file. Hence, we’re changing the file type by doing this manipulation.

def undoit()

OSX_Mod_FileName = self.OSX_Mod_FileName

FileNameWithPath = path + '/' + FileName
os.rename(OSX_Mod_FileName, FileNameWithPath)

In this case, our application simply renaming a file with its the original file to get the file as a normal file.

Let’s understand that in Linux or MAC, you have a lot of other ways to restrict any files as it has much more granular level access control.  But, I thought, why not take a slightly different & fun way to achieve the same. After all, we’re building an Infinity War for Python verse. A little bit of fun will certainly make some sense. 🙂

5. clsProcess.py (This script will invoke any of the hide scripts, i.e. clsWinHide.py or clsOSXHide.py based on the OS platform. Hence, the name comes into the picture.)

 1
 2
 3
 4
 5
 6
 7
 8
 9
10
11
12
13
14
15
16
17
18
19
20
21
22
23
24
25
26
27
28
29
30
31
32
33
34
35
36
37
38
39
40
41
42
43
44
45
46
47
48
49
50
51
52
53
54
55
56
57
58
59
60
61
62
63
64
65
66
67
###########################################
#### Written By: SATYAKI DE          ######
#### Written On: 25-Jan-2019         ######
####                                 ######
#### Objective: Based on the OS, this######
#### script calls the actual script. ######
###########################################

from clsParam import clsParam as cp

plat_det = cp.config['OS_DET']

# Based on the platform
# Application is loading subprocess
# in order to avoid library missing
# case against cross platform

if plat_det == "Windows":
    import clsWinHide as win
else:
    import clsOSXHide as osx

# End of conditional class load

class clsProcess(object):
    def __init__(self):
        self.os_det = plat_det

    def doit(self):
        try:

            os_det = self.os_det
            print("OS Info: ", os_det)

            if os_det == "Windows":
                win_doit = win.clsWinHide()
                ret_val = win_doit.doit()
            else:
                osx_doit = osx.clsOSXHide()
                ret_val = osx_doit.doit()

            return ret_val
        except Exception as e:
            x = str(e)
            print(x)

            return 1

    def undoit(self):
        try:

            os_det = self.os_det
            print("OS Info: ", os_det)

            if os_det == "Windows":
                win_doit = win.clsWinHide()
                ret_val = win_doit.undoit()
            else:
                osx_doit = osx.clsOSXHide()
                ret_val = osx_doit.undoit()

            return ret_val
        except Exception as e:
            x = str(e)
            print(x)

            return 1

Key lines to explores are as follows –

from clsParam import clsParam as cp

plat_det = cp.config['OS_DET']

# Based on the platform
# Application is loading subprocess
# in order to avoid library missing
# case against cross platform

if plat_det == "Windows":
    import clsWinHide as win
else:
    import clsOSXHide as osx

This step is very essential to run the same python scripts in both the environments, e.g. in this case like MAC & Windows.

So, based on the platform details, which the application is getting from the clsParam class, it is loading the specific class to the application. And why it is so important.

Under Windows OS, this will work if you load both the class. But, under MAC, this will fail as the first program will try to load all the libraries & it may happen that the pywin32/pypiwin32 package might not available under MAC. Anyway, you are not even using that package. So, this conditional class loading is significant.

os_det = self.os_det
print("OS Info: ", os_det)

if os_det == "Windows":
    win_doit = win.clsWinHide()
    ret_val = win_doit.doit()
else:
    osx_doit = osx.clsOSXHide()
    ret_val = osx_doit.doit()

As you can see that, based on the OS, it is invoking the correct function of that corresponding class.

6. clsEnDec.py (This script will read the credentials from a csv file & then based on the salt captured from the hidden file, it will either encrypt or decrypt the content. Hence, the name comes into the picture.)

 1
 2
 3
 4
 5
 6
 7
 8
 9
10
11
12
13
14
15
16
17
18
19
20
21
22
23
24
25
26
27
28
29
30
31
32
33
34
35
36
37
38
39
40
41
42
43
44
45
46
47
48
49
50
51
52
53
54
55
56
57
58
59
60
61
62
63
64
###########################################
#### Written By: SATYAKI DE        ########
#### Written On: 25-Jan-2019       ########
#### Package Cryptography needs to ########
#### install in order to run this  ########
#### script.                       ########
####                               ########
#### Objective: This script will   ########
#### encrypt/decrypt based on the  ########
#### hidden supplied salt value.   ########
###########################################

import pandas as p
from cryptography.fernet import Fernet

class clsEnDec(object):

    def __init__(self, token):
        # Calculating Key
        self.token = token

    def encrypt_str(self):
        try:
            # Capturing the Salt Information
            salt = self.token
            # Fetching the content of lookup file
            df_orig = p.read_csv('Config_orig.csv', index_col=False)

            # Checking Individual Types inside the Dataframe
            cipher = Fernet(salt)

            df_orig['User'] = df_orig['User'].apply(lambda x1: cipher.encrypt(bytes(x1,'utf8')))
            df_orig['Pwd'] = df_orig['Pwd'].apply(lambda x2: cipher.encrypt(bytes(x2,'utf8')))

            # Writing to the File
            df_orig.to_csv('Encrypt_Config.csv', index=False)

            return 0
        except Exception as e:
            x = str(e)
            print(x)
            return 1

    def decrypt_str(self):
        try:
            # Capturing the Salt Information
            salt = self.token
            # Checking Individual Types inside the Dataframe
            cipher = Fernet(salt)

            # Fetching the Encrypted csv file
            df_orig = p.read_csv('Encrypt_Config.csv', index_col=False)

            df_orig['User'] = df_orig['User'].apply(lambda x1: str(cipher.decrypt(bytes(x1[2:-1],'utf8'))).replace("b'","").replace("'",""))
            df_orig['Pwd'] = df_orig['Pwd'].apply(lambda x2: str(cipher.decrypt(bytes(x2[2:-1],'utf8'))).replace("b'","").replace("'",""))

            # Writing to the file
            df_orig.to_csv('Decrypt_Config.csv', index=False)

            return 0
        except Exception as e:
            x = str(e)
            print(x)
            return 1

Key lines from this script are as follows –

def encrypt_str()

# Checking Individual Types inside the Dataframe
cipher = Fernet(salt)

df_orig['User'] = df_orig['User'].apply(lambda x1: cipher.encrypt(bytes(x1,'utf8')))
df_orig['Pwd'] = df_orig['Pwd'].apply(lambda x2: cipher.encrypt(bytes(x2,'utf8')))

So, once you captured the salt from that hidden file, the application is capturing that value over here. And, based on that both the field will be encrypted. But, note that cryptography package is required for this. And, you need to pass bytes value to work this thing. Hence, we’ve used bytes() function over here.

def decrypt_str()

cipher = Fernet(salt)

# Fetching the Encrypted csv file
df_orig = p.read_csv('Encrypt_Config.csv', index_col=False)

df_orig['User'] = df_orig['User'].apply(lambda x1: str(cipher.decrypt(bytes(x1[2:-1],'utf8'))).replace("b'","").replace("'",""))
df_orig['Pwd'] = df_orig['Pwd'].apply(lambda x2: str(cipher.decrypt(bytes(x2[2:-1],'utf8'))).replace("b'","").replace("'",""))

Again, in this step, our application is extracting the salt & then it retrieves the encrypted values of corresponding fields & applies the decryption logic on top of it. Note that, since we need to pass bytes value to get it to work. Hence, your output will be appended with (b’xxxxx’). To strip that, we’ve used the replace() functions. You can use regular expression using pattern matching as well.

7. callEnDec.py (This script will create the split csv files or final merge file after the corresponding process. However, this can be used as normal verbose debug logging as well. Hence, the name comes into the picture.)

 1
 2
 3
 4
 5
 6
 7
 8
 9
10
11
12
13
14
15
16
17
18
19
20
21
22
23
24
25
26
27
28
29
30
31
32
33
34
35
36
37
38
39
40
41
42
43
44
45
46
47
48
49
50
51
52
53
54
55
56
57
58
59
60
61
62
63
64
65
66
67
68
69
70
71
72
73
74
75
76
77
78
79
80
81
82
###########################################
#### Written By: SATYAKI DE           #####
#### Written On: 25-Jan-2019          #####
####                                  #####
#### Objective: Main calling function #####
###########################################

import clsEnDec as ed
import clsProcess as h
from clsParam import clsParam as cp
import time as t
import pandas as p

def main():
    print("")
    print("#" * 60)
    print("Calling (Encryption/Decryption) Package!!")
    print("#" * 60)
    print("")

    # Unhiding the file
    x = h.clsProcess()
    ret_val_unhide = x.undoit()

    if ret_val_unhide == 0:
        print("Successfully Unhide the file!")
    else:
        print("Unsuccessful to Unhide the file!")

    # To See the Unhide file
    t.sleep(10)

    print("*" * 60)
    print("Proceeding with Encryption...")
    print("*" * 60)

    # Getting Salt Value from the hidden files
    # by temporarily making it available
    FileName = cp.config['FILENAME']
    df = p.read_csv(FileName, index_col=False)
    salt = str(df.iloc[0]['Token_Salt'])
    print("-" * 60)
    print("Salt: ", salt)
    print("-" * 60)

    # Calling the Encryption Method
    x = ed.clsEnDec(salt)
    ret_val = x.encrypt_str()

    if ret_val == 0:
        print("Encryption Successful!")
    else:
        print("Encryption Failure!")

    print("")
    print("*" * 60)
    print("Checking Decryption Now...")
    print("*" * 60)

    # Calling the Decryption Method
    ret_val1 = x.decrypt_str()

    if ret_val1 == 0:
        print("Decryption Successful!")
    else:
        print("Decryption Failure!")

    # Hiding the salt file
    x = h.clsProcess()
    ret_val_hide = x.doit()

    if ret_val_hide == 0:
        print("Successfully Hide the file!")
    else:
        print("Unsuccessful to Hide the file!")

    print("*" * 60)
    print("Operation Done!")
    print("*" * 60)

if __name__ == '__main__':
    main()

And, here comes the final calling methods.

The key lines that we would like to discuss –

# Getting Salt Value from the hidden files
# by temporarily making it available
FileName = cp.config['FILENAME']
df = p.read_csv(FileName, index_col=False)
salt = str(df.iloc[0]['Token_Salt'])

As I’ve shown that, we have our hidden files that contain only 1 row & 1 column. To extract the specific value we’ve used iloc with the row number as 0 along with the column name, i.e. Token_Salt.

Now, let’s see how it runs –

Windows (64 bit):

Win_Run

Mac (32 bit):

MAC_Run

So, from the screenshot, we can see our desired output & you can calculate the aggregated value based on our sample provided in the previous screenshot.

Let’s check the Encrypted & Decrypted values –

Encrypted Values (Encrypt_Config.csv):

Encrypted_File

Decrypted Values (Decrypt_Config.csv):

Decrypted_File

So, finally, we’ve achieved our target.

I hope this will give you some more idea about more insights into the Python verse. Let me know – how do you think about this post.

Till then – Happy Avenging!