This site mainly deals with various use cases demonstrated using Python, Data Science, Cloud basics, SQL Server, Oracle, Teradata along with SQL & their implementation. Expecting yours active participation & time. This blog can be access from your TP, Tablet & mobile also. Please provide your feedback.
Starts by clearing GPU memory and running garbage collection.
Loads the init_image, resizes it to 1024×1024 pixels, and converts it to RGB format.
Iteratively applies the pipeline to transform the image:
Uses the prompt and specified parameters like strength, guidance_scale, and num_inference_steps.
Stores the resulting frames in a list.
Interpolates between consecutive frames to create smooth transitions:
Uses linear blending for smooth animation across a specified duration and frame rate (24 fps for 10 segments).
Returns the final list of generated frames or an empty list if an error occurs.
Always clears memory after execution.
3. genVideo(prompt, inputImage, targetVideo, fps)
This is the main function for creating a video from an image and text prompt:
Logs the start of the animation generation process.
Calls generate_frames() with the given pipeline, inputImage, and prompt to create frames.
Saves the generated frames as a video using the imageio library, setting the specified frame rate (fps).
Logs a success message and returns 0 if the process is successful.
On error, logs the issue and returns 1.
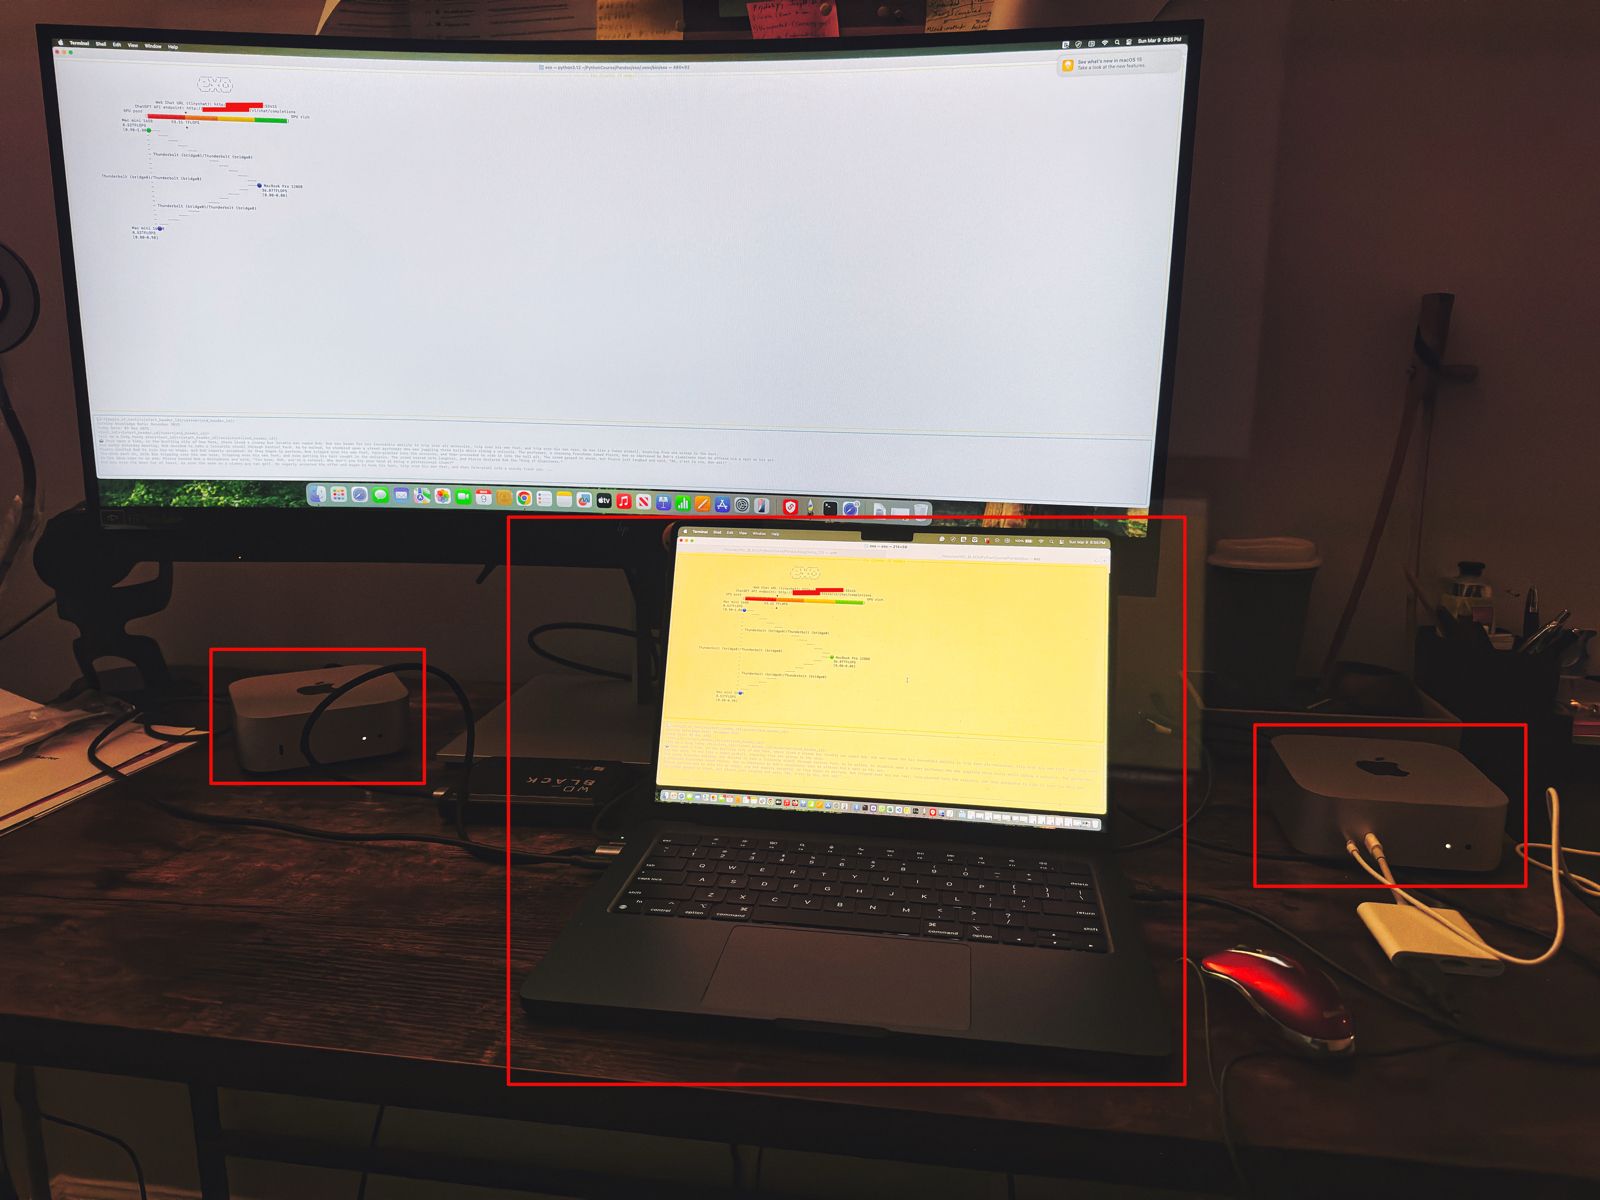
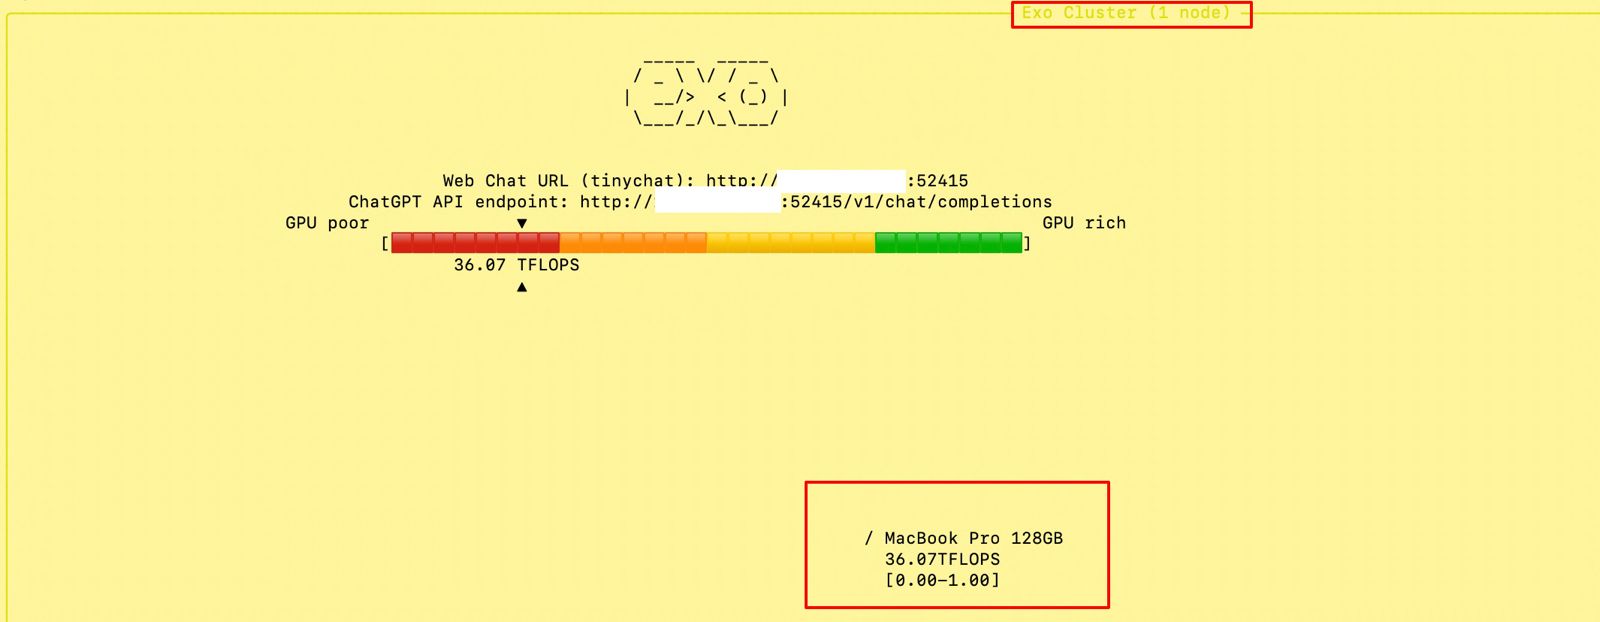
Now, let us understand the performance. But, before that let us explore the device on which we’ve performed these stress test that involves GPU & CPUs as well.
And, here is the performance stats –
From the above snapshot, we can clearly communicate that the GPU is 100% utilized. However, the CPU has shown a significant % of availability.
As you can see, the first pass converts the input prompt to intermediate images within 1 min 30 sec. However, the second pass constitutes multiple hops (11 hops) on an avg 22 seconds. Overall, the application will finish in 5 minutes 36 seconds for a 10-second video clip.
So, we’ve done it.
You can find the detailed code at the GitHub link.
I’ll bring some more exciting topics in the coming days from the Python verse.
Till then, Happy Avenging! 🙂
Note: All the data & scenarios posted here are representational data & scenarios & available over the internet & for educational purposes only. There is always room for improvement in this kind of model & the solution associated with it. I’ve shown the basic ways to achieve the same for educational purposes only.
Today, I’ll be publishing a series of posts on LLM agents and how they can help you improve your delivery capabilities for various tasks.
Also, we’re providing the demo here –
Isn’t it exciting?
Process Flow:
The application will interact with the AutoGen agents, use underlying Open AI APIs to follow the instructions, generate the steps, and then follow that path to generate the desired code. Finally, it will execute the generated scripts if the first outcome of the demo satisfies users.
Function: Sets the logging level to only capture error messages to avoid cluttering the output.
Role: Helps in debugging by capturing and displaying error messages.
Defining the buildAndPlay Method:
defbuildAndPlay(self,inputPrompt):try: user_proxy.initiate_chat( assistant,message=f"We need to solve the following problem: {inputPrompt}. ""Please coordinate with the admin, engineer, game_designer, planner and critic to provide a comprehensive solution. ")return0exceptExceptionas e: x =str(e)print('Error: <<Real-time Translation>>: ', x)return1
Purpose: Defines a method to initiate the problem-solving process.
Function:
Parameters: Takes inputPrompt, which is the problem to be solved.
Action:
Calls user_proxy.initiate_chat() to start a conversation between the user proxy agent and the assistant agent.
Sends a message requesting coordination among all agents to provide a comprehensive solution to the problem.
Error Handling: If an exception occurs, it prints an error message and returns 1.
Role: Initiates collaboration among all agents to solve the provided problem.
Summary of the Workflow:
Agents Setup: Multiple agents with specialized roles are created. Initiating Conversation: The buildAndPlay method starts a conversation, asking agents to collaborate. Problem Solving: Agents communicate and coordinate to provide a comprehensive solution to the input problem. Error Handling: The system captures and logs any errors that occur during execution.
We’ll continue to discuss this topic in the upcoming post.
I’ll bring some more exciting topics in the coming days from the Python verse.
Till then, Happy Avenging! 🙂
Note: All the data & scenarios posted here are representational data & scenarios & available over the internet & for educational purposes only. There is always room for improvement in this kind of model & the solution associated with it. I’ve shown the basic ways to achieve the same for educational purposes only.
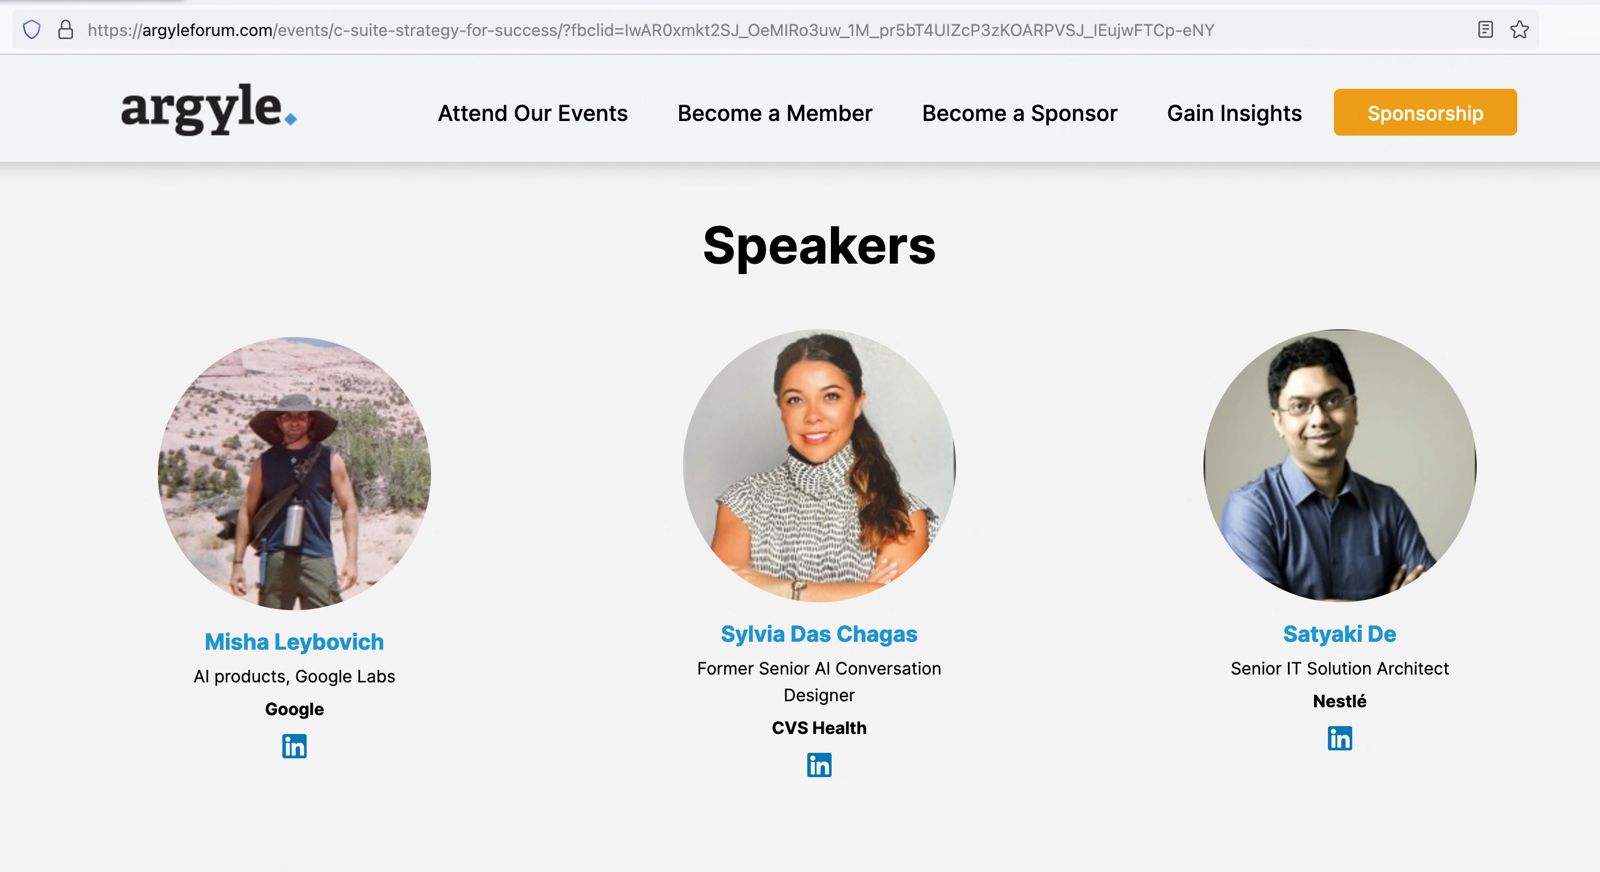
At the recent Argyle AI Summit, a prestigious event in the AI industry, I had the honor of participating as a speaker alongside esteemed professionals like Misha Leybovich from Google Labs. The summit, coordinated by Sylvia Das Chagas, a former senior AI conversation designer at CVS Health, provided an enlightening platform to discuss the evolving role of AI in talent management. Our session focused on the theme “Driving Talent with AI,” addressing some of the most pressing questions in the field. Frequently, relevant use cases were shared in detail to support these threads.
To view the actual page, please click the following link.
Impact of AI on Talent Management
One of the critical topics we explored was AI’s impact on talent management in the upcoming year. AI’s influence in hiring and retention is becoming increasingly significant. For example, AI-powered tools can now analyze vast amounts of data to identify the best candidates for a role, going beyond traditional resume screening. In retention, AI is instrumental in identifying patterns that indicate an employee’s likelihood to leave, enabling proactive measures.
Dispelling Fears Around AI Replacing Jobs
A burning question in AI is how leaders address fears that AI might replace manual jobs. We discussed the importance of leaders framing AI as a complement to human skills rather than a replacement. AI enhances employee capabilities by automating mundane tasks, allowing employees to focus on more creative and strategic work.
Innovative AI Tools for Organizations
Regarding new AI tools that organizations should watch out for, the conversation highlighted tools that enhance remote collaboration and workplace inclusivity. Tools like virtual meeting assistants that can transcribe, translate, and summarize meetings in real time are becoming invaluable in today’s global work environment.
AI in Boosting Employee Motivation and Productivity
AI’s role in boosting employee motivation and productivity was another focal point. We discussed how AI-driven career development programs can offer personalized learning paths, helping employees grow and stay motivated.
Incorporating Multilingual Capabilities in AI Tools
Incorporating multiple languages in tools like ChatGPT was highlighted as a critical step towards inclusivity. This expansion allows a broader range of employees to interact with AI tools in their native language, fostering a more inclusive workplace environment.
Addressing Reluctance to Change
Lastly, we tackled the challenge of addressing employees’ reluctance to change. Emphasizing the importance of transparent communication and education about AI’s benefits was identified as key. Organizations can alleviate fears and encourage a more accepting attitude towards AI by involving employees in the AI implementation process and providing training.
Conclusion
The Argyle AI Summit offered a compelling glimpse into the future of AI in talent management. The session provided valuable insights for leaders looking to harness AI’s potential to enhance talent management strategies by discussing real-world examples and strategies. To gain more in-depth knowledge and perspectives shared during this summit, I encourage interested parties to visit the recorded session link for a more comprehensive understanding.
Or, you can directly view it from here –
Feedback Request
I would greatly appreciate your feedback on the insights shared during the summit. Your thoughts and perspectives are invaluable as we continue to explore and navigate the evolving landscape of AI in the workplace.
Note: Video content hosted at a third-party site by the summit organizer & not by me.
Today, I will share a new post that will contextualize the source files & then read the data into the pandas data frame, and then dynamically create the SQL & execute it. Then, fetch the data from the sources based on the query generated dynamically. This project is for the advanced Python developer and data Science Newbie.
In this post, I’ve directly subscribed to OpenAI & I’m not using OpenAI from Azure. However, I’ll explore that in the future as well.
Before I explain the process to invoke this new library, why not view the demo first & then discuss it?
Demo
FLOW OF EVENTS:
Let us look at the flow diagram as it captures the sequence of events that unfold as part of the process.
The application will take the metadata captured from source data dynamically. It blends the metadata and enhances the prompt to pass to the Flask server. The Flask server has all the limits of contexts.
Once the application receives the correct generated SQL, it will then apply the SQL using the SQLAlchemy package to get the desired results.
IMPORTANT PACKAGES:
The following are the important packages that are essential to this project –
We’ll have both the server and the main application. Today, we’ll be going in reverse mode. We first discuss the main script & then explain all the other class scripts.
1_invokeSQLServer.py (This is the main calling Python script to invoke the OpenAI-Server.)
Please find some of the key snippet from this discussion –
This code defines a web application route that handles POST requests sent to the /message endpoint:
Route Declaration: The @app.route('/message', methods=['POST']) part specifies that the function message() is executed when the server receives a POST request at the /message URL.
Function Definition: Inside the message() function:
It retrieves two pieces of data from the request’s JSON body: input_text (the user’s input message) and session_id (a unique identifier for the user’s session).
It prints the user’s input message, surrounded by lines of asterisks for emphasis.
Conversation History Management:
The code retrieves the conversation history associated with the given session_id. This history is a list of messages.
It then adds the new user message (input_text) to this conversation history.
OpenAI API Call:
The function makes a call to the OpenAI API, passing the user’s message. It specifies not to retry the request if it fails (max_retries=0).
The model used for the OpenAI API call is taken from some configurations (cf.conf['MODEL_NAME']).
Processing API Response:
The response from the OpenAI API is processed to extract the content of the chat response.
This chat response is printed.
Updating Conversation History:
The chat response is added to the conversation history.
The updated conversation history is then stored back in the session or database, associated with the session_id.
Returning the Response: Finally, the function returns the chat response.
clsDynamicSQLProcess.py (This Python class generates the SQL & then executes the flask server to invoke the OpenAI-Server.)
Now, let us understand the few important piece of snippet –
Function Overview: The text2SQLBegin function processes a list of database file names (DBFileNameList), a file path (fileDBPath), a query prompt (srcQueryPrompt), join conditions (joinCond), and a debug indicator (debugInd) to generate SQL commands.
Initial Setup: It starts by initializing variables for the question, the SQL table creation statement, and a string for join conditions.
Debug Prints: The function prints the current and previous session database file names for debugging purposes.
Flag Setting: A flag is set to ‘Y’ if the current session’s database file names match the previous session’s; otherwise, it’s set to ‘N’.
Processing New Session Data: If the flag is ‘N’, indicating new session data:
For each database file, it reads the data, converts string columns to lowercase, and creates a corresponding SQL table in a database using the pandas library.
Metadata is generated for each table and a CREATE TABLE SQL statement is created.
Join Conditions and Statement Aggregation: Join conditions are concatenated, and previous session information is updated with the current session’s data.
Handling Repeated Sessions: If the session data is repeated (flag is ‘Y’), it uses the previous session’s SQL table creation statements and database file names.
Final Input Prompt Creation: It constructs the final input prompt by combining template values with the create table statement, join conditions, and the original question.
Debug Printing: If debug mode is enabled, it prints the final input prompt.
Conclusion: The function clears the DBFileNameList and create_table_statement variables, and returns the constructed input prompt.
The text2SQLEnd function sends an HTTP POST request to a specified URL and returns the response. It takes two parameters: srcContext which contains the input text, and an optional debugInd for debugging purposes. The function constructs the request payload by converting the input text and an empty session ID to JSON format. It sets the request headers, including a content type of ‘application/json’ and a token from the configuration file. The function then sends the POST request using the requests library and returns the text content of the response.
The sql2Data function is designed to execute a SQL query on a database and return the result. It takes a single parameter, srcSQL, which contains the SQL query to be executed. The function uses the pandas library to run the provided SQL query (srcSQL) against a database connection (engine). It then returns the result of this query, which is typically a DataFrame object containing the data retrieved from the database.
defgenData(self,srcQueryPrompt,fileDBPath,DBFileNameList,joinCond,debugInd='N'):try:authorName=self.authorNamewebsite=self.websitevar=datetime.now().strftime("%Y-%m-%d_%H-%M-%S")print('*'*240)print('SQL Start Time: '+str(var))print('*'*240)print('*'*240)print()ifdebugInd=='Y':print('Author Name: ',authorName)print('For more information, please visit the following Website: ',website)print()print('*'*240)print('Your Data for Retrieval:')print('*'*240)ifdebugInd=='Y':print()print('Converted File to Dataframe Sample:')print()else:print()context=self.text2SQLBegin(DBFileNameList,fileDBPath,srcQueryPrompt,joinCond,debugInd)srcSQL=self.text2SQLEnd(context,debugInd)print(srcSQL)print('*'*240)print()resDF=self.sql2Data(srcSQL)print('*'*240)print('SQL End Time: '+str(var))print('*'*240)returnresDFexceptExceptionas e:x=str(e)print('Error: ',x)df=pd.DataFrame()returndf
Initialization and Debug Information: The function begins by initializing variables like authorName, website, and a timestamp (var). It then prints the start time of the SQL process. If the debug indicator (debugInd) is ‘Y’, it prints additional information like the author’s name and website.
Generating SQL Context and Query: The function calls text2SQLBegin with various parameters (file paths, database file names, query prompt, join conditions, and the debug indicator) to generate an SQL context. Then it calls text2SQLEnd with this context and the debug indicator to generate the actual SQL query.
Executing the SQL Query: It prints the generated SQL query for visibility, especially in debug mode. The query is then executed by calling sql2Data, which returns the result as a data frame (resDF).
Finalization and Error Handling: After executing the query, it prints the SQL end time. In case of any exceptions during the process, it catches the error, prints it, and returns an empty DataFrame.
Return Value: The function returns the DataFrame (resDF) containing the results of the executed SQL query. If an error occurs, it returns an empty DataFrame instead.
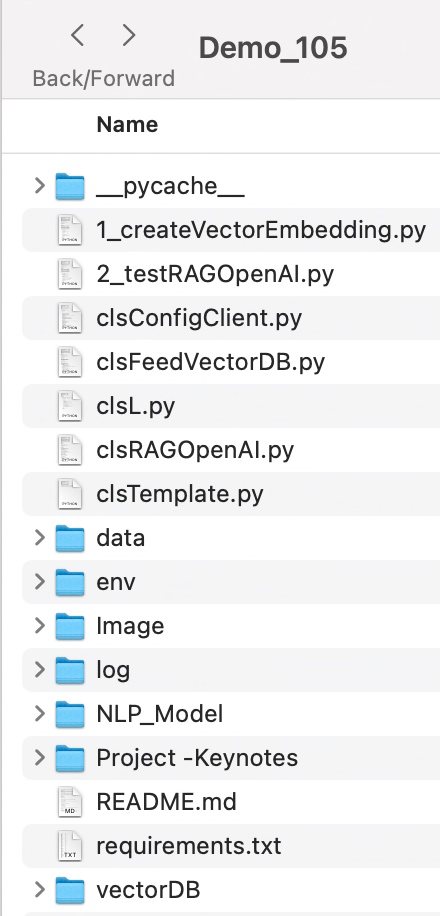
DIRECTORY STRUCTURES:
Let us explore the directory structure starting from the parent to some of the important child folder should look like this –
Let us understand the important screenshots of this entire process –
So, finally, we’ve done it.
You will get the complete codebase in the following GitHub link.
I’ll bring some more exciting topics in the coming days from the Python verse. Please share & subscribe to my post & let me know your feedback.
Till then, Happy Avenging! 🙂
Note: All the data & scenarios posted here are representational data & scenarios & available over the internet & for educational purposes only. Some of the images (except my photo) we’ve used are available over the net. We don’t claim ownership of these images. There is always room for improvement & especially in the prediction quality.
Today, I’ll be presenting another exciting capability of architecture in the world of LLMs, where you need to answer one crucial point & that is how valid the response generated by these LLMs is against your data. This response is critical when discussing business growth & need to take the right action at the right time.
Why not view the demo before going through it?
Demo
Isn’t it exciting? Great! Let us understand this in detail.
Flow of Architecture:
The first dotted box (extreme-left) represents the area that talks about the data ingestion from different sources, including third-party PDFs. It is expected that organizations should have ready-to-digest data sources. Examples: Data Lake, Data Mart, One Lake, or any other equivalent platforms. Those PDFs will provide additional insights beyond the conventional advanced analytics.
You need to have some kind of OCR solution that will extract all the relevant information in the form of text from the documents.
The next important part is how you define the chunking & embedding of data chunks into Vector DB. Chunking & indexing strategies, along with the overlapping chain, play a crucial importance in tying that segregated piece of context into a single context that will be fed into the source for your preferred LLMs.
This system employs a vector similarity search to browse through unstructured information and concurrently accesses the database to retrieve the context, ensuring that the responses are not only comprehensive but also anchored in validated knowledge.
This approach is particularly vital for addressing multi-hop questions, where a single query can be broken down into multiple sub-questions and may require information from numerous documents to generate an accurate answer.
clsFeedVectorDB.py (This is the main class that will invoke the Faiss framework to contextualize the docs inside the vector DB with the source file name to validate the answer from Gen AI using Globe.6B embedding models.)
Let us understand some of the key snippets from the above script (Full scripts will be available in the GitHub Repo) –
# Samplefunctiontoconverttexttoavectordeftext2Vector(self,text): # Encode the text using the tokenizerwords = [wordforwordintext.lower().split()ifwordinself.model] # Ifnowordsinthemodel, returnazerovectorifnot words:returnnp.zeros(self.model.vector_size) # Computetheaverageofthewordvectorsvector=np.mean([self.model[word] forwordinwords],axis=0)returnvector.reshape(1,-1)
This code is for a function called “text2Vector” that takes some text as input and converts it into a numerical vector. Let me break it down step by step:
It starts by taking some text as input, and this text is expected to be a sentence or a piece of text.
The text is then split into individual words, and each word is converted to lowercase.
It checks if each word is present in a pre-trained language model (probably a word embedding model like Word2Vec or GloVe). If a word is not in the model, it’s ignored.
If none of the words from the input text are found in the model, the function returns a vector filled with zeros. This vector has the same size as the word vectors in the model.
If there are words from the input text in the model, the function calculates the average vector of these words. It does this by taking the word vectors for each word found in the model and computing their mean (average). This results in a single vector that represents the input text.
Finally, the function reshapes this vector into a 2D array with one row and as many columns as there are elements in the vector. The reason for this reshaping is often related to compatibility with other parts of the code or libraries used in the project.
So, in simple terms, this function takes a piece of text, looks up the word vectors for the words in that text, and calculates the average of those vectors to create a single numerical representation of the text. If none of the words are found in the model, it returns a vector of zeros.
defgenData(self):try:basePath=self.basePathmodelFileName=self.modelFileNamevectorDBPath=self.vectorDBPathvectorDBFileName=self.vectorDBFileName # CreateaFAISSindexdimension=int(cf.conf['NO_OF_MODEL_DIM']) # Assuming100-dimensionalvectorsindex=faiss.IndexFlatL2(dimension)print('*'*240)print('Vector Index Your Data for Retrieval:')print('*'*240)FullVectorDBname=vectorDBPath+vectorDBFileNameindexFile=str(vectorDBPath) +str(vectorDBFileName) +'.index'print('File: ',str(indexFile))data={} # Listallfilesinthespecifieddirectoryfiles=os.listdir(basePath) # Filteroutfilesthatarenottextfilestext_files= [fileforfileinfilesiffile.endswith('.txt')] # Readeachtextfileforfilein text_files:file_path=os.path.join(basePath,file)print('*'*240)print('Processing File:')print(str(file_path))try: # Attempttoopenwithutf-8encodingwithopen(file_path,'r',encoding='utf-8') as file:forline_number,lineinenumerate(file,start=1): # Assumeeachlineisaseparatedocumentvector=self.text2Vector(line)vector=vector.reshape(-1)index_id=index.ntotalindex.add(np.array([vector])) # Addingthevectortotheindexdata[index_id] ={'text':line,'line_number':line_number,'file_name':file_path} # Storingthelineandfilenameexcept UnicodeDecodeError: # Ifutf-8fails,tryadifferentencodingtry:withopen(file_path,'r',encoding='ISO-8859-1') as file:forline_number,lineinenumerate(file,start=1): # Assumeeachlineisaseparatedocumentvector=self.text2Vector(line)vector=vector.reshape(-1)index_id=index.ntotalindex.add(np.array([vector])) # Addingthevectortotheindexdata[index_id] ={'text':line,'line_number':line_number,'file_name':file_path} # StoringthelineandfilenameexceptExceptionas e:print(f"Could not read file {file}: {e}")continueprint('*'*240) # SavethedatadictionaryusingpickledataCache=vectorDBPath+modelFileNamewithopen(dataCache,'wb') as f:pickle.dump(data,f) # Savetheindexanddataforlaterusefaiss.write_index(index,indexFile)print('*'*240)return0exceptExceptionas e:x=str(e)print('Error: ',x)return1
This code defines a function called genData, and its purpose is to prepare and store data for later retrieval using a FAISS index. Let’s break down what it does step by step:
It starts by assigning several variables, such as basePath, modelFileName, vectorDBPath, and vectorDBFileName. These variables likely contain file paths and configuration settings.
It creates a FAISS index with a specified dimension (assuming 100-dimensional vectors in this case) using faiss.IndexFlatL2. FAISS is a library for efficient similarity search and clustering of high-dimensional data.
It prints the file name and lines where the index will be stored. It initializes an empty dictionary called data to store information about the processed text data.
It lists all the files in a directory specified by basePath. It filters out only the files that have a “.txt” extension as text files.
It then reads each of these text files one by one. For each file:
It attempts to open the file with UTF-8 encoding.
It reads the file line by line.
For each line, it calls a function text2Vector to convert the text into a numerical vector representation. This vector is added to the FAISS index.
It also stores some information about the line, such as the line number and the file name, in the data dictionary.
If there is an issue with UTF-8 encoding, it tries to open the file with a different encoding, “ISO-8859-1”. The same process of reading and storing data continues.
If there are any exceptions (errors) during this process, it prints an error message but continues processing other files.
Once all the files are processed, it saves the data dictionary using the pickle library to a file specified by dataCache.
It also saves the FAISS index to a file specified by indexFile.
Finally, it returns 0 if the process completes successfully or 1 if there was an error during execution.
In summary, this function reads text files, converts their contents into numerical vectors, and builds a FAISS index for efficient similarity search. It also saves the processed data and the index for later use. If there are any issues during the process, it prints error messages but continues processing other files.
clsRAGOpenAI.py (This is the main class that will invoke the RAG class, which will get the contexts with references including source files, line numbers, and source texts. This will help the customer to validate the source against the OpenAI response to understand & control the data bias & other potential critical issues.)
Let us understand some of the key snippets from the above script (Full scripts will be available in the GitHub Repo) –
defragAnswerWithHaystackAndGPT3(self,queryVector,k,question):modelName=self.modelNamemaxToken=self.maxTokentemp=self.temp # AssuminggetTopKContextsisamethodthatreturnsthetopKcontextscontexts=self.getTopKContexts(queryVector,k)messages= [] # Addcontextsas system messagesforfile_name,line_number,textin contexts:messages.append({"role":"system","content":f"Document: {file_name} \nLine Number: {line_number} \nContent: {text}"})prompt=self.generateOpenaiPrompt(queryVector,k)prompt=prompt+"Question: "+str(question) +". \n Answer based on the above documents." # Adduserquestionmessages.append({"role":"user","content":prompt}) # Createchatcompletioncompletion=client.chat.completions.create(model=modelName,messages=messages,temperature=temp,max_tokens=maxToken ) # Assumingthelastmessageintheresponseistheanswerlast_response=completion.choices[0].message.contentsource_refernces= ['FileName: '+str(context[0]) +' - Line Numbers: '+str(context[1]) +' - Source Text (Reference): '+str(context[2]) forcontextincontexts]returnlast_response,source_refernces
This code defines a function called ragAnswerWithHaystackAndGPT3. Its purpose is to use a combination of the Haystack search method and OpenAI’s GPT-3 model to generate an answer to a user’s question. Let’s break down what it does step by step:
It starts by assigning several variables, such as modelName, maxToken, and temp. These variables likely contain model-specific information and settings for GPT-3.
It calls a method getTopKContexts to retrieve the top K contexts (which are likely documents or pieces of text) related to the user’s query. These contexts are stored in the contexts variable.
It initializes an empty list called messages to store messages that will be used in the conversation with the GPT-3 model.
It iterates through each context and adds them as system messages to the messages list. These system messages provide information about the documents or sources being used in the conversation.
It creates a prompt that combines the query, retrieved contexts, and the user’s question. This prompt is then added as a user message to the messages list. It effectively sets up the conversation for GPT-3, where the user’s question is followed by context.
It makes a request to the GPT-3 model using the client.chat.completions.create method, passing in the model name, the constructed messages, and other settings such as temperature and maximum tokens.
After receiving a response from GPT-3, it assumes that the last message in the response contains the answer generated by the model.
It also constructs source_references, which is a list of references to the documents or sources used in generating the answer. This information includes the file name, line numbers, and source text for each context.
Finally, it returns the generated answer (last_response) and the source references to the caller.
In summary, this function takes a user’s query, retrieves relevant contexts or documents, sets up a conversation with GPT-3 that includes the query and contexts, and then uses GPT-3 to generate an answer. It also provides references to the sources used in generating the answer.
This code defines a function called getTopKContexts. Its purpose is to retrieve the top K relevant contexts or pieces of information from a pre-built index based on a query vector. Here’s a breakdown of what it does:
It takes two parameters as input: queryVector, which is a numerical vector representing a query, and k, which specifies how many relevant contexts to retrieve.
Inside a try-except block, it attempts the following steps:
It uses the index.search method to find the top K closest contexts to the given queryVector. This method returns two arrays: distances (measuring how similar the contexts are to the query) and indices (indicating the positions of the closest contexts in the data).
It creates a list called “resDict", which contains tuples for each of the top K contexts. Each tuple contains three pieces of information: the file name (file_name), the line number (line_number), and the text content (text) of the context. These details are extracted from a data dictionary.
If the process completes successfully, it returns the list of top K contexts (resDict) to the caller.
If there’s an exception (an error) during this process, it captures the error message as a string (x), prints the error message, and then returns the error message itself.
In summary, this function takes a query vector and finds the K most relevant contexts or pieces of information based on their similarity to the query. It returns these contexts as a list of tuples containing file names, line numbers, and text content. If there’s an error, it prints an error message and returns the error message string.
defgenerateOpenaiPrompt(self,queryVector,k):contexts=self.getTopKContexts(queryVector,k)template=ct.templateVal_1prompt=templateforfile_name,line_number,textin contexts:prompt+=f"Document: {file_name}\n Line Number: {line_number} \n Content: {text}\n\n"returnprompt
This code defines a function called generateOpenaiPrompt. Its purpose is to create a prompt or a piece of text that combines a template with information from the top K relevant contexts retrieved earlier. Let’s break down what it does:
It starts by calling the getTopKContexts function to obtain the top K relevant contexts based on a given queryVector.
It initializes a variable called template with a predefined template value (likely defined elsewhere in the code).
It sets the prompt variable to the initial template.
Then, it enters a loop where it iterates through each of the relevant contexts retrieved earlier (contexts are typically documents or text snippets).
For each context, it appends information to the prompt. Specifically, it adds lines to the prompt that include:
The document’s file name (Document: [file_name]).
The line number within the document (Line Number: [line_number]).
The content of the context itself (Content: [text]).
It adds some extra spacing (newlines) between each context to ensure readability.
Finally, it returns the complete – prompt, which is a combination of the template and information from the relevant contexts.
In summary, this function takes a query vector, retrieves relevant contexts, and creates a prompt by combining a template with information from these contexts. This prompt can then be used as input for an AI model or system, likely for generating responses or answers based on the provided context.
Let us understand the directory structure of this entire application –
To learn more about this package, please visit the following GitHub link.
So, finally, we’ve done it. I know that this post is relatively smaller than my earlier post. But, I think, you can get a good hack to improve some of your long-running jobs by applying this trick.
I’ll bring some more exciting topics in the coming days from the Python verse. Please share & subscribe to my post & let me know your feedback.
Till then, Happy Avenging! 🙂
Note: All the data & scenarios posted here are representational data & scenarios & available over the internet & for educational purposes only. Some of the images (except my photo) we’ve used are available over the net. We don’t claim ownership of these images. There is always room for improvement & especially in the prediction quality.
Today, I’m very excited to demonstrate an effortless & new way to extract the transcript from YouTube videos & then answer the questions based on the topics selected by the users. In this post, I plan to deal with the user inputs to consider the case first & then it can summarize the video content through useful advanced analytics with the help of the LangChain & OpenAI-based model.
In this post, I’ve directly subscribed to OpenAI & I’m not using OpenAI from Azure. However, I’ll explore that in the future as well. Before I explain the process to invoke this new library, why not view the demo first & then discuss it?
Demo
Isn’t it very exciting? This will lead to a whole new ballgame, where one can get critical decision-making information from these human sources along with their traditional advanced analytical data.
How will it help?
Let’s say as per your historical data & analytics, the dashboard is recommending prod-A, prod-B & prod-C as the top three products for potential top-performing brands. Whereas, you are getting some alerts from the TV news on prod-B due to the recent incidents. So, in that case, you don’t want to continue with the prod-B investment. You may find a new product named prod-Z. That may reduce the risk of your investment.
What is LangChain?
LangChain is a framework for developing applications powered by language models. We believe that the most powerful and differentiated applications will not only call out to a language model but will also be:
Data-aware: connect a language model to other sources of data
Agentic: allow a language model to interact with its environment
The LangChain framework works around these principles.
To know more about this, please click the following link.
As you can see, this is one of the critical components in our solution, which will bind the OpenAI bot & it will feed the necessary data to provide the correct response.
What is FAISS?
Faiss is a library for efficient similarity search and clustering of dense vectors. It contains algorithms that search in sets of vectors of any size, up to ones that do not fit in RAM. It also has supporting code for evaluation and parameter tuning.
Faiss developed using C++ with complete wrappers for Python—some of the most beneficial algorithms available both on CPU & in GPU as well. Facebook AI Research develops it.
To know more about this, please click the following link.
FLOW OF EVENTS:
Let us look at the flow diagram as it captures the sequence of events that unfold as part of the process.
Here are the steps that will follow in sequence –
The application will first get the topic on which it needs to look from YouTube & find the top 5 videos using the YouTube data-API.
Once the application returns a list of websites from the above step, LangChain will drive the application will extract the transcripts from the video & then optimize the response size in smaller chunks to address the costly OpenAI calls. During this time, it will invoke FAISS to create document DBs.
Finally, it will send those chunks to OpenAI for the best response based on your supplied template that performs the final analysis with small data required for your query & gets the appropriate response with fewer costs.
CODE:
Why don’t we go through the code made accessible due to this new library for this particular use case?
clsConfigClient.py (This is the main calling Python script for the input parameters.)
This file contains hidden or bidirectional Unicode text that may be interpreted or compiled differently than what appears below. To review, open the file in an editor that reveals hidden Unicode characters. Learn more about bidirectional Unicode characters
From the above code snippet, one can understand that we need both the API keys for YouTube & OpenAI. And they have separate costs & usage, which I’ll share later in the post. Also, notice that the temperature sets to 0.2 ( range between 0 to 1). That means our AI bot will be consistent in response. And our application will use the GPT-3.5-turbo model for its analytic response.
clsTemplate.py (Contains all the templates for OpenAI.)
This file contains hidden or bidirectional Unicode text that may be interpreted or compiled differently than what appears below. To review, open the file in an editor that reveals hidden Unicode characters. Learn more about bidirectional Unicode characters
The above code is self-explanatory. Here, we’re keeping the correct instructions for our OpenAI to respond within these guidelines.
clsVideoContentScrapper.py (Main class to extract the transcript from the YouTube videos & then answer the questions based on the topics selected by the users.)
This file contains hidden or bidirectional Unicode text that may be interpreted or compiled differently than what appears below. To review, open the file in an editor that reveals hidden Unicode characters. Learn more about bidirectional Unicode characters
The above code will fetch the most relevant YouTube URLs & bind them into a list along with the channel names & then share the lists with the main functions.
The provided Python code defines a function createDBFromYoutubeVideoUrl which appears to create a database of text documents from the transcript of a YouTube video. Here’s the explanation in simple English:
The function createDBFromYoutubeVideoUrl has defined with one argument: video_url.
The function uses a try-except block to handle any potential exceptions or errors that may occur.
Inside the try block, the following steps are going to perform:
First, it creates a YoutubeLoader object from the provided video_url. This object is likely responsible for interacting with the YouTube video specified by the URL.
The loader object then loads the transcript of the video. This object is the text version of everything spoken in the video.
It then creates a RecursiveCharacterTextSplitter object with a specified chunk_size of 1000 and chunk_overlap of 100. This object may split the transcript into smaller chunks (documents) of text for easier processing or analysis. Each piece will be around 1000 characters long, and there will overlap of 100 characters between consecutive chunks.
The split_documents method of the text_splitter object will split the transcript into smaller documents. These documents are stored in the docs variable.
The FAISS.from_documents method is then called with docs and embeddings as arguments to create a FAISS (Facebook AI Similarity Search) index. This index is a database used for efficient similarity search and clustering of high-dimensional vectors, which in this case, are the embeddings of the documents. The FAISS index is stored in the db variable.
Finally, the db variable is returned, representing the created database from the video transcript.
4. If an exception occurs during the execution of the try block, the code execution moves to the except block:
Here, it first converts the exception e to a string x.
Then it prints an error message.
Finally, it returns an empty string as an indication of the error.
defgetResponseFromQuery(self,db,query,k=4):try:""" gpt-3.5-turbo can handle up to 4097 tokens. Setting the chunksize to 1000 and k to 4 maximizesthenumberoftokenstoanalyze.""" mod_name = self.model_nametemp_val=self.temp_valdocs=db.similarity_search(query,k=k)docs_page_content="".join([d.page_contentfordindocs])chat=ChatOpenAI(model_name=mod_name,temperature=temp_val) # Templatetouseforthesystemmessageprompttemplate=ct.templateVal_1system_message_prompt=SystemMessagePromptTemplate.from_template(template) # Humanquestionprompthuman_template="Answer the following question: {question}"human_message_prompt=HumanMessagePromptTemplate.from_template(human_template)chat_prompt=ChatPromptTemplate.from_messages( [system_message_prompt,human_message_prompt] )chain=LLMChain(llm=chat,prompt=chat_prompt)response=chain.run(question=query,docs=docs_page_content)response=response.replace("\n","")returnresponse,docsexceptExceptionas e:x=str(e)print('Error: ',x)return'',''
The Python function getResponseFromQuery is designed to search a given database (db) for a specific query and then generate a response using a language model (possibly GPT-3.5-turbo). The answer is based on the content found and the particular question. Here is a simple English summary:
The function getResponseFromQuery takes three parameters: db, query, and k. The k parameter is optional and defaults to 4 if not provided. db is the database to search, the query is the question or prompts to analyze, and k is the number of similar items to return.
The function initiates a try-except block for handling any errors that might occur.
Inside the try block:
The function retrieves the model name and temperature value from the instance of the class this function is a part of.
The function then searches the db database for documents similar to the query and saves these in docs.
It concatenates the content of the returned documents into a single string docs_page_content.
It creates a ChatOpenAI object with the model name and temperature value.
It creates a system message prompt from a predefined template.
It creates a human message prompt, which is the query.
It combines these two prompts to form a chat prompt.
An LLMChain object is then created using the ChatOpenAI object and the chat prompt.
This LLMChain object is used to generate a response to the query using the content of the documents found in the database. The answer is then formatted by replacing all newline characters with empty strings.
Finally, the function returns this response along with the original documents.
If any error occurs during these operations, the function goes to the except block where:
The error message is printed.
The function returns two empty strings to indicate an error occurred, and no response or documents could be produced.
defextractContentInText(self,topic,query):try:discussedTopic= []strKeyText=''cnt=0max_cnt=self.max_cnturlList,channelList=self.topFiveURLFromYouTube(youtube,q=topic,part='id,snippet',maxResults=max_cnt,type='video')print('Returned List: ')print(urlList)print()forvideo_urlin urlList:print('Processing Video: ')print(video_url)db=self.createDBFromYoutubeVideoUrl(video_url)response,docs=self.getResponseFromQuery(db,query)iflen(response) >0:strKeyText='As per the topic discussed in '+channelList[cnt] +', 'discussedTopic.append(strKeyText+response)cnt+=1returndiscussedTopicexceptExceptionas e:discussedTopic= []x=str(e)print('Error: ',x)returndiscussedTopic
This Python function, extractContentInText, is aimed to extract relevant content from the transcripts of top YouTube videos on a specific topic and generate responses to a given query. Here’s a simple English translation:
The function extractContentInText is defined with topic and query as parameters.
It begins with a try-except block to catch and handle any possible exceptions.
In the try block:
It initializes several variables: an empty list discussedTopic to store the extracted information, an empty string strKeyText to keep specific parts of the content, a counter cnt initialized at 0, and max_cnt retrieved from the self-object to specify the maximum number of YouTube videos to consider.
It calls the topFiveURLFromYouTube function (defined previously) to get the URLs of the top videos on the given topic from YouTube. It also retrieves the list of channel names associated with these videos.
It prints the returned list of URLs.
Then, it starts a loop over each URL in the urlList.
For each URL, it prints the URL, then creates a database from the transcript of the YouTube video using the function createDBFromYoutubeVideoUrl.
It then uses the getResponseFromQuery function to get a response to the query based on the content of the database.
If the length of the response is greater than 0 (meaning there is a response), it forms a string strKeyText to indicate the channel that the topic was discussed on and then appends the answer to this string. This entire string is then added to the discussedTopic list.
It increments the counter cnt by one after each iteration.
Finally, it returns the discussedTopic list, which now contains relevant content extracted from the videos.
If any error occurs during these operations, the function goes into the except block:
It first resets discussedTopic to an empty list.
Then it converts the exception e to a string and prints the error message.
Lastly, it returns the empty discussedTopic list, indicating that no content could be extracted due to the error.
testLangChain.py (Main Python script to extract the transcript from the YouTube videos & then answer the questions based on the topics selected by the users.)
This file contains hidden or bidirectional Unicode text that may be interpreted or compiled differently than what appears below. To review, open the file in an editor that reveals hidden Unicode characters. Learn more about bidirectional Unicode characters
defmain():try:var=datetime.datetime.now().strftime("%Y-%m-%d_%H-%M-%S")print('*'*120)print('Start Time: '+str(var))print('*'*120) #query="What are they saying about Microsoft?"print('Please share your topic!')inputTopic=input('User: ')print('Please ask your questions?')inputQry=input('User: ')print()retList=cVCScrapper.extractContentInText(inputTopic,inputQry)cnt=0fordiscussedTopicin retList:finText=str(cnt+1) +') '+discussedTopicprint()print(textwrap.fill(finText,width=150))cnt+=1r1=len(retList)ifr1>0:print()print('Successfully Scrapped!')else:print()print('Failed to Scrappe!')print('*'*120)var1=datetime.datetime.now().strftime("%Y-%m-%d_%H-%M-%S")print('End Time: '+str(var1))exceptExceptionas e:x=str(e)print('Error: ',x)if__name__=="__main__":main()
The above main application will capture the topics from the user & then will give the user a chance to ask specific questions on the topics, invoking the main class to extract the transcript from YouTube & then feed it as a source using ChainLang & finally deliver the response. If there is no response, then it will skip the overall options.
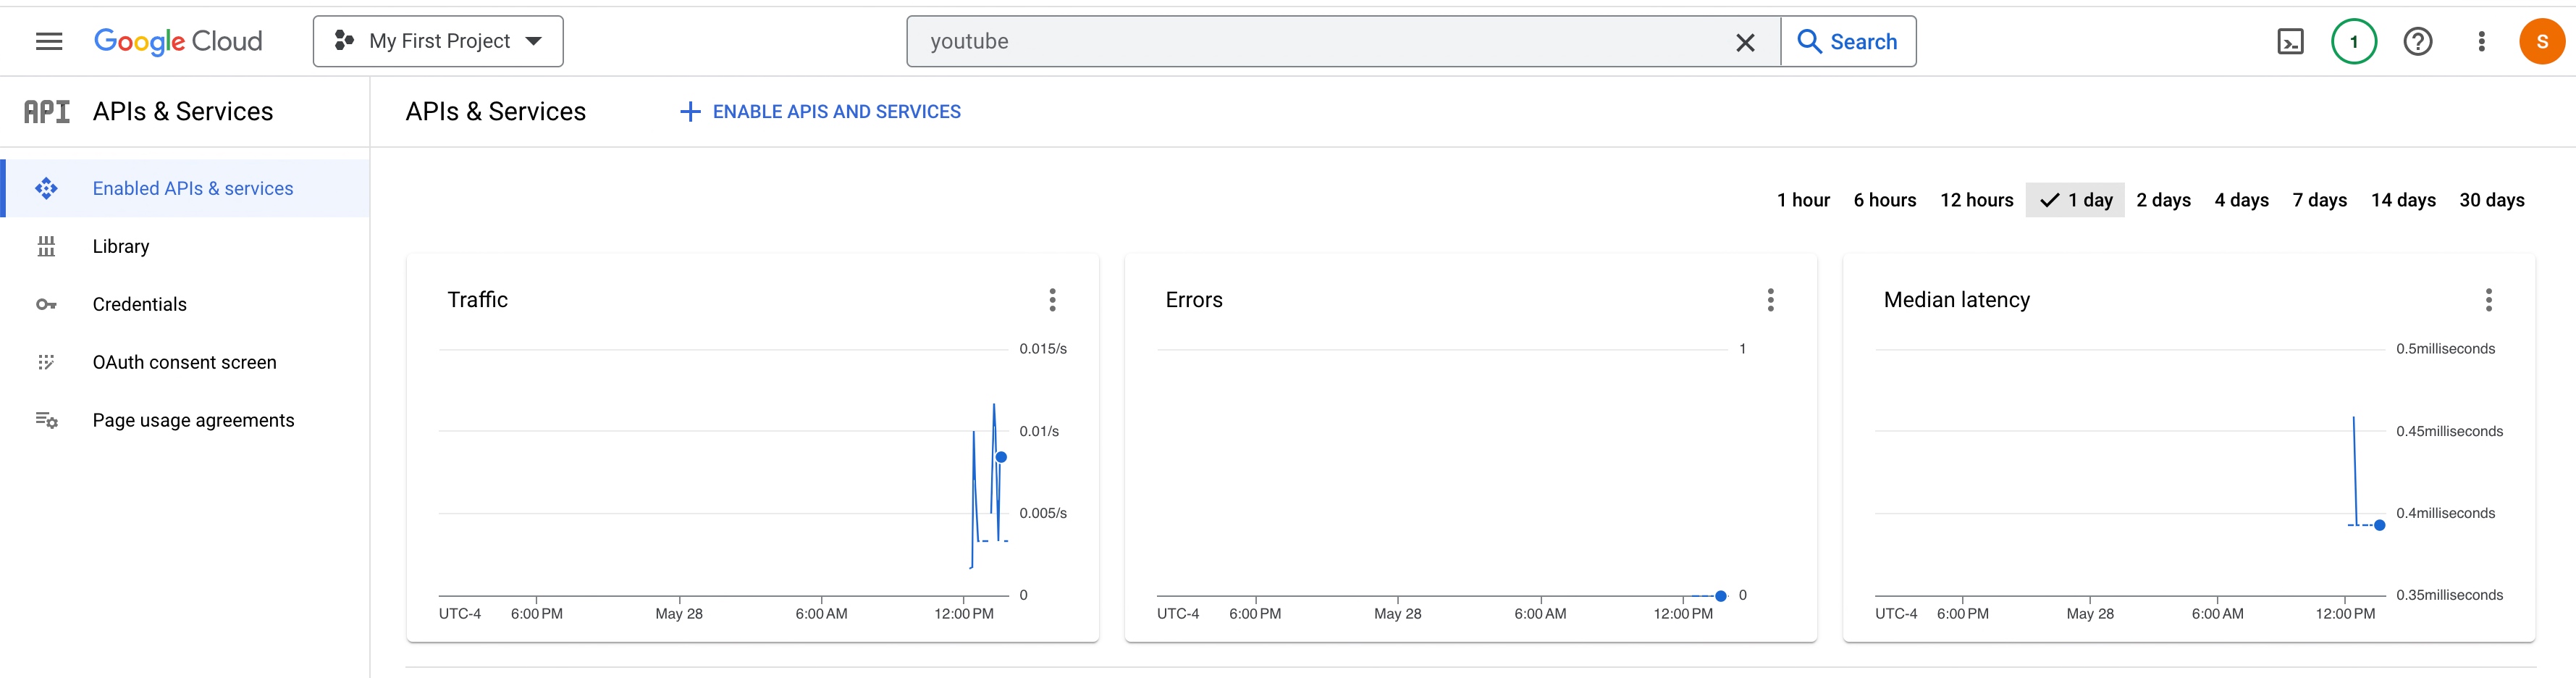
USAGE & COST FACTOR:
Please find the OpenAI usage –
Please find the YouTube API usage –
So, finally, we’ve done it.
I know that this post is relatively bigger than my earlier post. But, I think, you can get all the details once you go through it.
You will get the complete codebase in the following GitHub link.
I’ll bring some more exciting topics in the coming days from the Python verse. Please share & subscribe to my post & let me know your feedback.
Till then, Happy Avenging! 🙂
Note: All the data & scenarios posted here are representational data & scenarios & available over the internet & for educational purposes only. Some of the images (except my photo) we’ve used are available over the net. We don’t claim ownership of these images. There is always room for improvement & especially in the prediction quality. Sample video taken from Santrel Media & you would find the link over here.
Today, I’ll discuss another important topic before I will share the excellent use case next month, as I still need some time to finish that one. We’ll see how we can leverage the brilliant capability of a low-code machine-learning library named PyCaret.
But before going through the details, why don’t we view the demo & then go through it?
Demo
Architecture:
Let us understand the flow of events –
As one can see, the initial training requests are triggered from the PyCaret-driven training models. And the application can successfully process & identify the best models out of the other combinations.
Python Packages:
Following are the python packages that are necessary to develop this use case –
pipinstallpandaspipinstallpycaret
PyCaret is dependent on a combination of other popular python packages. So, you need to install them successfully to run this package.
CODE:
clsConfigClient.py (Main configuration file)
This file contains hidden or bidirectional Unicode text that may be interpreted or compiled differently than what appears below. To review, open the file in an editor that reveals hidden Unicode characters. Learn more about bidirectional Unicode characters
I’m skipping this section as it is self-explanatory.
clsTrainModel.py (This is the main class that contains the core logic of low-code machine-learning library to evaluate the best model for your solutions.)
This file contains hidden or bidirectional Unicode text that may be interpreted or compiled differently than what appears below. To review, open the file in an editor that reveals hidden Unicode characters. Learn more about bidirectional Unicode characters
Import necessary libraries and load the Titanic dataset.
Initialize the PyCaret setup, specifying the target variable, train-test split, categorical and ordinal features, and features to ignore.
Compare various models to find the best-performing one.
Create a specific model (Random Forest in this case).
Perform hyper-parameter tuning on the Random Forest model.
Evaluate the model’s performance using a confusion matrix and AUC-ROC curve.
Finalize the model by training it on the complete dataset.
Make predictions on new data.
Save the trained model for future use.
trainPYCARETModel.py (This is the main calling python script that will invoke the training class of PyCaret package.)
This file contains hidden or bidirectional Unicode text that may be interpreted or compiled differently than what appears below. To review, open the file in an editor that reveals hidden Unicode characters. Learn more about bidirectional Unicode characters
The above code is pretty self-explanatory as well.
testPYCARETModel.py (This is the main calling python script that will invoke the testing script for PyCaret package.)
This file contains hidden or bidirectional Unicode text that may be interpreted or compiled differently than what appears below. To review, open the file in an editor that reveals hidden Unicode characters. Learn more about bidirectional Unicode characters
In this code, the application uses the stored model & then forecasts based on the optimized PyCaret model tuning.
Conclusion:
The above code demonstrates an end-to-end binary classification pipeline using the PyCaret library for the Titanic dataset. The goal is to predict whether a passenger survived based on the available features. Here are some conclusions you can draw from the code and data:
Ease of use: The code showcases how PyCaret simplifies the machine learning process, from data preprocessing to model training, evaluation, and deployment. With just a few lines of code, you can perform tasks that would require much more effort using lower-level libraries.
Model selection: The compare_models() function provides a quick and easy way to compare various machine learning algorithms and identify the best-performing one based on the chosen evaluation metric (accuracy by default). This selection helps you select a suitable model for the given problem.
Hyper-parameter tuning: The tune_model() function automates the process of hyper-parameter tuning to improve model performance. We tuned a Random Forest model to optimize its predictive power in the example.
Model evaluation: PyCaret provides several built-in visualization tools for assessing model performance. In the example, we used a confusion matrix and AUC-ROC curve to evaluate the performance of the tuned Random Forest model.
Model deployment: The example demonstrates how to make predictions using the trained model and save the model for future use. This deployment showcases how PyCaret can streamline the process of deploying a machine-learning model in a production environment.
It is important to note that the conclusions drawn from the code and data are specific to the Titanic dataset and the chosen features. Adjust the feature engineering, preprocessing, and model selection steps for different datasets or problems accordingly. However, the general workflow and benefits provided by PyCaret would remain the same.
So, finally, we’ve done it.
I know that this post is relatively bigger than my earlier post. But, I think, you can get all the details once you go through it.
You will get the complete codebase in the following GitHub link.
I’ll bring some more exciting topics in the coming days from the Python verse. Please share & subscribe to my post & let me know your feedback.
Till then, Happy Avenging! 🙂
Note: All the data & scenarios posted here are representational data & scenarios & available over the internet & for educational purposes only. Some of the images (except my photo) we’ve used are available over the net. We don’t claim ownership of these images. There is always room for improvement & especially in the prediction quality.
This week we’re going to extend one of our earlier posts & trying to read an entire text from streaming using computer vision. If you want to view the previous post, please click the following link.
But, before we proceed, why don’t we view the demo first?
Demo
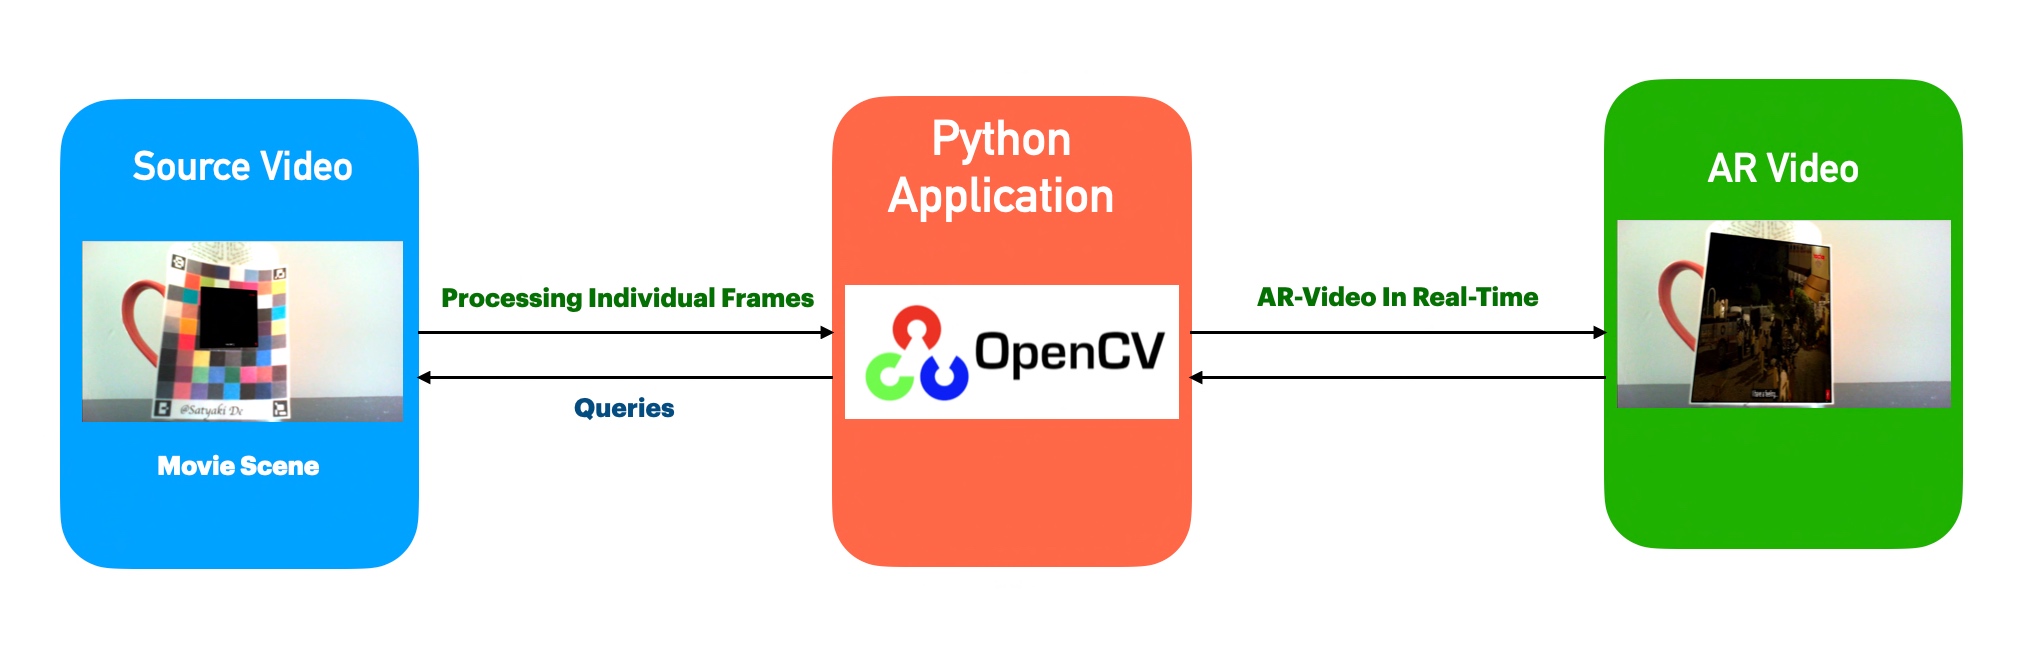
Architecture:
Let us understand the architecture flow –
Architecture flow
The above diagram shows that the application, which uses the Open-CV, analyzes individual frames from the source & extracts the complete text within the video & displays it on top of the target screen besides prints the same in the console.
Let us now understand the code. For this use case, we will only discuss three python scripts. However, we need more than these three. However, we have already discussed them in some of the early posts. Hence, we will skip them here.
clsReadingTextFromStream.py (This is the main class of python script that will extract the text from the WebCAM streaming in real-time.)
This file contains hidden or bidirectional Unicode text that may be interpreted or compiled differently than what appears below. To review, open the file in an editor that reveals hidden Unicode characters. Learn more about bidirectional Unicode characters
Please find the key snippet from the above script –
# Two output layer names for the text detector model
lNames = cf.conf['LAYER_DET']
# Tesseract OCR text param values
strVal = "-l " + str(cf.conf['LANG']) + " --oem " + str(cf.conf['OEM_VAL']) + " --psm " + str(cf.conf['PSM_VAL']) + ""
config = (strVal)
The first line contains the two output layers’ names for the text detector model. Among them, the first one indicates the outcome possibilities & the second one use to derive the bounding box coordinates of the predicted text.
The second line contains various options for the tesseract APIs. You need to understand the opportunities in detail to make them work. These are the essential options for our use case –
Language – The intended language, for example, English, Spanish, Hindi, Bengali, etc.
OEM flag – In this case, the application will use 4 to indicate LSTM neural net model for OCR.
OEM Value – In this case, the selected value is 7, indicating that the application treats the ROI as a single line of text.
For more details, please refer to the config file.
print("[INFO] Loading Text Detector...")
net = cv2.dnn.readNet(modelPath)
The above lines bring the already created model & load it to memory for evaluation.
# Setting new width and height and then determine the ratio in change
# for both the width and height
(newW, newH) = (wt, ht)
rW = origW / float(newW)
rH = origH / float(newH)
# Resize the frame and grab the new frame dimensions
frame = cv2.resize(frame, (newW, newH))
(H, W) = frame.shape[:2]
# Construct a blob from the frame and then perform a forward pass of
# the model to obtain the two output layer sets
blob = cv2.dnn.blobFromImage(frame, 1.0, (W, H), sParam, swapRB=True, crop=False)
net.setInput(blob)
(confScore, imgGeo) = net.forward(lNames)
# Decode the predictions, then apply non-maxima suppression to
# suppress weak, overlapping bounding boxes
(rects, confidences) = self.predictText(confScore, imgGeo)
boxes = non_max_suppression(np.array(rects), probs=confidences)
The above lines are more of preparing individual frames to get the bounding box by resizing the height & width followed by a forward pass of the model to obtain two output layer sets. And then apply the non-maxima suppression to remove the weak, overlapping bounding box by interpreting the prediction. In short, this will identify the potential text region & put the bounding box surrounding it.
# Initialize the list of results
res = []
# Getting BoundingBox boundaries
res = self.findBoundBox(boxes, res, rW, rH, orig, origW, origH, pad)
The above function will create the bounding box surrounding the predicted text regions. Also, we will capture the expected text inside the result variable.
for (spX, spY, epX, epY) in boxes:
# Scale the bounding box coordinates based on the respective
# ratios
spX = int(spX * rW)
spY = int(spY * rH)
epX = int(epX * rW)
epY = int(epY * rH)
# To obtain a better OCR of the text we can potentially
# apply a bit of padding surrounding the bounding box.
# And, computing the deltas in both the x and y directions
dX = int((epX - spX) * pad)
dY = int((epY - spY) * pad)
# Apply padding to each side of the bounding box, respectively
spX = max(0, spX - dX)
spY = max(0, spY - dY)
epX = min(origW, epX + (dX * 2))
epY = min(origH, epY + (dY * 2))
# Extract the actual padded ROI
roi = orig[spY:epY, spX:epX]
Now, the application will scale the bounding boxes based on the previously computed ratio for actual text recognition. In this process, the application also padded the bounding boxes & then extracted the padded region of interest.
# Choose the proper OCR Config
text = pytesseract.image_to_string(roi, config=config)
# Add the bounding box coordinates and OCR'd text to the list
# of results
res.append(((spX, spY, epX, epY), text))
Using OCR options, the application extracts the text within the video frame & adds that to the res list.
# Sort the results bounding box coordinates from top to bottom
res = sorted(res, key=lambda r:r[0][1])
It then sends a sorted output to the primary calling functions.
for ((spX, spY, epX, epY), text) in res:
# Display the text OCR by using Tesseract APIs
print("Reading Text::")
print("=" *60)
print(text)
print("=" *60)
# Removing the non-ASCII text so it can draw the text on the frame
# using OpenCV, then draw the text and a bounding box surrounding
# the text region of the input frame
text = "".join([c if ord(c) < aRange else "" for c in text]).strip()
output = orig.copy()
cv2.rectangle(output, (spX, spY), (epX, epY), drawTag, 2)
cv2.putText(output, text, (spX, spY - 20), cv2.FONT_HERSHEY_SIMPLEX, 1.2, drawTag, 3)
# Show the output frame
cv2.imshow(title, output)
Finally, it fetches the potential text region along with the text & then prints on top of the source video. Also, it removed some non-printable characters during this time to avoid any cryptic texts.
readingVideo.py (Main calling script.)
This file contains hidden or bidirectional Unicode text that may be interpreted or compiled differently than what appears below. To review, open the file in an editor that reveals hidden Unicode characters. Learn more about bidirectional Unicode characters
# Instantiating all the main class
x1 = rtfs.clsReadingTextFromStream()
# Execute all the pass
r1 = x1.processStream(debugInd, var)
if (r1 == 0):
print('Successfully read text from the Live Stream!')
else:
print('Failed to read text from the Live Stream!')
The above lines instantiate the main calling class & then invoke the function to get the desired extracted text from the live streaming video if that is successful.
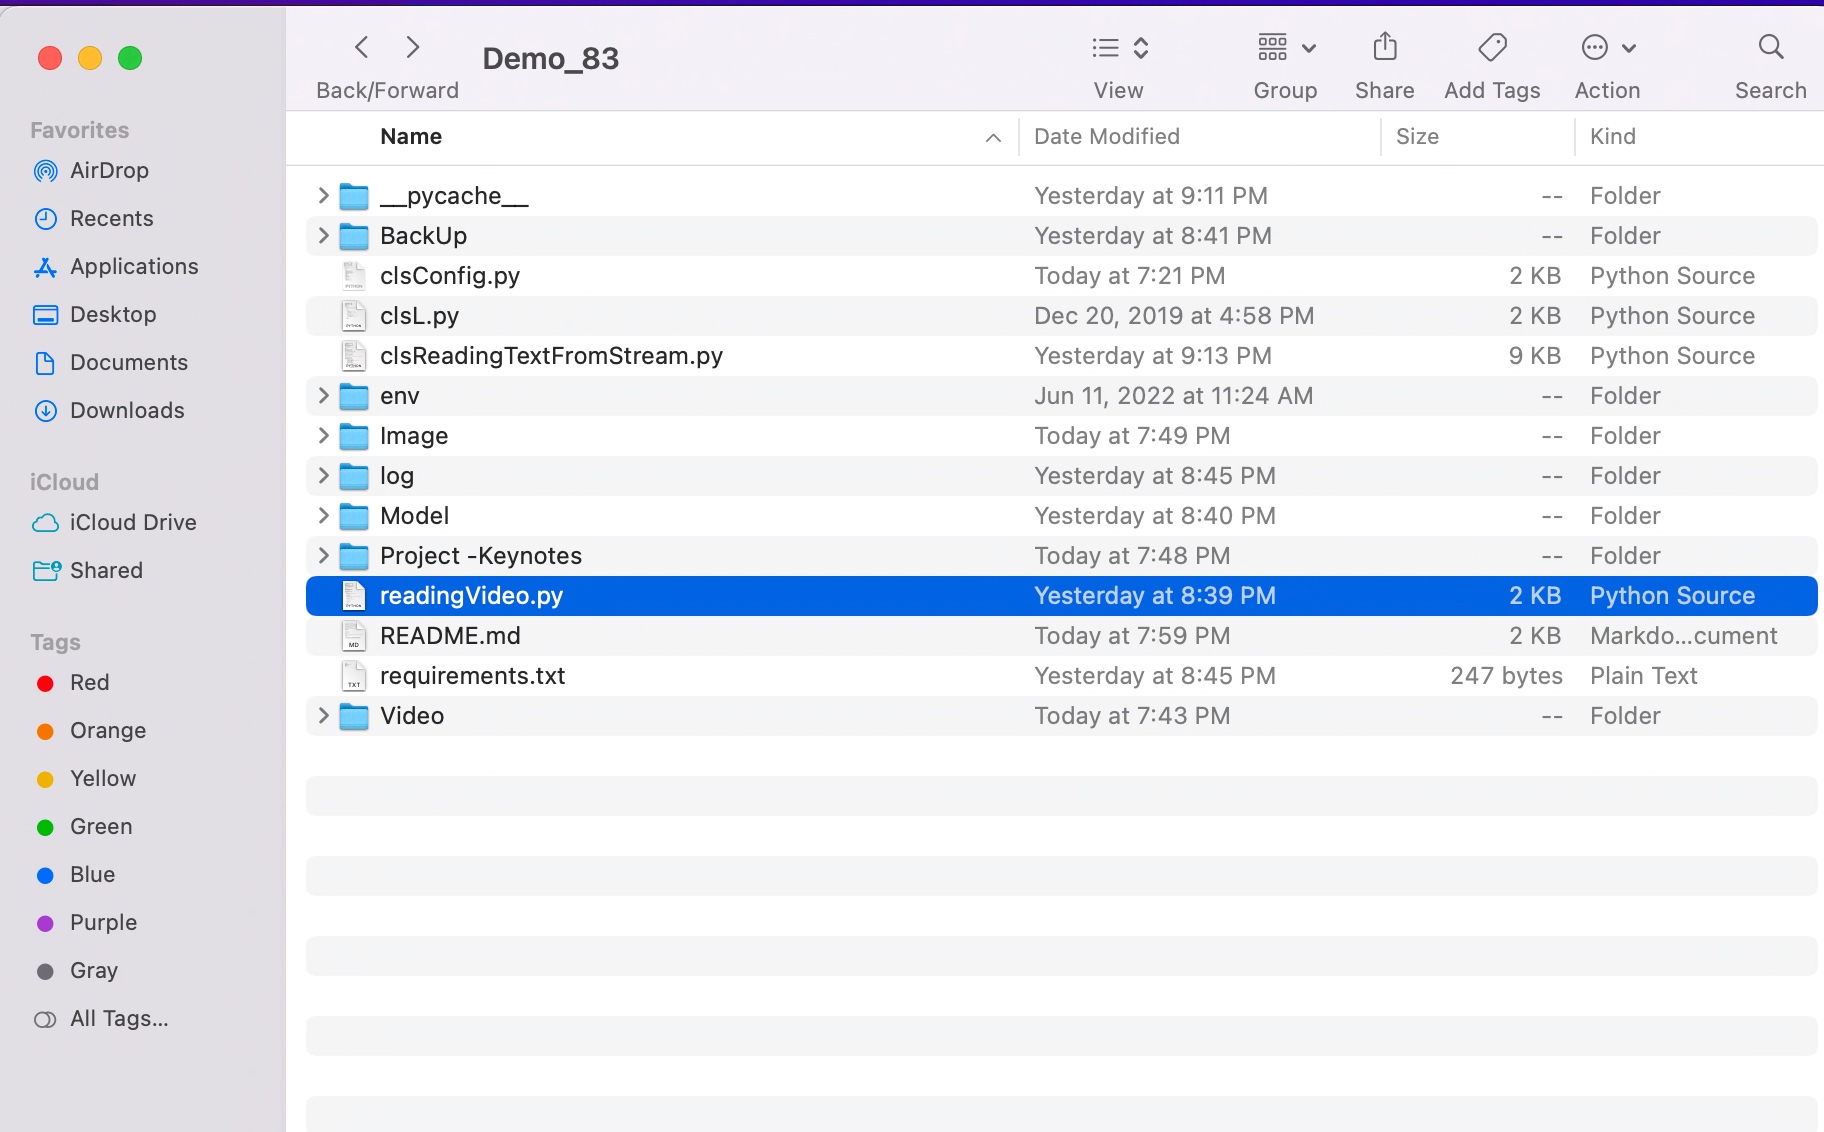
FOLDER STRUCTURE:
Here is the folder structure that contains all the files & directories in MAC O/S –
You will get the complete codebase in the following Github link.
Unfortunately, I cannot upload the model due to it’s size. I will share on the need basis.
I’ll bring some more exciting topic in the coming days from the Python verse. Please share & subscribe my post & let me know your feedback.
Till then, Happy Avenging! 🙂
Note: All the data & scenario posted here are representational data & scenarios & available over the internet & for educational purpose only. Some of the images (except my photo) that we’ve used are available over the net. We don’t claim the ownership of these images. There is an always room for improvement & especially the prediction quality.
Today, I’m going to discuss another Computer Vision installment. I’ll discuss how to implement Augmented Reality using Open-CV Computer Vision with full audio. We will be using part of a Bengali OTT Series called “Feludar Goendagiri” entirely for educational purposes & also as a tribute to the great legendary director, late Satyajit Roy. To know more about him, please click the following link.
Why don’t we see the demo first before jumping into the technical details?
Demo
Architecture:
Let us understand the architecture –
Process Flow
The above diagram shows that the application, which uses the Open-CV, analyzes individual frames from the source & blends that with the video trailer. Finally, it creates another video by correctly mixing the source audio.
Python Packages:
Following are the python packages that are necessary to develop this brilliant use case –
pip install opencv-python
pip install pygame
CODE:
Let us now understand the code. For this use case, we will only discuss three python scripts. However, we need more than these three. However, we have already discussed them in some of the early posts. Hence, we will skip them here.
clsAugmentedReality.py (This is the main class of python script that will embed the source video with the WebCAM streams in real-time.)
This file contains hidden or bidirectional Unicode text that may be interpreted or compiled differently than what appears below. To review, open the file in an editor that reveals hidden Unicode characters. Learn more about bidirectional Unicode characters
Identifying the Aruco markers are key here. The above lines help the program detect all four corners.
However, let us discuss more on the Aruco markers & strategies that I’ve used for several different surfaces.
Aruco Markers
As you can see, the right-hand side Aruco marker is tiny compared to the left one. Hence, that one will be ideal for a curve surface like Coffee Mug, Bottle rather than a flat surface.
Also, we’ve demonstrated the zoom capability with the smaller Aruco marker that will Augment almost double the original surface area.
Let us understand why we need that; as you know, any spherical surface like a bottle is round-shaped. Hence, detecting relatively more significant Aruco markers in four corners will be difficult for any camera to identify.
Hence, we need a process where close four corners can be extrapolated mathematically to relatively larger projected areas easily detectable by any WebCAM.
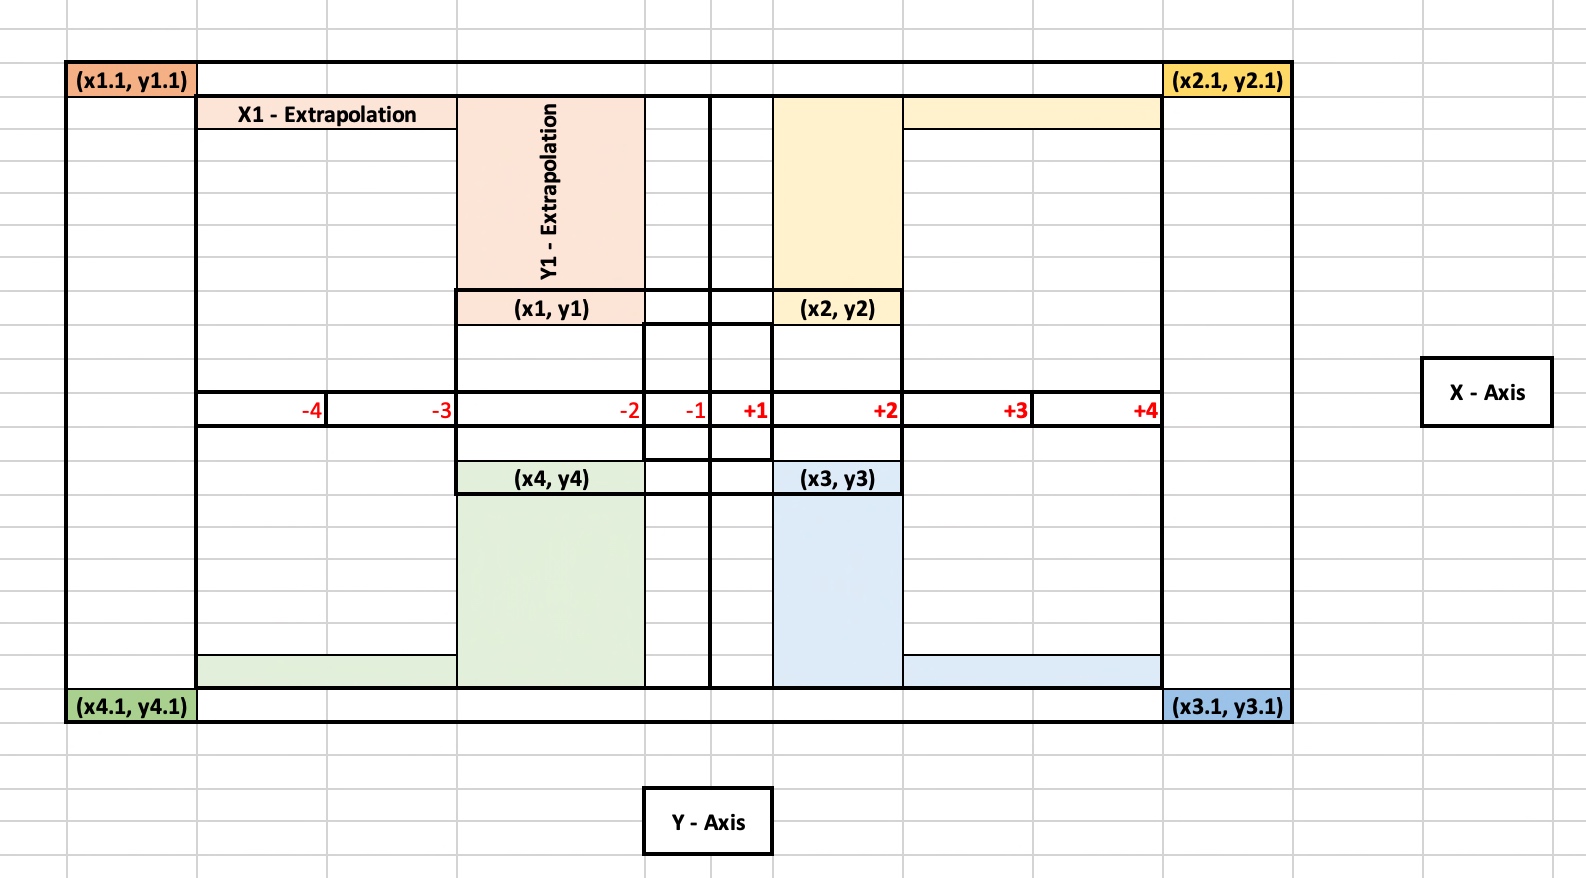
Let’s observe the following figure –
Simulated Extrapolated corners
As you can see that the original position of the four corners is represented using the following points, i.e., (x1, y1), (x2, y2), (x3, y3) & (x4, y4).
And these positions are very close to each other. Hence, it will be easier for the camera to detect all the points (like a plain surface) without many retries.
And later, you can add specific values of x & y to them to get the derived four corners as shown in the above figures through the following points, i.e. (x1.1, y1.1), (x2.1, y2.1), (x3.1, y3.1) & (x4.1, y4.1).
# Loop over the IDs of the ArUco markers in Top-Left, Top-Right,
# Bottom-Right, and Bottom-Left order
for i in cornerIDs:
# Grab the index of the corner with the current ID
j = np.squeeze(np.where(ids == i))
# If we receive an empty list instead of an integer index,
# then we could not find the marker with the current ID
if j.size == 0:
continue
# Otherwise, append the corner (x, y)-coordinates to our list
# of reference points
corner = np.squeeze(corners[j])
refPts.append(corner)
# Check to see if we failed to find the four ArUco markers
if len(refPts) != 4:
# If we are allowed to use cached reference points, fall
# back on them
if useCache and CACHED_REF_PTS is not None:
refPts = CACHED_REF_PTS
# Otherwise, we cannot use the cache and/or there are no
# previous cached reference points, so return early
else:
return None
# If we are allowed to use cached reference points, then update
# the cache with the current set
if useCache:
CACHED_REF_PTS = refPts
# Unpack our Aruco reference points and use the reference points
# to define the Destination transform matrix, making sure the
# points are specified in Top-Left, Top-Right, Bottom-Right, and
# Bottom-Left order
(refPtTL, refPtTR, refPtBR, refPtBL) = refPts
dstMat = [refPtTL[0], refPtTR[1], refPtBR[2], refPtBL[3]]
dstMat = np.array(dstMat)
In the above snippet, the application will scan through all the points & try to detect Aruco markers & then create a list of reference points, which will later be used to define the destination transformation matrix.
The above snippets calculate the revised points for the zoom-out capabilities as discussed in one of the earlier figures.
# Define the transform matrix for the *source* image in Top-Left,
# Top-Right, Bottom-Right, and Bottom-Left order
srcMat = np.array([[0, 0], [srcW, 0], [srcW, srcH], [0, srcH]])
The above snippet will create a transformation matrix for the video trailer.
# Compute the homography matrix and then warp the source image to
# the destination based on the homography depending upon the
# zoom flag
if zoomFlag == 1:
(H, _) = cv2.findHomography(srcMat, dstMat)
else:
(H, _) = cv2.findHomography(srcMat, dstMatMod)
warped = cv2.warpPerspective(source, H, (imgW, imgH))
# Construct a mask for the source image now that the perspective
# warp has taken place (we'll need this mask to copy the source
# image into the destination)
mask = np.zeros((imgH, imgW), dtype="uint8")
if zoomFlag == 1:
cv2.fillConvexPoly(mask, dstMat.astype("int32"), (255, 255, 255), cv2.LINE_AA)
else:
cv2.fillConvexPoly(mask, dstMatMod.astype("int32"), (255, 255, 255), cv2.LINE_AA)
# This optional step will give the source image a black
# border surrounding it when applied to the source image, you
# can apply a dilation operation
rect = cv2.getStructuringElement(cv2.MORPH_RECT, (3, 3))
mask = cv2.dilate(mask, rect, iterations=2)
# Create a three channel version of the mask by stacking it
# depth-wise, such that we can copy the warped source image
# into the input image
maskScaled = mask.copy() / 255.0
maskScaled = np.dstack([maskScaled] * 3)
# Copy the warped source image into the input image by
# (1) Multiplying the warped image and masked together,
# (2) Then multiplying the original input image with the
# mask (giving more weight to the input where there
# are not masked pixels), and
# (3) Adding the resulting multiplications together
warpedMultiplied = cv2.multiply(warped.astype("float"), maskScaled)
imageMultiplied = cv2.multiply(frame.astype(float), 1.0 - maskScaled)
output = cv2.add(warpedMultiplied, imageMultiplied)
output = output.astype("uint8")
Finally, depending upon the zoom flag, the application will create a warped image surrounded by an optionally black border.
clsEmbedVideoWithStream.py (This is the main class of python script that will invoke the clsAugmentedReality class to initiate augment reality after splitting the audio & video & then project them via the Web-CAM with a seamless broadcast.)
This file contains hidden or bidirectional Unicode text that may be interpreted or compiled differently than what appears below. To review, open the file in an editor that reveals hidden Unicode characters. Learn more about bidirectional Unicode characters
Please find the key snippet from the above script –
def playAudio(self, audioFile, audioLen, freq, stopFlag=False):
try:
pygame.mixer.init()
pygame.init()
pygame.mixer.music.load(audioFile)
pygame.mixer.music.set_volume(10)
val = int(audioLen)
i = 0
while i < val:
pygame.mixer.music.play(loops=0, start=float(i))
time.sleep(freq)
i = i + 1
if (i >= val):
raise BreakLoop
if (stopFlag==True):
raise BreakLoop
return 0
except BreakLoop as s:
return 0
except Exception as e:
x = str(e)
print(x)
return 1
The above function will initiate the pygame library to run the sound of the video file that has been extracted as part of a separate process.
def extractAudio(self, video_file, output_ext="mp3"):
try:
"""Converts video to audio directly using `ffmpeg` command
with the help of subprocess module"""
filename, ext = os.path.splitext(video_file)
subprocess.call(["ffmpeg", "-y", "-i", video_file, f"{filename}.{output_ext}"],
stdout=subprocess.DEVNULL,
stderr=subprocess.STDOUT)
return 0
except Exception as e:
x = str(e)
print('Error: ', x)
return 1
The above function temporarily extracts the audio file from the source trailer video.
# Initialize the video file stream
print("[INFO] accessing video stream...")
vf = cv2.VideoCapture(videoFile)
x = self.extractAudio(videoFile)
if x == 0:
print('Successfully Audio extracted from the source file!')
else:
print('Failed to extract the source audio!')
# Initialize a queue to maintain the next frame from the video stream
Q = deque(maxlen=128)
# We need to have a frame in our queue to start our augmented reality
# pipeline, so read the next frame from our video file source and add
# it to our queue
(grabbed, source) = vf.read()
Q.appendleft(source)
# Initialize the video stream and allow the camera sensor to warm up
print("[INFO] starting video stream...")
vs = VideoStream(src=0).start()
time.sleep(2.0)
flg = 0
The above snippets read the frames from the video file after invoking the audio extraction. Then, it uses a Queue method to store all the video frames for better performance. And finally, it starts consuming the standard streaming video from the WebCAM to augment the trailer video on top of it.
t = threading.Thread(target=self.playAudio, args=(audioFile, audioLen, audioFreq, stopFlag,))
t.daemon = True
Now, the application has instantiated an orphan thread to spin off the audio play function. The reason is to void the performance & video frame frequency impact on top of it.
while len(Q) > 0:
try:
# Grab the frame from our video stream and resize it
frame = vs.read()
frame = imutils.resize(frame, width=1020)
# Attempt to find the ArUCo markers in the frame, and provided
# they are found, take the current source image and warp it onto
# input frame using our augmented reality technique
warped = x1.getWarpImages(
frame, source,
cornerIDs=(923, 1001, 241, 1007),
arucoDict=arucoDict,
arucoParams=arucoParams,
zoomFlag=zFlag,
useCache=CacheL > 0)
# If the warped frame is not None, then we know (1) we found the
# four ArUCo markers and (2) the perspective warp was successfully
# applied
if warped is not None:
# Set the frame to the output augment reality frame and then
# grab the next video file frame from our queue
frame = warped
source = Q.popleft()
if flg == 0:
t.start()
flg = flg + 1
# For speed/efficiency, we can use a queue to keep the next video
# frame queue ready for us -- the trick is to ensure the queue is
# always (or nearly full)
if len(Q) != Q.maxlen:
# Read the next frame from the video file stream
(grabbed, nextFrame) = vf.read()
# If the frame was read (meaning we are not at the end of the
# video file stream), add the frame to our queue
if grabbed:
Q.append(nextFrame)
# Show the output frame
cv2.imshow(title, frame)
time.sleep(videoFrame)
# If the `q` key was pressed, break from the loop
if cv2.waitKey(2) & 0xFF == ord('q'):
stopFlag = True
break
except BreakLoop:
raise BreakLoop
except Exception as e:
pass
if (len(Q) == Q.maxlen):
time.sleep(2)
break
The final segment will call the getWarpImages function to get the Augmented image on top of the video. It also checks for the upcoming frames & whether the source video is finished or not. In case of the end, the application will initiate a break method to come out from the infinite WebCAM read. Also, there is a provision for manual exit by pressing the ‘Q’ from the MacBook keyboard.
# Performing cleanup at the end
cv2.destroyAllWindows()
vs.stop()
It is always advisable to close your camera & remove any temporarily available windows that are still left once the application finishes the process.
augmentedMovieTrailer.py (Main calling script)
This file contains hidden or bidirectional Unicode text that may be interpreted or compiled differently than what appears below. To review, open the file in an editor that reveals hidden Unicode characters. Learn more about bidirectional Unicode characters
The above script will initially instantiate the main calling class & then invoke the processStream function to create the Augmented Reality.
FOLDER STRUCTURE:
Here is the folder structure that contains all the files & directories in MAC O/S –
Directory Structure
You will get the complete codebase in the following Github link.
If you want to know more about this legendary director & his famous work, please visit the following link.
I’ll bring some more exciting topic in the coming days from the Python verse. Please share & subscribe my post & let me know your feedback.
Till then, Happy Avenging! 🙂
Note: All the data & scenario posted here are representational data & scenarios & available over the internet & for educational purpose only. Some of the images (except my photo) that we’ve used are available over the net. We don’t claim the ownership of these images. There is an always room for improvement & especially the prediction quality.
Today, I’ll be using another exciting installment of Computer Vision. The application will read the real-time human hand gesture to control WebCAM’s zoom-in or zoom-out capability.
Why don’t we see the demo first before jumping into the technical details?
Demo
Architecture:
Let us understand the architecture –
Broad Diagram
As one can see, the application reads individual frames from WebCAM & then map the human hand gestures with a media pipe. And finally, calculate the distance between particular pipe points projected on human hands.
Let’s take another depiction of the experiment to better understand the above statement.
Camera & Subject Position
Python Packages:
Following are the python packages that are necessary to develop this brilliant use case –
pip install mediapipe
pip install opencv-python
CODE:
Let us now understand the code. For this use case, we will only discuss three python scripts. However, we need more than these three. However, we have already discussed them in some of the early posts. Hence, we will skip them here.
clsConfig.py (Configuration script for the application.)
This file contains hidden or bidirectional Unicode text that may be interpreted or compiled differently than what appears below. To review, open the file in an editor that reveals hidden Unicode characters. Learn more about bidirectional Unicode characters
2. clsVideoZoom.py (This script will zoom the video streaming depending upon the hand gestures.)
This file contains hidden or bidirectional Unicode text that may be interpreted or compiled differently than what appears below. To review, open the file in an editor that reveals hidden Unicode characters. Learn more about bidirectional Unicode characters
The above method will zoom in & zoom out depending upon the scale value that the human hand gesture will receive.
cap = cv2.VideoCapture(0)
detector = hms.clsHandMotionScanner(detectionCon=0.7)
The following lines will read the individual frames from webCAM. Instantiate another open-source customized class, which will find the hand’s position.
To understand the above lines, let’s look into the following diagram –
Source: Mediapipe
As one can see, the thumbs tip value is 4 & Index fingertip is 8. The application will mark these points with a solid circle.
lenVal = math.hypot(x2-x1, y2-y1)
The above line will calculate the distance between the thumbs tip & index fingertip.
# Camera Zoom Range is 0.01, 1
minVal = self.minVal
maxVal = self.maxVal
zRange = np.interp(lenVal, [50, 270], [minVal, maxVal])
zRangeBar = np.interp(lenVal, [50, 270], [400, 150])
In the above lines, the application will translate the values captured between the two fingertips & then translate them into a more meaningful camera zoom range from 0.01 to 1.
if lenVal < 50:
cv2.circle(img, (cx,cy), 15, (0,255,0), cv2.FILLED)
The application will not consider a value below 50 as 0.01 for the WebCAM start value.
The application will capture the frame rate & share the original video frame and the test frame, where it will zoom in or out depending on the hand gesture.
3. clsHandMotionScanner.py (This is an enhance version of open source script, which will capture the hand position.)
This file contains hidden or bidirectional Unicode text that may be interpreted or compiled differently than what appears below. To review, open the file in an editor that reveals hidden Unicode characters. Learn more about bidirectional Unicode characters
def findHands(self, img, draw=True):
try:
# Send rgb image to hands
imgRGB = cv2.cvtColor(img,cv2.COLOR_BGR2RGB)
self.results = self.hands.process(imgRGB)
# process the frame
if self.results.multi_hand_landmarks:
for handLms in self.results.multi_hand_landmarks:
if draw:
#Draw dots and connect them
self.mpDraw.draw_landmarks(img,handLms,self.mpHands.HAND_CONNECTIONS)
return img
except Exception as e:
x = str(e)
print('Error: ', x)
return img
The above function will identify individual key points & marked them as dots on top of human hands.
def findPosition(self, img, handNo=0, draw=True):
try:
lmlist = []
# check wether any landmark was detected
if self.results.multi_hand_landmarks:
#Which hand are we talking about
myHand = self.results.multi_hand_landmarks[handNo]
# Get id number and landmark information
for id, lm in enumerate(myHand.landmark):
# id will give id of landmark in exact index number
# height width and channel
h,w,c = img.shape
#find the position - center
cx,cy = int(lm.x*w), int(lm.y*h)
lmlist.append([id,cx,cy])
# Draw circle for 0th landmark
if draw:
cv2.circle(img,(cx,cy), 15 , (255,0,255), cv2.FILLED)
return lmlist
except Exception as e:
x = str(e)
print('Error: ', x)
lmlist = []
return lmlist
The above line will capture the position of each media pipe point along with the x & y coordinate & store them in a list, which will be later parsed for main use case.
4. viewHandMotion.py (Main calling script.)
This file contains hidden or bidirectional Unicode text that may be interpreted or compiled differently than what appears below. To review, open the file in an editor that reveals hidden Unicode characters. Learn more about bidirectional Unicode characters
The above lines are self-explanatory. So, I’m not going to discuss anything on this script.
FOLDER STRUCTURE:
Here is the folder structure that contains all the files & directories in MAC O/S –
Directory
So, we’ve done it.
You will get the complete codebase in the following Github link.
I’ll bring some more exciting topic in the coming days from the Python verse. Please share & subscribe my post & let me know your feedback.
Till then, Happy Avenging! 🙂
Note: All the data & scenario posted here are representational data & scenarios & available over the internet & for educational purpose only. Some of the images (except my photo) that we’ve used are available over the net. We don’t claim the ownership of these images. There is an always room for improvement & especially the prediction quality.
You must be logged in to post a comment.